Differences Between Nylon and Steel String Guitars
Acoustic guitars are available with either steel strings or nylon strings. Guitars with nylon strings are often referred to as classical guitars. Here are some of the main differences between the two different types of guitar. Genre When deciding what type of acoustic guitar to get, the most important factor is what type of music you want to play. The nylon strings on classical guitars contribute to a warmer, mellower sound, which is well-suited for classical, flamenco, and folk music. An acoustic guitar with steel strings would be more well-suited for playing country, rock, bluegrass, or just about any other type of music. If you plan on playing with a pick, a classical guitar may not be the best choice for you. Most classical guitarists stick to fingerstyle playing and strumming, and most nylon-string guitars do not come with pickguards. Without a pickguard, your instrument can be quickly damaged by playing with a pick, so we discourage using anything other than your fingers when playing a classical guitar. Differences Classical guitars have smaller bodies and wider necks than standard acoustic guitars. They typically have slotted headstocks with poles that the strings are wrapped around. A full-size steel string guitar will have a larger body and strings which are held in place on the guitar's bridge with the help of bridge pins (nylon strings are tied on to the guitar's bridge). You will see a lot of steel-string guitars with pickguards in place to protect the instrument from damage that is caused by using a pick. This is not the case with classical guitars since nylon strings are not usually played with a pick. Which is better for beginners, Steel Strings or Nylon Strings? If you are a beginner, you may be wondering which type of guitar is easier to learn on. Nylon strings may seem like they would cause less pain for your fingers if you are just starting out. The truth is, your fingers will take some time to become adjusted to playing a guitar regardless of what type of strings you are playing on. If your guitar is properly set up, the type of guitar you have should not effect your ability to learn on it. Above all else, choose a guitar type that is best suited for the type of music you want to play and practice diligently until you get the hang of your new instrument. If you are interested in taking Guitar lessons on Zoom or In Person, please contact us at (818) 902-1233 or on our website at https://www.losangelesmusicteachers.com/online-guitar-lessons-in-burbank-ca.html How To Relax Your Voice After Singing
3/29/2021
After vocal warm-ups and singing, it is essential that you also cool down your voice. You can use the same vocal exercises you used during your warm-up, starting with the most intense and working down to the least intense. Simply using the humming vocal exercise will also allow your voice to cool down and relax. Following these tips will keep your voice strong and allow you to perform at your best.
Vocal warm-ups are a critical part of any singer’s practice and performance routine. These quick and easy vocal warm-ups will refine your technique, build your vocal power and control, and help expand your vocal range. At Los Angeles Music Teachers, our trained vocal instructors teach students all aspects of singing, including warm-ups and other vocal techniques that thousands of professional singers use every day to keep their voices in shape and sounding their best. If you are interested in taking singing lessons on Zoom or In Person, please contact us at (818) 902-1233 or on our website at https://www.losangelesmusicteachers.com/online-voice-lessons-in-burbank-ca.html BREATHING TECHNIQUES FOR BETTER SINGING
Now that you've mastered a few vocal warm-ups and exercises, always remember to maintain good posture and use proper breathing techniques. Two common breathing techniques are singing from your diaphragm and exhaling on a hiss. Keep reading to learn how you can perform these to improve your singing. 1. SING FROM YOUR DIAPHRAGM When singing, it is vitally important to use proper breathing techniques to avoid hurting your voice. It is most common to breathe from the chest during everyday activities, including speaking, but singing requires breathing from the diaphragm. Proper breathing gives your voice more power, more control and a fuller, more expressive tone. Sing from your diaphragm to avoid straining your voice. Your body should be relaxed and balanced, with your weight slightly forward. WHAT IS YOUR DIAPHRAGM? The diaphragm is a muscle between your chest and your belly that governs how much air you inhale and exhale when you breathe. “Singing from your diaphragm” is a phrase for this important breathing technique, which describes the proper way to breathe in and out while singing. The sound of your voice doesn’t actually come from your diaphragm, of course — sound is generated by vibrations of your vocal cords. The vibrations are caused by air being pushed out of your lungs. Your diaphragm is what controls the pushing and is responsible for putting power behind your voice. 2. EXHALE ON A HISSA hissing breath exercise is a great way to start when learning how to warm up your voice before singing. This technique forces vocalists to sing from their diaphragms and improves breath control. To master the exhale on a hiss breathing technique, it’s important to:
Now that you've warmed up your voice and know how to breathe from your diaphragm and exhale on a hiss, you’re ready to sing. If you are interested in taking Singing lessons on Zoom or In Person, please contact us at (818) 902-1233 or on our website at https://www.losangelesmusicteachers.com/online-voice-lessons-in-burbank-ca.html Right now in 2021 the piano/keyboard is the most requested instrument to play by young musicians at least in the U.S. It’s the number one instrument in most music schools with the guitar a close second. It’s probably the most versatile of all musical instruments and is used in every style of music. It can be played or accompany other instruments and is often played as a solo instrument. It also covers a range from the lowest of bass instruments to the highest piccolo sounds.
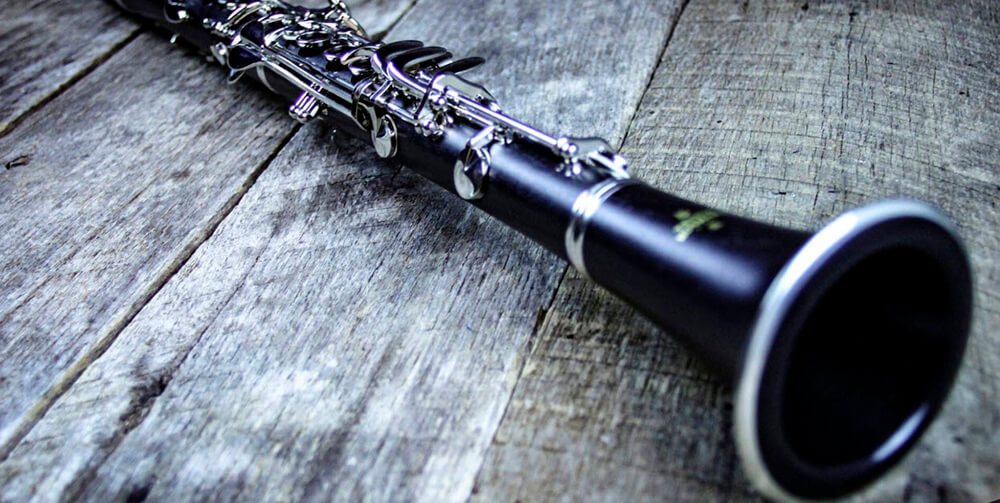
In addition, many musicians who’s main instrument is a woodwind, string, brass or percussion learn the piano because it is a very visual instrument that makes it easy to learn theory and work out compositions. Many composers think of it as “having the orchestra in their hands,” therefore most of the great composers for hundreds of years were pianists and used the piano to compose and that remains the same currently in contemporary music. The electric keyboard makes it possible for more parents to be able to afford to buy a piano because electric keyboard companies are able to make them for as low as 50.00 and even good 88 key electric keyboards with weighted keys are less than 500.00. If you are interested in taking lessons on Zoom or In Person, please contact us at (818) 902-1233 or on our website at https://www.losangelesmusicteachers.com/online-piano-lessons-in-burbank-ca.html WANT TO PLAY THE CLARINET?
3/19/2021
The clarinet is as versatile as it is fun. It is a great woodwind instrument to learn to play. If you're unsure on how to properly clean your instrument, our list of advice is designed to assist beginners. For more personalized, speak with your music instructor.
What Equipment Is Needed? There are a few essential pieces of equipment for every clarinetist: Reeds Ligatures Mouthpieces Did the clarinet come with a stock mouthpiece? If so, it is time to upgrade a better mouthpiece that provides the desired sound. All stock ligatures should be eliminated as well. Cloth ligatures offer more control than metal ones, so most educators recommend that their students transition into the usage of metal ligatures to open up their sound. The reed's strength should be determined by the mouthpiece. A “3” is usually the most common but it is not right for everyone. Be sure to speak with your music educator to find out about the strength that is right for you. How Is Embouchure Improved? This process doesn’t happen overnight. It’s an often overlooked performance aspect that involves the proper coordination between your upper lip, lower lip, chin and teeth. To begin, drop the jaw so that it is relaxed and not forced open. From there, move the jaw from side to side slightly, so that it can loosen up. Once full relaxation is achieved, roll your bottom lip ever so slightly over your lower teeth and firm up the mouths's corners. They should be brought forward and in, much like a smile. Place the index finger against the space between your top teeth and use the upper lip to press downward onto your finger. (The chin should automatically point downward once this step is taken.) Remove the finger, do not move a muscle, insert 1/4th of your mouthpiece and keep the upper teeth resting on top. Perfect embouchure has been achieved! What About Reeds? Finding the right clarinet reeds and maintaining them in the proper manner is crucial to your success. Choose the correct reeds for your mouthpiece and the level of pressure used. Do not moisten reeds with saliva, as these acids are highly detrimental to cane. When a new box of reeds is opened, do not test them all at the same time. The lip desensitizes and reed impressions are inaccurate. The break in process should be steady and slow. It does not take place in one day, they are played for a few minutes each day. When it comes to cleaning and maintenance, rinse your reeds in water after playing and use a soft cloth to dry them before they are stored on glass. Reed adjustment requires trial and error, so be sure to speak with your clarinet instructor for further advice. Any Practicing Advice? Most new clarinet players are misguided as far as practicing is concerned. The amount of time spent practicing is not as important as how that time is spent. An hour of efficient practicing is more effective than three hours of distracted practice. Practice time should consist of warm-ups, enjoyable sheet music and technique practice. Keeping up the technical side of things can be tough. Always practice technique, no matter what. Each practice should begin with a warm up, you can switch between sheet music and technique as necessary. What If I Have a Bad Day? Bad clarinet days are a very real thing. Practice can be frustrating at times. The trick is to remain calm. Don't force yourself to complete technique exercises or run through scales. At times like these, it is important to simply play through some of your favorite tunes. Spending time playing what you want to play lets you get into the flow of playing more rapidly. Becoming frustrated? There's nothing wrong with skipping your practice session for that day. Remember: this process is a challenge. There are going to be good days and there will be bad ones. Don't be discouraged. Your determination will pay off in the long run. If you are interested in taking a beginner clarinet lesson on Zoom or In Person, please contact us at (818) 902-1233 or on our website at https://www.losangelesmusicteachers.com/online-clarinet-lessons-in-burbank-ca.html The saxophone is one of the easiest of the woodwinds to learn at the beginning level but like all instruments it’s difficult to master. If you want to see some complete beginner’s progress, I’ve made videos of my students. It will show you what you can potentially do (if you practice every day about 45 minutes). These students were not taught to read music (reading adds a whole lot of other brain effort which slows down the process). The students in these videos are all playing by ear, just reading the chord changes but everything is improvised. Here’s a few: If you are interested in taking lessons on Zoom or In Person, please contact us at (818) 902-1233 or on our website at https://www.losangelesmusicteachers.com/online-jazz-improvisation-lessons-in-burbank-ca.html
Music lessons for children aged 7 and up. We are offering lessons for piano, saxophone, violin, and many other instruments. Our music teachers teach rock, blues, metal, country and classical music lessons. Beginner students can get to work on chords, simple songs, melodies, music theory, and tabs reading. We try to make each lesson joyful to learn. All the theory and technical concepts are divided into small parts and end in something fun. No matter if you want to learn your favorite guitar riff or learn to play your favorite song, you are welcome to bring your CDs or iPod to the class to learn it from the teachers. If you are wondering who we are and what we do, in this blog we will cover all the aspects of our website and give you an overview of what we do. You will also learn a lot about our mission like why we founded this company and how you can benefit as a musician by choosing us as your music teachers. Who We Are We have professional and accomplished teachers and performers in the LA area who combined their expertise to form Los Angeles Music Teachers. In our long careers, we have taught for so many music schools but we were unable to produce the results we wanted due to the restrictions. It was the need of the hour to form a business that could overcome all the weaknesses of the competitors and offer something that could really provide benefits to the young students. Our Mission We believe that it is not necessary for a music school to have a complicated website that could confuse the student right in the very beginning. This is the reason why we made a website that is easy to navigate and provides all the information in the best way possible. Secondly, being music teachers, we want to offer lessons that are tailored to your needs and goals. Being musicians, we know that no two musicians are same and they cannot be taught in the same way. It is one of our mantras to offer special discounts to our students. You can pay all your fees in advance either for a month or a year, whatever you are comfortable with. However, customer satisfaction is our main priority and if you are not satisfied with your first lesson, you can claim your full fee back. We won’t ask you any questions. As we mentioned earlier that we like to offer discounts to our students, our referral scheme is something we take pride in. Just refer a friend to us and get a full month of free classes as a reward. We never impose our teaching plan on our students. We teach you what you are interested in learning; which is the beauty of our classes. No matter if it is a specific song or a riff, our experienced teachers will teach it to you. This is why we brag that it is a fun learning with us. Hopefully, this post is enough to answer all your queries and introducing ourselves to you. If you still have any further questions, please call us now at (818)902-1233, or leave your question in the contact form. We will answer you as quickly as possible. Hope you have a good time reading, we look forward to hearing from you. If you are interested in taking lessons on Zoom or In Person, please contact us at (818) 902-1233 or on our website at https://www.losangelesmusicteachers.com/online-music-lessons-burbank-ca.html What Violin Strings Are Best For You?
3/16/2021
Most violinists stick with the strings they’ve been using for years, while others constantly seek different strings that might improve their instrument’s sound or make playing easier. These days, string players face a multitude of choices when it comes to picking violin strings, including a cavalcade of E strings that come plated in platinum, gold, and silver, among other materials. Trying every available string on the market to find your dream strings is probably unrealistic, but you can make an educated guess about a string’s sound if you understand some of the qualities of its core and winding materials, string tension, and the general tonal and playing qualities of each brand.
Of course, talking to other musicians about their experiences and preferences is also helpful in building your knowledge about different strings, but keep in mind, each instrument has its own characteristic sound. And while your violin can be adjusted and tweaked, changing to a new brand of strings alone probably won’t make a huge change in the tone or playability of your instrument. CORE MATERIAL, TENSION & GAUGE Gut core These are the original type of strings and their design goes back several centuries. Typically made from sheep intestines, gut strings are lower tension than synthetic- or steel-core strings and have a complex tone that is rich with overtones. Because of the low tension and winding method, they are more pliable under the fingers than other strings, tend to have slower response, and require players to finesse the sound from their instruments with the bow. Gut-core strings also need more frequent tuning, especially if there is a rapid change in room temperature, like stepping under hot stage lights. Steel core The steel E string was introduced for violins at the beginning of the 20th century and was followed by the other steel-core strings and various windings, usually chrome steel. The steel E quickly became widely used and cellists took to steel-core strings fairly quickly. In general, steel strings have a quick response and a clear, focused, brilliant tone. But, don’t expect a great deal of depth and tonal complexity from steel-core strings. Normally, classical players prefer other types of strings, but others, such as fiddlers, tend to prefer steel-core strings. They’re also widely used on fractional-size instruments. Generally, they are the least expensive strings on the market. The violin E strings are available in three different types: plain steel, plated steel, and wrapped steel. The original is the plain steel E. In recent years, a number of steel E strings plated with various materials like tin, gold, and platinum have been introduced. The gold-plated steel E, for example, has a brilliant, clear, pure sound that many like, though they do tend to wear out quickly (the gold-plating wears off, and some instruments tend to whistle when going from the A to open E). The wrapped E has a steel core, usually with a chrome steel wrapping, and tends to have less edge and brilliance than unwound E strings, leaving them a bit warmer and mellower, but slower in response. They might be a good choice for someone who finds steel E strings too shrill or for instruments that tend to whistle when going quickly from the A to an open E. In a situation like this, I recommend the Kaplan Solutions E from D’Addario. Synthetic core About 40 years ago, the Austrian string-making company Thomastik-Infeld introduced Dominant strings with a core made of Perlon (a type of nylon). They were an instant success, and some would say that Dominant strings changed violin playing forever. Synthetic core is much more stable in pitch than gut. Though “gut-like,” they tend to have a more focused tone with fewer complex overtones. In the last 15 years, other core materials have been used that combine different synthetic materials for a more complex sound, thus the commonly used term “composite” core. While not quite sounding “just like gut,” these newer strings have interesting and sophisticated tonal characteristics. String gauge Though often used interchangeably with string tension, a string’s gauge, or width, is different altogether. Unwound gut strings are a great example of this. Tuned at the same pitch as a steel- or synthetic-core string, a gut string will need to be thicker than other types of strings, even though its tension will be lower. Players who switch to a wider type of string, like gut, may need to have a luthier widen the slots on their instrument’s bridge and nut to accommodate the thicker gauge of the strings. Still, at a basic level, when shopping for strings, you will be confronted with three gauges of the same string and it’s helpful to understand the differences. Compared to a medium gauge set of the same make of string, a thinner (also sometimes called “weich” or “dolce”) string will be lower tension, with a brighter, more responsive tone, but it will be lower in volume. A thicker (“stark,” “forte”) string, will do just the opposite, giving you a darker tone, but with a slower response. String tension Though it’s one of the biggest factors determining the tonal differences between different types of strings, string tension is often confused with string gauge. Within specific types of strings, tension and gauge are related, but they are not the same. Almost all strings, even the least expensive student strings, are available in different tensions: light, medium, and heavy. Gut-core strings tend to have a lower average tension than either synthetic- or steel-core strings. You can feel that lower tension as pliability under the fingers—the strings are easier to press down and you can feel them roll. Synthetic-core strings have a higher tension than gut-core strings, with the darker, warmer-sounding strings (e.g., Pirastro Evah Pirazzi) tending to have a slightly lower tension, although there are some exceptions to this (Thomastik Infeld Blue vs. Infeld Red, which have almost identical tensions). Steel-core strings tune up to a higher tension better than any other types. When experimenting with different strings, it’s usually best to begin with medium-gauge strings first and then go to a different gauge only if necessary. On some instruments, the higher tension can actually choke the sound. String winding In recent years, a number of string manufacturers have offered interesting and exotic winding materials, especially for steel-core strings. Altering the winding material allows manufacturers to change the string’s response and tension with such heavier materials as tungsten, resulting in a high-tension string that is thinner than one made from a less dense metal, like aluminum or silver. A player’s chemistry may also be a factor in choosing strings. Some players, with acidic perspiration, will find that their sweat tends to corrode aluminum-wound strings. The wrapping quickly develops a rough gray surface, which usually doesn’t happen with other kinds of wrappings. Those players might want to try a silver wrapped D, for example. MATCHING THE STRINGS TO YOUR NEEDS Each violin, viola, cello, or bass has its own tonal characteristics that may be improved by a skilled luthier. If you would like to fine-tune the sound of your properly adjusted instrument, you may want to experiment with different strings. Before you begin experimenting, you may want to answer a few questions about your current sound. What is your instrument’s characteristic sound? What strings you are using now? What sound do you want to hear? Once you’ve addressed these questions, you can use the following guide to get the sound you’re seeking. If your instrument is too bright, you may want a string that has darker, warmer characteristics. You may want to try something with a synthetic core, like Pirastro’s Obligato or Violino, or the Aricore brand, or Thomastik’s Infeld Red or Vision Solo strings. If you want gut-core strings, consider Pirastro Eudoxa. Pirastro’s popular Evah Pirazzi strings are more brilliant than these others, but still have some warmth compared to the more brilliant strings. If you are on a budget, try D’Addario Pro-Arté or Super Sensitive Octava strings. While lacking in complexity and character of tone, these can be useful on inexpensive student instruments. If your violin is bright to the point of sounding shrill, a low-tension string, like Larsen Tzigane, may tone down a harsh-sounding instrument. An instrument that’s too dark may benefit from a brilliant string, like Thomastik’s Vision, Infeld Blue, or Dominant strings, or Pirastro’s Tonica or Wondertone Solo. Gut-string fans may want to look at the new Pirastro Passione Solo or the Oliv. If steel-core strings are your preference, try D’Addario’s stranded steel-core Helicores. If your instrument is unclear or unfocused, light-gauge versions of the brilliant strings that can help an instrument that’s too dark or dull will usually help focus an instrument with a mushy core sound. Players are frequently looking for more (or occasionally less) volume. Different strings don’t seem to offer much volume difference, but you perceive brilliant, focused strings as sounding louder under the ear and they may project better. SHOULD YOU MIX STRINGS? The ideal instrument is balanced on all four strings, with no single string jumping out in comparison to the others. Sadly, the reality is different, leading many string players to mix and match strings to get the best sound out of the instrument. For years, many violinists and violists used the same kind of string for the three lower strings, sometimes using a different top string. For instance, a standard setup was Thomastik Dominant A, D, and G, and a Pirastro Gold-Label E. Violists have used Dominant D, G, and C, with a Jargar (or Larsen) A. But this has changed with the introduction of so many new strings, so experiment to find the best match for your desired sound. However, strings alone don’t determine the balance. If you have an unbalanced instrument, the first step should be taking it to a qualified luthier for an adjustment. Sometimes, just moving the soundpost can make a difference. If you want to solve a balance problem by changing strings, start first by trying a different gauge on the offending string. Thomastik introduced the Infeld Red and Blue strings (red=darker, blue=more brilliant) with the idea that you can mix and match them to get a proper balance. Keep in mind that if you mix different brands and types of strings, a difference in tension might affect the sound of the other strings as well. You may also find the difference in actual thickness of strings to be distracting. Things are a bit different for cellists, who seem to mix and match strings far more often than other string players. For a long time, a favorite set up was Jargar A and D with Thomastik Spirocore Tungsten G and C, though some cellists opt for Larsens on the upper strings. This setup is fairly brilliant. If you want a complete set that is warmer, you can try the new Kaplan Solutions from D’Addario or Pirastro’s Evah Pirazzi. Lifetime of a String: When to Make a ChangeWhich strings last longer? Given the price of strings, it’s a reasonable question. It doesn’t seem like any one type of string lasts longer. What seems to be most important is how you play on the strings and how your body chemistry affects them. Depending on your sweat and technique, you may need to change strings every couple of months, or perhaps, once a year. Either way, you should wipe off the strings after every playing session. Also, remember, strings deteriorate, the core fatigues, and the sound gradually becomes more dull and dead. The process is so slow that you usually don’t realize it until you change strings. Choosing strings can be very complex, and you may wonder: what’s the best string? The answer is that there is no best string—there’s only the best string for you and your instrument, so consider your needs and examine your options. If you are interested in taking lessons on Zoom or In Person, please contact us at (818) 902-1233 or on our website at https://www.losangelesmusicteachers.com/online-violin-lessons-in-burbank-ca.html Learning to play the piano can look like a pretty big challenge to a beginner. You might be staring at your keyboard right now, wondering where to even start? But don’t let all those keys intimidate you! Making sense of the keyboard is actually quite simple, you just have to know what to look out for. Identifying Octaves The first thing we’ll do is break the piano down into more manageable chunks. If you look closely at the keyboard, you’ll see that there is actually a pattern to how the keys are laid out. They’re laid out in such a way that after 12 keys the notes repeat themselves. We call this sequence of 12 keys an Octave. A traditional 88 key piano can be split up into just 7 octaves. Learning to identify this octave pattern is crucial for finding your way around the keyboard. Finding Middle C Now that you know how to split your piano up into discrete octaves, finding specific notes is easy! Let’s start with the most important note on the piano, Middle C. How do we find it? Take a look at the black keys of the piano, and notice how there’s a pattern of black keys across the whole keyboard, alternating between groupings of three black keys and two black keys. To find any ‘C’ note, simply take that grouping of two black keys and play the white key just below the lowest black key. You can see this pattern across the whole keyboard, so if you want to find a ‘C’ note anywhere, all you have to do is find that grouping of two black keys! Middle C is the fourth ‘C’ note from the bottom of the piano. Take special note of it as it’ll be your home base for learning the entire instrument. Naming the Notes Knowing middle C is one thing, but what about all those other notes in the octave? These notes are all given letters as well. For now, just focus on the white keys. Walking up from middle C, the note order is D, E, F, G, A, B, and then the octave pattern repeats with C again. Number The Fingers In order to play the piano to the best of our ability, you need to be sure to play with the proper fingerings. The first step to proper fingerings is to number the fingers themselves. For both hands the fingerings go from #1 for thumbs to #5 for the pinky finger. Playing Scales Now that you know the numbers for your fingers and the names of the notes, you can apply your knowledge to play a C major scale. The C major scale consists of eight notes from C to the C in the octave above. This means that you’ll need to learn some special finger techniques to get your five fingers to play an eight note sequence fluidly. The fingering pattern in the right hand is 1, 2, 3, 1, 2, 3, 4, 5. Notice how there’s a fingering reset between the 3rd and 4th notes of the scale. In order to play this order of fingerings fluidly, you’ll need to master a technique called the thumbtuck. A thumbtuck involves curling your thumb under your hand in order to play reposition your hand and continue playing a phrase. Although it may seem simple, the thumbtuck is one of the most important skills in a pianist’s bag of tricks, so make sure you’re always aware of it during your practice sessions! When playing scales in the left hand, all the same rules apply, except our hands are mirrored. This means the fingering pattern is 5, 4, 3, 2, 1, 3, 2, 1. Keep an eye out for that fingertuck between notes 5 and 6. It’s a similar motion to the right hand, but this time your middle finger will cross over to continue playing the scale. Practicing scales is just one of the many ways you’ll build confidence and musicality as a piano player. When you’re practicing them make sure you’ve got your technique and fingerings consistently solid. Prioritizing good technique in your early days as a piano player will pay off HUGELY moving forward! If you are interested in taking lessons on Zoom or In Person, please contact us at (818) 902-1233 or on our website at https://www.losangelesmusicteachers.com/online-piano-lessons-in-burbank-ca.html |
Archives
June 2022
Categories
All
|
Music Lessons Available on All Instruments:
Piano Lessons
Guitar Lessons Voice Lessons Drum Lessons Violin Lessons Cello Lessons Saxophone Lessons Jazz Improvisation Lessons Flute Lessons Clarinet Lessons Singing Lessons Acoustic & Elec Bass Songwriting & Production |
Contact Us Now
|
Website by Never Alone Business Services