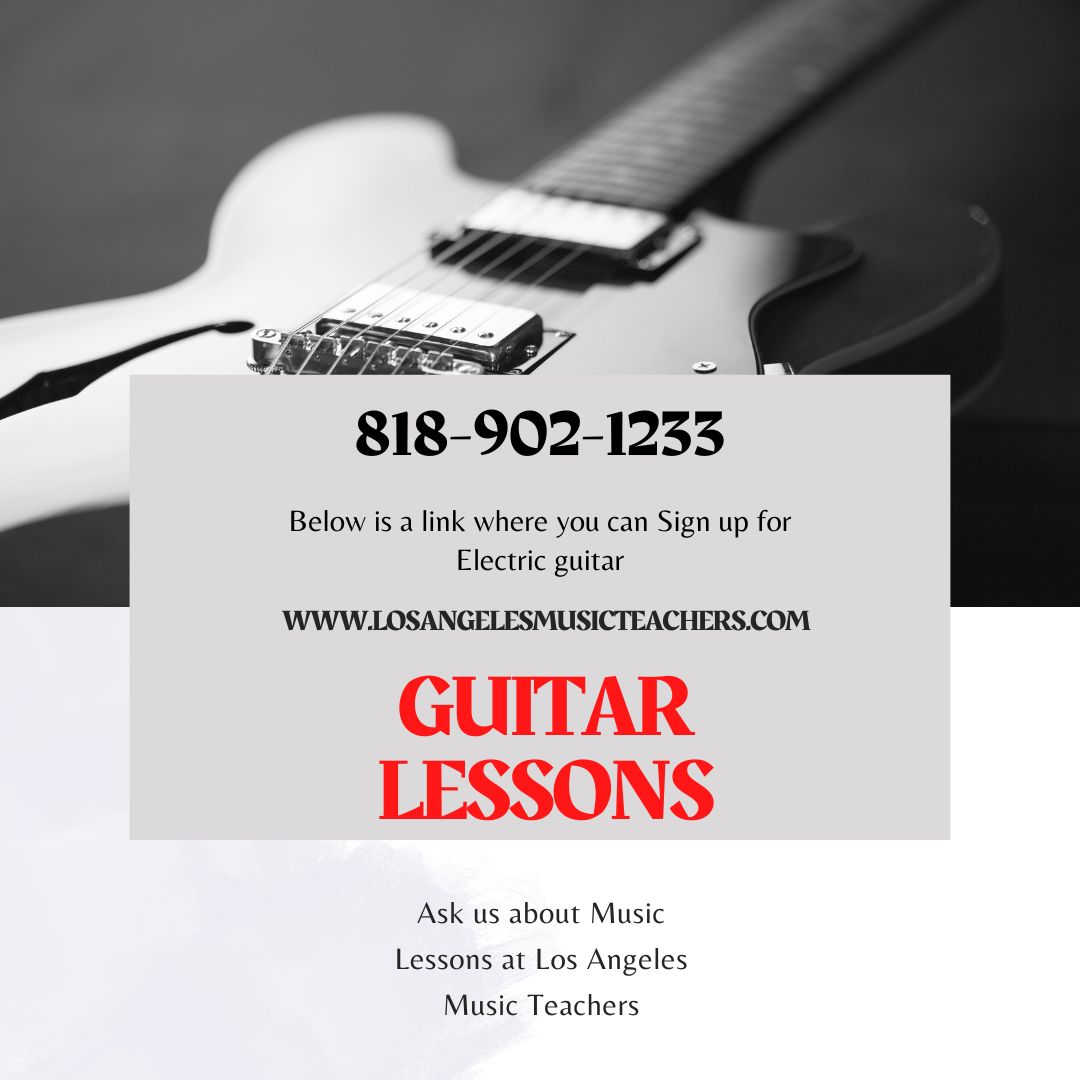
Best Guitar Lessons for Beginners and Advanced Students in Burbank, Hollywood and Glendale
7/26/2024
 Best Guitar Lessons for Beginner and Advanced Students in Burbank, Hollywood & Glendale If you're in Burbank, Hollywood, or Glendale and looking to learn the guitar, whether you're a beginner or an advanced player, Los Angeles Music Teachers is the place to be. Our highly skilled instructors are passionate about helping students of all levels achieve their musical dreams. Here's why our guitar lessons stand out from the rest. Tailored Lessons for Every Skill Level At Los Angeles Music Teachers, we understand that every student is unique. Our instructors take the time to assess your current skill level, musical interests, and goals. Whether you're picking up a guitar for the first time or looking to master advanced techniques, our lessons are customized to meet your needs. Beginners can expect to learn the basics of guitar playing, including chords, strumming patterns, and simple songs. Advanced students will delve into complex techniques, music theory, and improvisation. Expert Instructors Our team consists of experienced and dedicated musicians who have a deep understanding of various musical styles. They are not only excellent guitarists but also exceptional teachers who can break down complex concepts into easy-to-understand lessons. Our instructors are committed to fostering a positive and encouraging learning environment, ensuring that every student feels motivated and confident in their progress. Convenient Locations in Burbank, Hollywood & Glendale We pride ourselves on being accessible to students across the Los Angeles area. With convenient locations in Burbank, Hollywood, and Glendale, you can easily find a studio near you. Each location is equipped with state-of-the-art facilities to provide the best learning experience possible. Whether you prefer in-person lessons or the flexibility of online sessions, we've got you covered. Comprehensive Learning Approach Our guitar lessons go beyond just playing the instrument. We offer a comprehensive learning approach that includes music theory, ear training, and sight-reading. This well-rounded education ensures that you not only become a proficient guitarist but also a well-rounded musician. Our instructors incorporate a variety of teaching methods to keep lessons engaging and effective, from playing along with your favorite songs to exploring different genres and techniques. Performance Opportunities We believe that performing is a crucial part of learning music. That's why we provide our students with regular opportunities to showcase their skills. From recitals to local gigs, we encourage students to take the stage and gain valuable performance experience. This not only builds confidence but also allows students to share their passion for music with others. Join Our Musical Community When you join Los Angeles Music Teachers, you're not just signing up for guitar lessons; you're becoming part of a vibrant musical community. Our students and instructors share a love for music and a commitment to excellence. You'll have the chance to connect with fellow musicians, participate in workshops, and collaborate on musical projects. In conclusion, if you're looking for the best guitar lessons for beginner and advanced students in Burbank, Hollywood, or Glendale, look no further than Los Angeles Music Teachers. Our tailored lessons, expert instructors, convenient locations, and comprehensive learning approach make us the top choice for aspiring guitarists. Start your musical journey with us today and discover the joy of playing the guitar. If you're interested in taking Guitar lessons on Zoom or In Person in Burbank, Glendale or North Hollywood, please contact us at (818)902-1233 or on our website at https://www.losangelesmusicteachers.com/guitar-lessons-in-burbank-ca.html  Discover the Joy of In-Home Guitar Lessons with Los Angeles Music Teachers
Welcome to Los Angeles Music Teachers, your premier destination for in-home guitar lessons in Los Angeles, Glendale, North Hollywood, and Burbank. Whether you’re a beginner or an experienced guitarist, our expert instructors are dedicated to helping you achieve your musical goals. Why Learn Guitar?
We understand the importance of a comfortable learning environment. That’s why we offer personalized in-home guitar lessons throughout Los Angeles, Glendale, North Hollywood, and Burbank. Our professional instructors will come to your home, providing customized lessons tailored to your unique needs and pace, ensuring a productive and enjoyable learning experience. Convenient Online Guitar Lessons For those who prefer the flexibility of online learning or live outside our service areas, we offer convenient online guitar lessons. Through Zoom, our talented instructors deliver high-quality, interactive lessons that you can access from anywhere in the U.S. All you need is an internet connection and a passion for playing the guitar. Guitar Lessons for All Ages and Skill Levels At Los Angeles Music Teachers, we welcome students of all ages and skill levels. Whether you’re a child, teenager, or adult, our curriculum is designed to meet your specific needs. From foundational techniques for beginners to advanced performance skills for experienced guitarists, our lessons help you develop your musical abilities and achieve your goals. Award-Winning Music School We are proud to be recognized as an award-winning music school, celebrated for our dedication to excellence and student success. Our commitment to providing high-quality instruction has established us as a leading choice for music education in the Los Angeles area. Explore a Variety of Musical Instruments While our focus is on guitar lessons, Los Angeles Music Teachers also offers instruction in other instruments, including piano, drums, voice/singing, violin, cello, saxophone, clarinet, and flute. Our diverse team of instructors is passionate about helping you explore and achieve your musical ambitions. Get Started with the Best Guitar Lessons in Los Angeles Embark on your guitar learning journey with Los Angeles Music Teachers! Whether you’re interested in in-home lessons in Los Angeles, Glendale, North Hollywood, or Burbank, virtual lessons, or exploring other instruments, we’re here to support your musical aspirations. Visit our website at losangelesmusicteachers.com or call us at 818-902-1233 to begin your musical adventure. Join Los Angeles Music Teachers and discover your potential as a guitarist. Experience the joy of music and start strumming your way to success with us! #LosAngelesMusicTeachers #GuitarLessons #InHomeGuitarLessons #LearnGuitar #MusicEducation #GuitarSchool #MusicSchoolLosAngeles #BurbankMusic #GlendaleMusic #NorthHollywoodMusic Contact Information: Phone Number: (818) 902-1233 Email: [email protected]  Why Singers Should Take Piano Or Guitar Lessons In Person And Online Singers, you are musicians. Often times we are lost in the solo world of performance and emotive expression through sound, which is awesome. But we are complete musicians and expected to be, and definitely respected much more so, when we act as such. Solo performers are at somewhat a disadvantage when they show up at rehearsals with other kinds of musicians, a band, an orchestra, back up singers, or a pianist. We need to keep time so that people can play with us. We need to be able to follow a conductor during a staged performance. We need to be able to count. And that is where piano or guitar lessons will do you some good. Learning to really read music, for real; rests, quarter notes, time signatures, key signatures, key changes, dynamics, tempo markings, minor, major, harmony, theory and songwriting etc... And number one, being able to learn your part spot on, by yourself correctly, even when it is hard. May we suggest you sign up for some piano or guitar lessons? We have been teaching and working in the profession for over 20 years. We love to teach the piano and guitar at Los Angeles Music Teachers with a passion because it works a different part of your brain than a voice lesson. It always feels like completing a complicated math test after a good lesson and that is great for us. I am sure our piano/guitar students feel that way as well. Also, what is fantastic about piano and guitar is that you can really track your improvement by completing levels of music so you know you are getting better. Singing is more complicated. You have to be born with a certain amount of talent beyond your control. Lessons are important and help so much in singing, but it is different than piano playing. (You do need a certain amount of natural talent to be a concert pianist/guitarist of course- I am not referring to that). So consider putting learning the piano/guitar on your list of things to do to further your singing level. We can not tell you as a singer how many times it came in handy for me to be able to pluck out my parts, or play the harmonies with my part so we could practice singing against them. Piano/guitar especially helped me out of college because we are able to teach voice lessons. If you're interested in taking piano, guitar or singing lessons on Zoom or In Person in Burbank, Glendale or North Hollywood, we have some of the best piano, guitar and singing lessons in Los Angeles. Our instructors are picked by interviewing hundreds of drum instructors and we have really high standards on both their teaching ability as well as their personality. If you'd like to talk to one of our instructors or set up a first lesson we have a guarantee that if you don't absolutely love your first lesson you don't have to pay for it. Please contact us at (818)902-1233 or on our website at https://www.losangelesmusicteachers.com/contact-us-for-info.html
Mistakes That Slows Your Progress In Learning Any Musical Instrument
When learning how to play any musical instrument, you could catch up fast or you could progress at a snail’s speed. It all depends on your learning approach. Most music teachers focus more on making sure that you don’t miss your learning sessions. Of course, missing your practice will slow your progress down, but your learning approach is more important than the time spent on it. Students make several mistakes in their approach and these mistakes impact the result they get from their practice sessions. Here are some of the mistakes and their solutions. 1. Playing without concentration Some students practice with their musical instrument while doing something else. Most commonly, people play an instrument while watching the TV. Learning requires full concentration as it requires the whole of your mind. When you play an instrument without full concentration, it is just a repetition of what you have already learned. It is a waste of time because you won’t learn anything more. Whenever you want to practice, you have remove anything that may cause a distraction, so you can listen to what you’re playing and look out for flaws. 2. Playing without looking out for flaws Another common mistake is playing an instrument through a piece of music without taking note of your flaws. If you do that, you won’t improve. You’ll only turn your training session to a formality. You will continue to move on with your flaws. You’ll slow down your progress that way. Instead, watch for flaws while you’re playing the music. And if you come across any bad spot, stop and try to improve on the spot before you move on. 3. Playing through a particular musical piece repeatedly It is true that practice makes perfect. You’ll improve when you keep playing through a piece again and again, but the rate of improvement will be very slow. You’ll keep playing through your flaws over and over again. It is better to stop each time you encounter a problem. Find the cause and solution to the problem before you move on. You’ll learn faster that way. 4. Playing a problematic passage until it sounds better Some students prefer to play over a problematic area until they observe an improvement before they move forward. The problem with this learning technique is that it is not certain that you’ll breeze through the spot when next you play the piece. It is better to get to the root of the problem. Find out the real problem and the cause of the problem. That way, you’ll be able to proffer a technical solution to the problem. When the problem is solved, you’ll be able to play it better subsequently. You need full concentration and engagement for identifying problems and solving them. When your brain is fully engaged in this, you’ll be able to take note of the problems and their solutions. Most importantly, everything you learn will stick with you for a long time. This is the most effective approach to learning how to play any musical instrument.
If you're interested in taking lessons on Zoom or In Person in Burbank, Glendale or North Hollywood, please contact us at (818)902-1233 or on our website at https://www.losangelesmusicteachers.com/online-music-lessons-burbank-ca.html
 Unlock Your Musical Potential with Premier Guitar Lessons in Los Angeles
Are you passionate about learning guitar and looking for the best place to hone your skills in Los Angeles? Look no further than Los Angeles Music Teachers! Our expert instructors are committed to helping you achieve your musical goals through tailored guitar lessons designed to suit your individual needs and preferences. Why Los Angeles Music Teachers?
Contact Information:
Join the community of passionate guitar players at Los Angeles Music Teachers and take your playing to the next level! We look forward to helping you achieve your musical dreams.  Discover the Joy of In-Home Flute Lessons with Los Angeles Music Teachers
Welcome to Los Angeles Music Teachers, your top destination for in-home flute lessons in Los Angeles, Glendale, North Hollywood, and Burbank. Whether you're a beginner or an experienced flutist, our expert instructors are dedicated to helping you achieve your musical goals. Why Learn the Flute?
We understand the importance of a comfortable learning environment. That’s why we offer personalized in-home flute lessons throughout Los Angeles, Glendale, North Hollywood, and Burbank. Our professional instructors will come to your home, providing customized lessons tailored to your unique needs and pace, ensuring an enjoyable and productive learning experience. Convenient Online Flute Lessons For those who prefer the flexibility of online learning or live outside our service areas, we offer convenient online flute lessons. Through Zoom, our talented instructors deliver high-quality, interactive lessons that you can access from anywhere in the U.S. All you need is an internet connection and a passion for playing the flute. Flute Lessons for All Ages and Skill Levels At Los Angeles Music Teachers, we welcome students of all ages and skill levels. Whether you’re a child, teenager, or adult, our curriculum is designed to meet your specific needs. From foundational techniques for beginners to advanced performance skills for experienced flutists, our lessons help you develop your musical abilities and achieve your goals. Award-Winning Music School We are proud to be recognized as an award-winning music school, celebrated for our dedication to excellence and student success. Our commitment to providing high-quality instruction has established us as a leading choice for music education in the Los Angeles area. Explore a Variety of Musical Instruments While our focus is on flute lessons, Los Angeles Music Teachers also offers instruction in other instruments, including piano, guitar, drums, voice/singing, violin, cello, saxophone, and clarinet. Our diverse team of instructors is passionate about helping you explore and achieve your musical ambitions. Get Started with the Best Flute Lessons in Los Angeles Embark on your flute learning journey with Los Angeles Music Teachers! Whether you’re interested in in-home lessons in Los Angeles, Glendale, North Hollywood, or Burbank, virtual lessons, or exploring other instruments, we’re here to support your musical aspirations. Visit our website at losangelesmusicteachers.com or call us at 818-902-1233 to begin your musical adventure. Join Los Angeles Music Teachers and discover your potential as a flutist. Experience the joy of music and start playing beautiful melodies with us! #LosAngelesMusicTeachers #FluteLessons #InHomeFluteLessons #LearnFlute #MusicEducation #FluteSchool #MusicSchoolLosAngeles #BurbankMusic #GlendaleMusic #NorthHollywoodMusic Contact Information: Phone Number: (818) 902-1233 Email: [email protected]  In 2021, the piano/keyboard remains the most requested instrument among young musicians in the U.S. It’s the number one instrument in most music schools, with the guitar coming in a close second. The piano's versatility allows it to be played solo or accompany other instruments, covering a range from the deepest bass to the highest piccolo sounds.
Why Learn Piano?
Electric keyboards have made owning a piano more affordable. Models can be found for as low as $150, and even good 88-key electric keyboards with weighted keys are available for less than $500. Why Choose Los Angeles Music Teachers? If you're interested in taking in-home piano, guitar, or singing lessons in Burbank, Glendale, or North Hollywood, we offer some of the best in-home piano lessons in Los Angeles. Here’s why you should choose us:
Contact us at (818) 902-1233 or visit our website at losangelesmusicteachers.com/contact-us-for-info.html to start your musical journey. #LosAngelesMusicTeachers #PianoLessons #InHomePianoLessons #LearnPiano #MusicEducation #PianoSchool #KeyboardLessons #MusicSchoolLosAngeles #BurbankMusic #GlendaleMusic #NorthHollywoodMusic Contact Information: Phone Number: (818) 902-1233 Email: [email protected] In Home Music lessons In Home Music Lessons Piano Lessons - Piano Lessons Online Piano Lessons - Online Piano Lessons  Explore the World of Violin with Los Angeles Music Teachers Welcome to Los Angeles Music Teachers, the premier destination for violin enthusiasts in Burbank, California. Whether you are a beginner or an advanced player, our top-notch instructors are here to elevate your violin skills. Customized Violin Lessons at Your Doorstep We understand the value of your time and comfort. That's why we provide personalized violin lessons right at your home. Our experienced teachers are available in Burbank, Glendale, Los Angeles, Van Nuys, and North Hollywood, ensuring that you receive high-quality instruction in the environment where you feel most comfortable. Flexible Online Violin Classes If you're not located near Burbank, don't worry! Our violin lessons are accessible online through Zoom, making it easy for you to learn from anywhere in the U.S. All you need is an internet connection, and you're ready to start your violin journey at your convenience. Violin Instruction for All Ages and Levels At Los Angeles Music Teachers, we welcome students from all walks of life—kids, teens, and adults. Our curriculum is carefully designed to cater to various skill levels, from those picking up the violin for the first time to seasoned players looking to master complex techniques and improvisational skills. Award-Winning Music Education We are proud to be recognized as an award-winning music school in Los Angeles. Our commitment to excellence and passion for teaching have made us a leading choice for music education in the area. Broaden Your Musical Horizons While the violin is our focus, we also offer lessons in a variety of other instruments including piano, guitar, voice/singing, drums, cello, saxophone, clarinet, and flute. Our skilled instructors are enthusiastic about helping you explore new musical territories and achieve your artistic goals. Start Your Violin Adventure with Us Ready to kick-start your violin journey? Whether you prefer the convenience of in-home lessons, the flexibility of online classes, or are interested in learning other instruments, Los Angeles Music Teachers is here to support your musical aspirations. Visit our website at losangelesmusicteachers.com or call us at 818-902-1233 to get started. Join us at Los Angeles Music Teachers and unlock your potential as a violinist. Discover the excitement of music and let's make beautiful melodies together! #ViolinLessons #LosAngelesMusicTeachers #MusicEducation #InHomeLessons #OnlineMusicClasses #LearnViolin #MusicForAllAges #ExpertInstructors #BeginnerViolin #AdvancedViolin #LosAngelesMusic #PlayViolin #ViolinTeacher #MusicLessons #BurbankMusic #GlendaleMusic #VanNuysMusic #NorthHollywoodMusic #MusicCommunity #ViolinJourney
Unlock Your Musical Potential with Top Guitar Lessons in Burbank at Los Angeles Music Teachers
7/11/2024
 Are you looking to start your guitar journey or elevate your playing skills in Burbank? Look no further! At Los Angeles Music Teachers, we offer a variety of guitar lessons tailored to meet the needs of each student, whether you're a beginner or an advanced player. Our experienced instructors are passionate about helping you achieve your musical goals through in-person, online, and in-home lessons. Why Choose Los Angeles Music Teachers for Guitar Lessons?
#BurbankGuitarLessons, #LAMusicTeachers, #LearnGuitarLA, #MusicLessonsBurbank, #OnlineGuitarLessons, #InHomeMusicTuition, #GuitarHeroes, #BurbankMusic, #GuitarEducation, #PlayGuitarLA

#VocalWarmUps #SingingTechniques #VoiceTraining #MusicLessons #LosAngelesMusic #VocalExercises #PerformanceSkills #SingerLife #MusicEducation #VoiceCoaching #VocalHealth #SingingTips #ExpressiveSinging #VoiceRange #JawLoosening #PitchControl #VocalFlexibility #SirenExercise #Portamento #FirstLessonFree #Burbank #Glendale #NorthHollywood
 Right now in 2021, the piano/keyboard is the most requested instrument to play by young musicians in the U.S. It’s the number one instrument in most music schools, with the guitar a close second. The piano is incredibly versatile, used in every style of music, and can accompany other instruments or be played solo. It covers a range from the lowest bass to the highest piccolo sounds.
Many musicians whose main instrument is a woodwind, string, brass, or percussion also learn the piano because it is a very visual instrument, making it easy to learn theory and work out compositions. Many composers think of it as “having the orchestra in their hands.” Most great composers for hundreds of years were pianists and used the piano to compose, a tradition that continues in contemporary music. The electric keyboard makes it possible for more parents to afford a piano, with models available for as low as $50. Even good 88-key electric keyboards with weighted keys can be found for less than $500. If you're interested in taking piano, guitar, or singing lessons on Zoom or in person in Burbank, Glendale, or North Hollywood, we offer some of the best in-home and online lessons in Los Angeles. Our instructors are carefully selected, with high standards for teaching ability and personality. We guarantee that if you don't absolutely love your first lesson, you don't have to pay for it. Contact us at (818) 902-1233 or visit our website at [losangelesmusicteachers.com/contact-us-for-info.html](https://www.losangelesmusicteachers.com/contact-us-for-info.html). #LosAngelesMusicTeachers #PianoLessons #InHomePianoLessons #OnlinePianoLessons #LearnPiano #MusicEducation #PianoSchool #KeyboardLessons #MusicSchoolLosAngeles #BurbankMusic #GlendaleMusic #NorthHollywoodMusic **Contact Information:** Phone Number: (818) 902-1233 Email: [email protected] 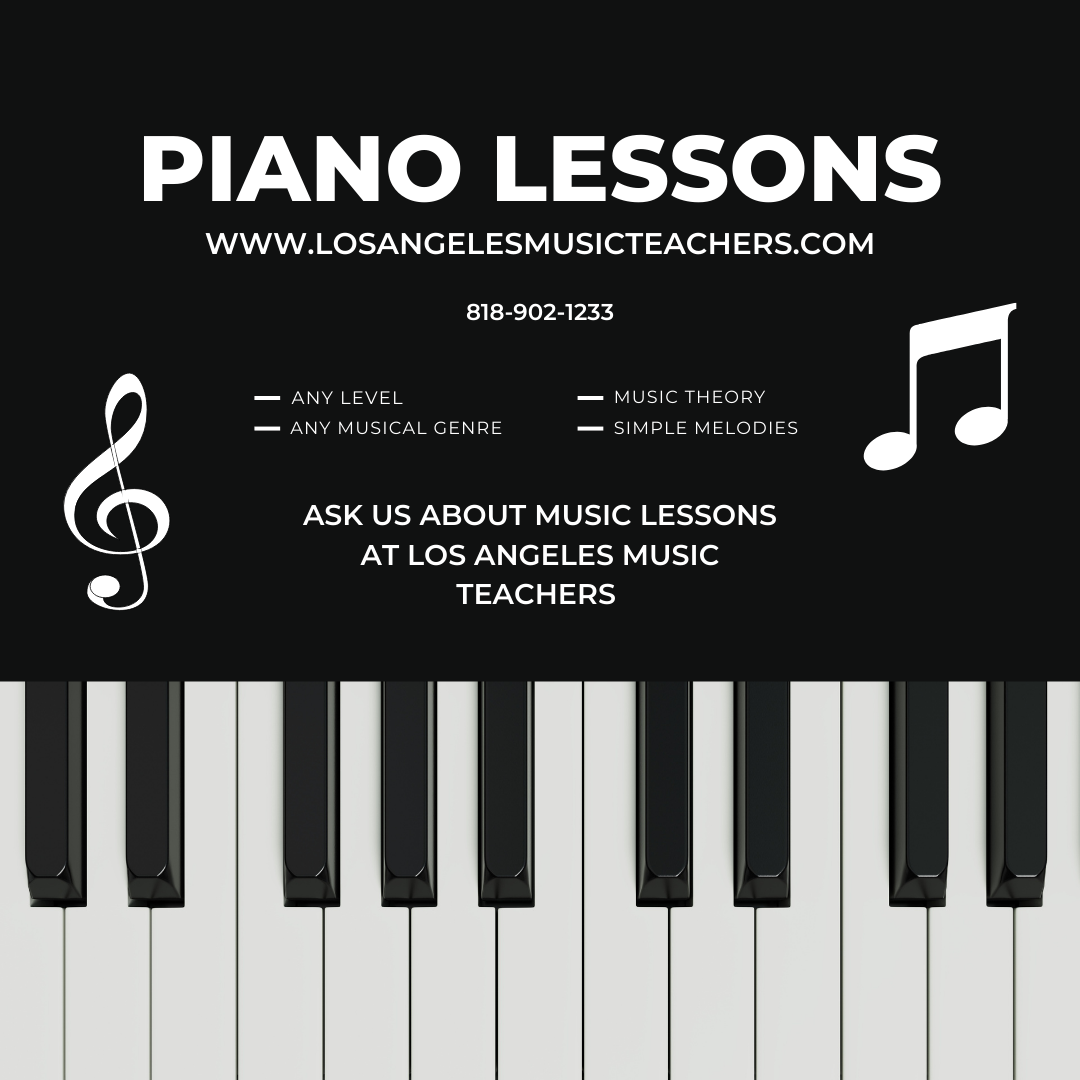
Introduction:
Nestled within the vibrant cultural hub of Los Angeles, Burbank, California, is a place where the melodies of learning and musical growth harmonize effortlessly. For those seeking to explore the enchanting world of music, Los Angeles Music Teachers stands out as a beacon of excellence. With a team of accomplished instructors, we offer the finest piano lessons Burbank has to offer, and we're proud to be among the best music schools in Los Angeles. Our Versatile Music Education Services: Los Angeles Music Teachers takes pride in offering a wide range of music education services to cater to diverse musical tastes and learning preferences. Whether you're a beginner eager to embark on your musical journey or an advanced musician looking to refine your skills, our instructors are here to guide you every step of the way.
Diverse Instrument Instruction: While we excel in piano instruction, our expertise extends to a variety of musical instruments, including:
Contact Los Angeles Music Teachers: Ready to embark on your musical journey or looking to enhance your existing skills? Contact Los Angeles Music Teachers today to schedule your first lesson. You can reach us at losangelesmusicteachers.com or by calling 818-902-1233. Conclusion: Los Angeles Music Teachers in Burbank, CA, stands as a testament to the rich musical heritage of Los Angeles. Our commitment to providing the best piano lessons in the area, along with a wide range of instrument instruction options, sets us apart as a leading music school. Whether you choose in-home lessons or opt for the convenience of Zoom sessions, our dedicated instructors are here to help you unlock your musical potential and create beautiful melodies that resonate with your soul. Join us on this musical journey and let the notes of your dreams come to life.
#LosAngelesMusicTeachers, #BurbankMusicLessons, #PianoLessonsInBurbank, #MusicEducation, #LAInstrumentLessons, #OnlineMusicLessons, #InHomeMusicLessons, #MusicalJourney, #AwardWinningTeachers, #MusicInstructors, #ZoomMusicLessons, #MusicalTalent, #InstrumentInstruction, #MusicSkills, #PlayThePiano, #GuitarLessons, #VoiceLessons, #DrumLessons, #ViolinClass, #SaxophoneSkills
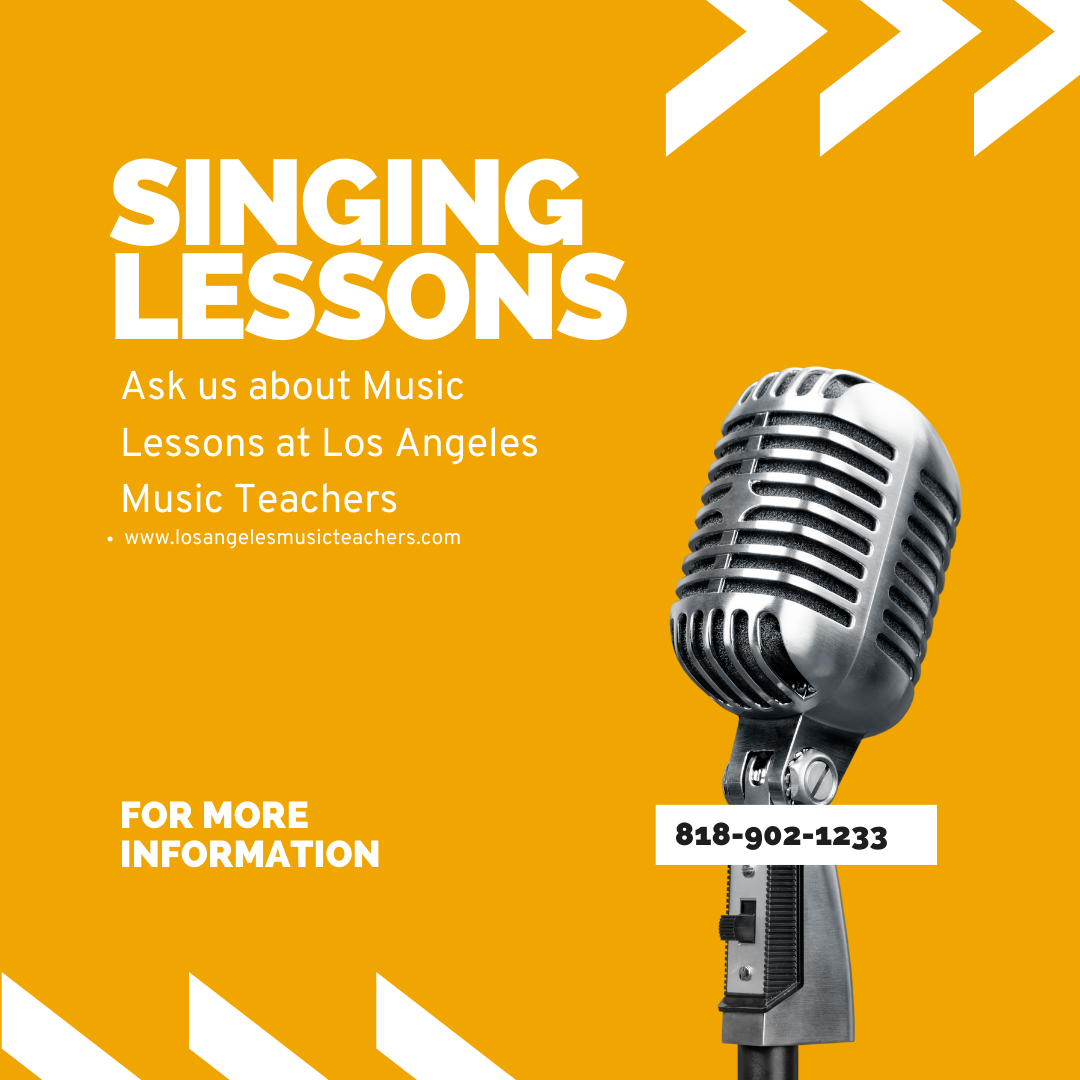
Are you an aspiring singer looking to hone your vocal talents in the vibrant city of Los Angeles? Look no further, as Los Angeles Music Teachers is here to guide you on your musical journey. Nestled in the heart of Burbank, our music school boasts some of the finest teachers Los Angeles has to offer, specializing in voice lessons that cater to students of all ages and skill levels.
In-Home Lessons for Your Convenience At Los Angeles Music Teachers, we understand that your comfort and convenience are paramount. That's why we offer in-home lessons in Burbank, Glendale, Los Angeles, Van Nuys, and North Hollywood. Our experienced instructors will travel to your location, eliminating the need for a tiresome commute and allowing you to focus solely on your vocal development. Zoom Lessons for Worldwide Access For those who prefer the comfort of their own space, or for students located outside of the Los Angeles area, we offer the flexibility of online voice lessons via Zoom. Regardless of where you are in the world, our dedicated instructors are ready to guide you through your vocal journey. It's never been easier to access top-quality voice lessons right from your home. Tailored Lessons for All Ages and Skill Levels Whether you're a complete beginner, an intermediate singer, or an advanced vocal artist, our teachers are equipped to cater to your unique needs. From building a strong vocal foundation to advanced techniques and even improvisation, our comprehensive voice lessons cover it all. We're committed to helping you achieve your musical goals and unlock your full vocal potential. An Award-Winning School in Burbank Los Angeles Music Teachers is not just any music school; we are proud to be an award-winning institution in Burbank, recognized for our excellence in music education. Our commitment to providing the best lessons in Los Angeles has earned us the trust and admiration of countless students and families. More Than Just Voice Lessons While we specialize in voice lessons, our school offers instruction in a variety of instruments to cater to all musical interests. In addition to voice/singing, we provide lessons in piano, guitar, drums, violin, cello, saxophone, clarinet, and flute. Whether you're looking to master multiple instruments or want to diversify your musical skills, our experienced instructors are ready to guide you on your musical journey. Contact Us Today Ready to embark on your musical journey with Los Angeles Music Teachers? Reach out to us on our website at losangelesmusicteachers.com or give us a call at 818-902-1233 to schedule your voice lessons or inquire about any of our other music programs. Our dedicated team of instructors is eager to help you reach your musical aspirations, whether you're in Los Angeles or anywhere across the U.S. Join us today and discover the joy of making music with Los Angeles Music Teachers!  Welcome to Los Angeles Music Teachers, your ultimate destination for the best saxophone lessons in Los Angeles, Glendale, North Hollywood, and Burbank. Whether you’re a beginner or an experienced saxophonist, our expert instructors are dedicated to helping you achieve your musical goals.
Personalized In-Home Saxophone Lessons We understand the importance of a comfortable learning environment, which is why we offer personalized in-home saxophone lessons throughout Los Angeles, Glendale, North Hollywood, and Burbank. Our professional instructors will come to your home, providing customized lessons tailored to your unique needs and pace, ensuring a productive and enjoyable learning experience. Convenient Online Saxophone Lessons For those who prefer the flexibility of online learning or live outside our service areas, we offer convenient online saxophone lessons. Through Zoom, our talented instructors deliver high-quality, interactive lessons that you can access from anywhere in the U.S. All you need is an internet connection and a passion for playing the saxophone. Saxophone Lessons for All Ages and Skill Levels At Los Angeles Music Teachers, we welcome students of all ages and skill levels. Whether you’re a child, teenager, or adult, our curriculum is designed to meet your specific needs. From foundational techniques for beginners to advanced performance skills for experienced saxophonists, our lessons help you develop your musical abilities and achieve your goals. Award-Winning Music School We are proud to be recognized as an award-winning music school, celebrated for our dedication to excellence and student success. Our commitment to providing high-quality instruction has established us as a leading choice for music education in the Los Angeles area. Explore a Variety of Musical Instruments While our focus is on saxophone lessons, Los Angeles Music Teachers also offers instruction in other instruments, including piano, guitar, drums, voice/singing, violin, cello, clarinet, and flute. Our diverse team of instructors is passionate about helping you explore and achieve your musical ambitions. Get Started with the Best Saxophone Lessons in Los Angeles Embark on your saxophone learning journey with Los Angeles Music Teachers! Whether you’re interested in in-home lessons in Los Angeles, Glendale, North Hollywood, or Burbank, virtual lessons, or exploring other instruments, we’re here to support your musical aspirations. Visit our website at losangelesmusicteachers.com or call us at 818-902-1233 to begin your musical adventure. Join Los Angeles Music Teachers and discover your potential as a saxophonist. Experience the joy of music and start playing beautiful melodies with us! #LosAngelesMusicTeachers #SaxophoneLessons #BurbankMusic #InHomeSaxophoneLessons #OnlineSaxophoneLessons #MasterSaxophone #MusicEducation #LearnSaxophone #MusicSchoolLosAngeles #SaxophoneJourney #ExploreMusic Contact Information: Phone Number: 818-902-1233 Email: [email protected] 
Are you on the hunt for the best guitar lessons in Burbank, CA? Look no further! Los Angeles Music Teachers is here to provide you with top-notch guitar instruction that will help you reach your musical goals. We take pride in having some of the best teachers Los Angeles has to offer, and our commitment to excellence sets us apart in the world of music education.
In-Home Lessons for Your Convenience At Los Angeles Music Teachers, we understand that life can get busy, and commuting to a music school may not always be the most convenient option. That's why we offer in-home guitar lessons in Burbank, Glendale, Los Angeles, Van Nuys, and North Hollywood. We bring the music to you, allowing you to learn in the comfort of your own home. Zoom Lessons for Nationwide Access But our commitment to making music education accessible doesn't stop there. We also offer Zoom lessons, which means you can receive high-quality guitar instruction from our expert teachers no matter where you are in the U.S. Whether you're a beginner just starting your musical journey or an advanced player looking to refine your skills, our virtual lessons are designed to cater to all ages and skill levels. Award-Winning School in Burbank Los Angeles Music Teachers is proud to be recognized as an award-winning school in Burbank. Our reputation for excellence is built on the achievements and success stories of our students. When you choose us for guitar lessons, you're choosing a school that is dedicated to helping you achieve your musical aspirations. Guitar Lessons for All Ages and Skill Levels Our guitar lessons cover a wide range of topics, from the basics for beginners to advanced techniques and even improvisation. Whether you dream of strumming your favorite songs, becoming a skilled soloist, or mastering intricate fingerpicking patterns, our experienced instructors are here to guide you on your musical journey. More Than Just Guitar While we're known for our exceptional guitar lessons, Los Angeles Music Teachers offers instruction in a variety of other instruments as well. In addition to guitar, we provide lessons in piano, voice/singing, drums, violin, cello, saxophone, clarinet, and flute. Whatever your musical passion may be, we have a talented and dedicated teacher ready to help you excel. Contact Us Today! Ready to start your musical adventure with Los Angeles Music Teachers? Whether you're interested in guitar lessons or instruction on any of the other instruments we offer, we're here to help you reach your goals. Visit our website at losangelesmusicteachers.com or give us a call at 818-902-1233 to get started on your journey to musical excellence. Don't miss out on the opportunity to learn from some of the best teachers in Los Angeles. Join us at Los Angeles Music Teachers and let the magic of music transform your life.
#GuitarLessons, #MusicEducation, #BurbankCA, #LosAngelesMusicTeachers, #InHomeLessons, #ZoomLessons, #GuitarInstruction, #LearnGuitar, #MusicLessons, #AwardWinningSchool, #MusicalJourney, #GuitarTeachers, #InstrumentLessons, #VirtualMusicLessons, #MusicSchool, #PlayGuitar, #GuitarSkills, #MusicForAllAges, #Guitarists, #MusicStudents
 9 Questions to know before taking Drum Lessons at Los Angeles Music Teachers Do I have to own a drum set to take drum lessons? No. Many students start learning on a rubber practice pad and a pair of sticks. We recommend starting children at the age of five or six on keyboard/piano for a year or two and adults can start at any age. Then they have a huge head-start when they transition to Drum at the age of seven and it usually goes very smoothly for them. Do I have to bring sticks to my first lesson? No. Your teacher will have a pair you can borrow for the first lesson. Your teacher will suggest a pair of sticks that are the correct size for you based on music style, experience, etc. Then you can pick up a pair at a music store and bring them to future lessons. Should I learn on an acoustic or electric drum kit? If you are a beginner it doesn't really matter. There are some advantages to each. The cost is similar between electric and acoustic drums. You can wear headphones with electric drums and you can put rubber pads (silencers) on acoustic drums to bring the volume down. Please speak with your drum teacher about which drum set is right for you, your lifestyle and budget. You can always call our school office and someone will be happy to help you as with the brands and models as well. What age is best to start learning to play drums? Adults can start anytime! Students as young as five can learn to play but it is usually best if they wait until the age of seven to take drum lessons. Many people call us and say "my child plays pots and pans all the time and he is four years old. We want to get him into drum lessons." There is a big difference in having fun pounding away on pots, pans or even your desk if you are an adult and having your teacher give you certain patterns and songs to work on over and over until they are correct. Children under six and under generally don't have the attention span to take drum lessons. Instead, start them on keyboard until the age of seven and then switch them to drums if you really want to give them the best chance at success. Of course there are exceptions so please call us if you think your child is ready for drum lessons! Do I have to bring my drum set to each lesson? No. We have drum kits at our school for you to use at your lessons. However, you should bring your sticks (after the first lesson) and any books or other materials your teacher has you working on from week to week. Do you teach snare drum and other percussion instruments? Yes. Please call us for details as there are many different percussion instruments out there and various teachers at our many schools teach specific percussion instruments. Do I have to know how to read music to play drums? No. Your teacher will introduce you to drum music as you learn to play. Drum music notation is different than music notation for other instruments and is much easier to learn! Are their performance opportunities for drummers at Los Angeles Music Teachers? No. We are currently in an expansion in the school so we are just taking on private lessons, so we do not have any school concerts/performances, but any parent that would like to hear the students progress and want their child to have a performance to practice and prepare for, we can definitely set that up for you for we would like our students to grow and have something to work towards. We can set the drummers to perform a solo. What kind of drums do you recommend for a beginner? I would recommend contacting your teacher, there are many brands and models for basic and electric drum sets. Our teacher will give you the best advice on instruments you can purchase that will be excellent for you to start with. If you're interested in taking Drum lessons on Zoom or In Person in Burbank, Glendale or North Hollywood, we have some of the best drum lessons in Los Angeles. Our drum instructors are picked by interviewing hundreds of drum instructors and we have really high standards on both their teaching ability as well as their personality. If you'd like to talk to one of our instructors or set up a first lesson we have a guarantee that if you don't absolutely love your first lesson you don't have to pay for it. Please contact us at (818)902-1233 or on our website at https://www.losangelesmusicteachers.com/online-drum-lessons-in-burbank-ca.html

You Are New To Playing The Guitar, Where Do You Begin?
You just bought yourself a guitar and now you want to learn how to play. Where do you start? What are The Most important chords you need to know in order to strum a few songs? As a beginner, you must start at the beginning and slowly climb that set of building blocks. Chords are considered the harmony, and strumming your guitar is the rhythm, adding in someone who sings and you have a melody. Put these together and you will have music. The first chords each beginner learns are remembered easily by the word CAGED. Yes, that is: C-A-G-E-D, and the next three are Am-Em-Dm. These chords will give you a seemingly endless playlist once you master them. There are a few tips to remember that will help you on this journey. -Press the guitar strings with just the tips of your fingers. -Bend the three knuckles as you press the strings sturdily. -Be sure to not touch the string below. -Rest your thumb gently on the back side of the guitar neck. Practice daily, checking to verify that each chord is coming out clearly. As soon as you feel comfortable being able to switch between these three chords, G,C, and D; you can being learning some three chord songs, and as you find yourself more comfortable you can move on to four chord songs. Some of the top songs such as You’re Beautiful by James Blunt,, With or Without You by U2 and She will be loved by Maroon 5, are all played using just these four chords, G,D, Em and C. There are tons of songs to learn that use that chord succession. These few tips will have you well on your way to playing guitar like a professional musician. There are number chord diagrams to look at that will aid you in learning. The numbers on those diagrams match up with your fingers. 1 is the index finger 2 will be the middle finger 3 is the ring finger 4 is the pinky finger Learn and memorize all eight chords thoroughly to build your abilities. Be sure to practice daily and listen to the sounds as you practice. Listen for clarity, be sure that you are not muting by touching any other string. As you feel more confident in your chords and abilities, you can research and find songs to play that will get you excited to keep playing and to continue learning some of the more difficult chords and methods to guitar playing. Think of how you will amaze family and friends when you are able to play just a small set of chords and be able to play the songs that so many people know and love. If you're interested in taking Guitar lessons on Zoom or In Person in Burbank, Glendale or North Hollywood, we have some of the best guitar lessons in Los Angeles. Our guitar instructors are picked by interviewing hundreds of guitar instructors and we have really high standards on both their teaching ability as well as their personality. If you'd like to talk to one of our instructors or set up a first lesson we have a guarantee that if you don't absolutely love your first lesson you don't have to pay for it. Please contact us at (818)902-1233 or on our website at https://www.losangelesmusicteachers.com/online-guitar-lessons-in-burbank-ca.html  Welcome to Los Angeles Music Teachers, your premier destination for the best voice and singing lessons in Los Angeles, Glendale, North Hollywood, and Burbank. Whether you're a beginner or an experienced vocalist, our expert instructors are dedicated to helping you reach your full potential.
Personalized In-Home Voice Lessons We understand the importance of a comfortable learning environment, which is why we offer personalized in-home voice lessons throughout Los Angeles, Glendale, North Hollywood, and Burbank. Our professional instructors will come to your home, providing customized lessons tailored to your unique needs and pace, ensuring a productive and enjoyable learning experience. Convenient Online Voice Lessons For those who prefer the flexibility of online learning or live outside our service areas, we offer convenient online voice lessons. Through Zoom, our talented instructors deliver high-quality, interactive lessons that you can access from anywhere in the U.S. All you need is an internet connection and a passion for singing. Voice Lessons for All Ages and Skill Levels At Los Angeles Music Teachers, we welcome students of all ages and skill levels. Whether you're a child, teenager, or adult, our curriculum is designed to meet your specific needs. From foundational techniques for beginners to advanced performance skills for experienced singers, our lessons help you develop your vocal abilities and achieve your goals. Award-Winning Music School We are proud to be recognized as an award-winning music school, celebrated for our dedication to excellence and student success. Our commitment to providing high-quality instruction has established us as a leading choice for music education in the Los Angeles area. Explore a Variety of Musical Instruments While our focus is on voice and singing lessons, Los Angeles Music Teachers also offers instruction in other instruments, including piano, guitar, drums, violin, cello, saxophone, clarinet, and flute. Our diverse team of instructors is passionate about helping you explore and achieve your musical ambitions. Get Started with the Best Voice Lessons in Los Angeles Embark on your vocal learning journey with Los Angeles Music Teachers! Whether you're interested in in-home lessons in Los Angeles, Glendale, North Hollywood, or Burbank, virtual lessons, or exploring other instruments, we're here to support your musical aspirations. Visit our website at losangelesmusicteachers.com or call us at 818-902-1233 to begin your musical adventure. Join Los Angeles Music Teachers and discover your potential as a singer. Experience the joy of music and start singing your way to success with us! #LosAngelesMusicTeachers #VoiceLessons #SingingLessons #BurbankMusic #InHomeVoiceLessons #OnlineVoiceLessons #MasterVoice #MusicEducation #LearnSinging #MusicSchoolLosAngeles #VocalJourney #ExploreMusic Contact Information: Phone Number: 818-902-1233 Email: [email protected]  Music lessons for children aged 7 and up. We are offering lessons for piano, saxophone, violin, and many other instruments. Our music teachers teach rock, blues, metal, country and classical music lessons. Beginner students can get to work on chords, simple songs, melodies, music theory, and tabs reading. We try to make each lesson joyful to learn. All the theory and technical concepts are divided into small parts and end in something fun. No matter if you want to learn your favorite guitar riff or learn to play your favorite song, you are welcome to bring your CDs or iPod to the class to learn it from the teachers. If you are wondering who we are and what we do, in this blog we will cover all the aspects of our website and give you an overview of what we do. You will also learn a lot about our mission like why we founded this company and how you can benefit as a musician by choosing us as your music teachers. Who We Are We have professional and accomplished teachers and performers in the LA area who combined their expertise to form Los Angeles Music Teachers. In our long careers, we have taught for so many music schools but we were unable to produce the results we wanted due to the restrictions. It was the need of the hour to form a business that could overcome all the weaknesses of the competitors and offer something that could really provide benefits to the young students. Our Mission We believe that it is not necessary for a music school to have a complicated website that could confuse the student right in the very beginning. This is the reason why we made a website that is easy to navigate and provides all the information in the best way possible. Secondly, being music teachers, we want to offer lessons that are tailored to your needs and goals. Being musicians, we know that no two musicians are same and they cannot be taught in the same way. It is one of our mantras to offer special discounts to our students. You can pay all your fees in advance either for a month or a year, whatever you are comfortable with. However, customer satisfaction is our main priority and if you are not satisfied with your first lesson, you can claim your full fee back. We won’t ask you any questions. As we mentioned earlier that we like to offer discounts to our students, our referral scheme is something we take pride in. Just refer a friend to us and get a full month of free classes as a reward. We never impose our teaching plan on our students. We teach you what you are interested in learning; which is the beauty of our classes. No matter if it is a specific song or a riff, our experienced teachers will teach it to you. This is why we brag that it is a fun learning with us. Hopefully, this post is enough to answer all your queries and introducing ourselves to you. If you still have any further questions, please call us now at (818)902-1233, or leave your question in the contact form. We will answer you as quickly as possible. Hope you have a good time reading, we look forward to hearing from you. If you are interested in taking lessons on Zoom or In Person, please contact us at (818) 902-1233 or on our website at https://www.losangelesmusicteachers.com/online-music-lessons-burbank-ca.html  Welcome to Los Angeles Music Teachers, where you’ll find the best piano lessons in Los Angeles, Glendale, North Hollywood, and Burbank. Whether you’re just starting your musical journey or looking to refine your piano skills, our expert instructors are dedicated to helping you achieve your goals.
Personalized In-Home Piano Lessons We understand the importance of a comfortable learning environment, which is why we offer personalized in-home piano lessons across Los Angeles, Glendale, North Hollywood, and Burbank. Our experienced instructors will come to your home, providing customized lessons that cater to your unique needs and pace, ensuring an effective and enjoyable learning experience. Convenient Online Piano Lessons For those who prefer the flexibility of online learning or live outside our service areas, we offer convenient online piano lessons. Using Zoom, our talented instructors deliver high-quality, interactive lessons that you can access from anywhere in the U.S. All you need is an internet connection and a passion for music. Piano Lessons for All Ages and Skill Levels At Los Angeles Music Teachers, we welcome students of all ages and skill levels. Whether you’re a child, teenager, or adult, our curriculum is designed to meet your specific needs. From foundational skills for beginners to advanced techniques and performance preparation for seasoned pianists, our lessons help you grow as a musician. Award-Winning Music School We are proud to be recognized as an award-winning music school, celebrated for our dedication to excellence and student success. Our commitment to providing high-quality instruction has made us a leading choice for music education in the Los Angeles area. Explore a Variety of Musical Instruments While our focus is on piano lessons, Los Angeles Music Teachers also offers instruction in other instruments, including guitar, drums, voice/singing, violin, cello, saxophone, clarinet, and flute. Our diverse team of instructors is passionate about helping you explore and achieve your musical ambitions. Get Started with the Best Piano Lessons in Los Angeles Embark on your piano learning journey with Los Angeles Music Teachers! Whether you’re interested in in-home lessons in Los Angeles, Glendale, North Hollywood, or Burbank, virtual lessons, or exploring other instruments, we’re here to support your musical aspirations. Visit our website at losangelesmusicteachers.com or call us at 818-902-1233 to begin your musical adventure. Join Los Angeles Music Teachers and discover your potential as a pianist. Experience the joy of music and start playing beautiful melodies with us! #LosAngelesMusicTeachers #PianoLessons #BurbankMusic #InHomePianoLessons #OnlinePianoLessons #MasterPiano #MusicEducation #LearnPiano #MusicSchoolLosAngeles #PianoJourney #ExploreMusic Contact Information: Phone Number: 818-902-1233 Email: [email protected]  Welcome to Los Angeles Music Teachers, where you can find the best guitar lessons in Los Angeles, Glendale, North Hollywood, and Burbank. Whether you’re a beginner or an experienced guitarist looking to hone your skills, our expert instructors are dedicated to helping you achieve your musical dreams.
Personalized In-Home Guitar Lessons Understanding the importance of a comfortable learning environment, we offer personalized in-home guitar lessons throughout Los Angeles, Glendale, North Hollywood, and Burbank. Our skilled instructors will come to your home, providing customized lessons that cater to your unique needs and learning pace, ensuring a productive and enjoyable experience. Convenient Online Guitar Lessons For those who prefer the flexibility of online learning or live outside our service areas, we offer convenient online guitar lessons. Through Zoom, our experienced instructors provide high-quality, interactive lessons that you can access from anywhere in the U.S. All you need is an internet connection and a desire to learn. Guitar Lessons for All Ages and Skill Levels At Los Angeles Music Teachers, we welcome students of all ages and skill levels. Whether you’re a child, teenager, or adult, our curriculum is designed to meet your specific needs. From foundational skills for beginners to advanced techniques and improvisation for seasoned guitarists, our lessons are structured to help you grow as a musician. Award-Winning Music School We are proud to be recognized as an award-winning music school, celebrated for our commitment to excellence and student success. Our dedication to providing high-quality instruction has made us a leading choice for music education in the Los Angeles area. Explore a Variety of Musical Instruments While our focus is on guitar lessons, Los Angeles Music Teachers also offers instruction in other instruments, including piano, drums, voice/singing, violin, cello, saxophone, clarinet, and flute. Our diverse team of instructors is passionate about helping you explore and achieve your musical ambitions. Get Started with the Best Guitar Lessons in Los Angeles Embark on your guitar learning journey with Los Angeles Music Teachers! Whether you’re interested in in-home lessons in Los Angeles, Glendale, North Hollywood, or Burbank, virtual lessons, or exploring other instruments, we’re here to support your musical aspirations. Visit our website at losangelesmusicteachers.com or call us at 818-902-1233 to begin your musical adventure. Join Los Angeles Music Teachers and discover your potential as a guitarist. Experience the joy of music and start strumming your way to success with us! #LosAngelesMusicTeachers #GuitarLessons #BurbankMusic #InHomeGuitarLessons #OnlineGuitarLessons #MasterGuitar #MusicEducation #LearnGuitar #MusicSchoolLosAngeles #GuitarJourney #ExploreMusic Contact Information: Phone Number: 818-902-1233 Email: [email protected] What should I know about Violin Sizes?
6/20/2024
Most parents who want their children to engage in violin lessons do not really know the right instrument suitable for them. Looking for an instrument that your child will play is simply the first thing to do before even commencing violin lessons. Unfortunately, finding the right information can be very difficult as there are lots of options available.
|
Archives
July 2024
Categories
All
|


 RSS Feed
|
Music Lessons Available on All Instruments:
Piano Lessons
Guitar Lessons Voice Lessons Drum Lessons Violin Lessons Cello Lessons Saxophone Lessons Jazz Improvisation Lessons Flute Lessons Clarinet Lessons Singing Lessons Acoustic & Elec Bass Songwriting & Production |
Contact Us Now
|


Website by Never Alone Business Services