
The Best 10 Jazz Drummers Of All Time
5/24/2021
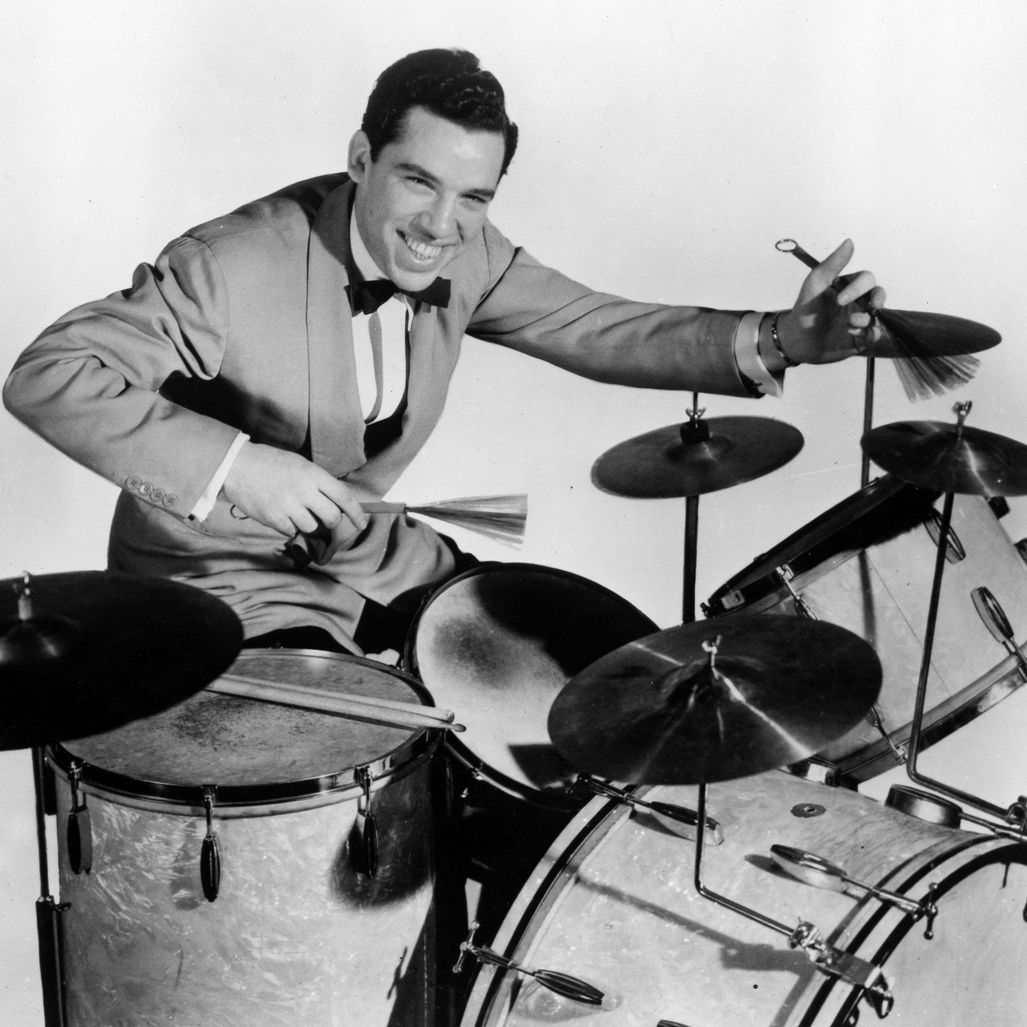 Jazz drumming is an art form that requires unprecedented control, coordination, and rhythmic understanding. Jazz is a musical genre that has birthed some of the greatest drummers alive. And jazz drummers have also been pivotal in the development of the modern drum set. In this article, I’m going to list ten of the best jazz drummers of all time. All of the jazz drummers I feature are true innovators and have made undeniable contributions to the genre throughout their careers. Read on to discover my selection of the best jazz drummers of all time, who have had an enormous influence on the genre and helped to further jazz as an art form! 10. Peter Erskine (Born 1954) Peter Erskine is a jazz drumming legend who picked up the drum sticks at the tender age of four. He is an incredibly diverse musician and is well-versed in all different forms of jazz and broader genres such as Funk and Pop. Erskine performed with Stan Kenton and Maynard Ferguson before joining the jazz-fusion group Weather Report. Erskine is an accomplished jazz drummer who is highly regarded for his efficient movement and exceptional technique. He effortlessly moves around the kit with real finesse, and he is a true master of swing and syncopation. 9. Steve Gadd (Born 1945) Steve Gadd is widely regarded as one of the most influential drummers of all time and has set a new standard in contemporary drumming. He is a very accomplished musician and can play anything from jazz right through to Rock music. He has an impeccable playing feel that leaves listeners amazed. As one of the ‘greatest groovers’ to ever pick up the sticks, he masterfully approaches jazz drumming with musical brilliance and delivers what the song requires, every time. Gadd’s feel, imagination, and technical ability makes him one of the best jazz drummers of all time. 8. Louie Bellson (1924-2009) Delivering explosive and dynamic performances, Louie Bellson has cemented himself as one of the jazz drumming greats. Not only is he one of the best jazz drummers, but Bellson also matured into an accomplished author, composer, and entrepreneur. His expressive playing style was indeed a reflection of his varied and hectic life! Louie Bellson helped to pioneer double bass drum sets, and he took full advantage of both bass drum pedals with his exciting and adventurous performances. He was one of the most incredible big band drummers of all time and played with a wide range of acclaimed artists during his long career. 7. Max Roach (1924-2007) A true innovator of Bop drumming, Max Roach left an enormous legacy and is considered one of the most crucial jazz drummers in history. As well as pioneering Bop, he worked in many other music styles and performed with the very best artists of his time, including Coleman Hawkins and Charlie Parker. Max Roach was one of the first drummers to utilize the ride cymbal to emphasize a rhythmic pattern, and this added a beautiful sonic texture to swing and jazz music. Roach innovated an entirely new drumming method by being one of the first drummers to utilize limbs independently. 6. Joe Morello (1928-2011) Joe Morello was an incredibly skilled jazz drumming legend who became renowned for his technical proficiency in playing unusual rhythmic time signatures. He played with a real finesse that helped him to achieve superstar jazz drumming status by emphasizing irregular beats and rhythms through his playing. Morello had an incredibly unique approach to the jazz drum set with Brubeck’s compositions. He held the music together while still showing his creative flair and originality with his unusual syncopations and exciting accents. 5. Tony Williams (1945-1977) Tony Williams was one of the most inspiring and best jazz drummers of all time. He gained fame by performing with Miles Davis at 17 and significantly helped to pioneer jazz fusion. He was not only an incredibly versatile drummer, but he played with incredible precision and technical prowess. Throughout his remarkable career, Tony Williams performed with other legendary musicians, including Jaco Pastorius and Herbie Hancock. He performed with sublime control and power, unleashing dazzling polyrhythms and intricate patterns behind the drum set. 4. Elvin Jones (1927-2004) Elvin Jones was an incredibly prolific jazz drummer who accompanied a wide range of pioneering artists, including John Coltrane, Charles, Mingus, Miles Davis, and more. He quickly distinguished himself as one of the best around his unique playing style – blending power with musical finesse. With the John Coltrane Quartet, Jones helped to innovate jazz music by breaking the music free from the cagey bar lines that restricted the flow. Jones’ drumming paved the way for a modern style of jazz that flowed freely. His creativity, legato phrasing, and syncopations helped to push the boundaries of the genre. 3. Art Blakey (1919-1990) Art Blakey was nicknamed “The Thunder” by Max Roach for his powerful and captivating drumming style. He was one of the most desirable and best jazz drummers throughout the ’50s, ’60s, ’70s, and ’80s. Every jazz musician wanted to play with Art Blakey. He had an incredible signature style and was incredibly adept at maintaining independence with all four limbs. Blakey had a more straight-ahead drumming style than most Bop drummers, but he also liked to innovate with different sounds behind the drum set. He can also be credited with inspiring the development of riveted cymbals by placing his keys over the ride cymbal wingnut to produce a sizzle effect. 2. Buddy Rich (1927-2004) Without a doubt, one of the best jazz drummers of all time, Bernard “Buddy” Rich was one of the most technically gifted and dazzling drummers there ever was. He displayed incredible speed, consistency, power, and dynamics with his highly expressive drumming. Even though his style was wild and powerful, he was also adept at playing softer with drum brushes. Buddy Rich performed with his time’s greatest jazz artists, including Tommy Dorsey, Benny Carter, Harry James, and many more. From 1966 until his death, he led successful big bands even in an era when their population had diminished. Rich’s extended drum solos were phenomenal, and there is no denying he was one of the most influential drummers of all time. 1. Gene Krupa (1909-1973) Gene Krupa is widely considered the founding father of modern drumming. Krupa’s style and showmanship were mesmerizing to watch. He was the first drummer to use a bass drum on a recording session and profoundly influenced the modern drum kit. Krupa was the first drummer to perform solos in a song and helped to bring attention to the drummer within a band. Krupa’s superb drum solos became widely celebrated amongst jazz musicians in the 1930s. He had a crucial role in elevating the drummer’s position from an accompanying instrument to a solo voice. There are far too many sensational jazz drummers to be able to list in a single article. There are countless drumming legends I have missed, who are all worthy of a feature! I hope you have enjoyed my selection of the best jazz drummers, who have all influenced entire generations of musicians and helped to further the legendary genre with their unmatched ability and creativity. If you're interested in taking lessons on Zoom or In Person in Burbank, Glendale or North Hollywood, please contact us at (818)902-1233 or on our website at https://www.losangelesmusicteachers.com/online-drum-lessons-in-burbank-ca.html
Ascap Article - The Death of Genre
5/6/2021
 What a Great article, If you read below you will see what Jeannette Cooper had to say about Genres in music today. Time was, you listened to jazz or rock, read mysteries or romances, majored in English lit. or anthropology, craved Chinese or Italian. You stuffed your likes into compartments. Then came cross-fertilization, influences, blends, hybrids, boundary-breaking ecommerce. Now you can listen to Japanese jazz or Afro-Celtic rock, read a literary mystery that is half cozy and half thriller, eat a kimchi quesadilla or roll sushi ingredients into a burrito. Genre is dying. “The idea of identity as a fixed and narrow concept, and of taste as inherently cloistered, feels bizarre, punitive, and regressive,” Amanda Petrusich wrote last month in the New Yorker. “Genre feels increasingly irrelevant to the way we think about, create, and consume art.” It is entirely relevant, however, to the way we market art. The few remaining bookstores need to figure out where, on what shelf, in what section, a book belongs. Librarians need to catalog that book. Publicists need to hype a new book to readers who already love books like this one. Awards shows need categories. So even as genre loses sway, it continues to organize our cultural marketplace—and we continue to glue on the wrong labels. Petrusich mentioned Justin Bieber’s distress to have his R&B album nominated for Best Pop Vocal Album—which, sure, was a more prestigious category, but the album was R&B. Tyler, the Creator objected to winning Best Rap Album because “whenever we, and I mean guys that look like me, do anything that’s genre-bending, they always put it in a rap or urban category…. Why can’t we just be in pop?” Why, and how, did genre take shape in the first place? Blame Aristotle, who gave the scientists their taxonomy of genus and species and broke literature into poetry, drama, and prose. From there he outlined subcategories: lyric, epic, and dramatic poetry, the latter including comedy, tragedy, melodrama, and—the start of the blending—tragicomedy. You will dizzy yourself if you try to find today’s criteria, the organizing principles we use to categorize. Genre can be determined by historical period (regency) or geographic location (westerns); by how tightly it cleaves to established reality (fantasy, magical realism, science fiction, true crime); by what psychological needs it satisfies in us (mystery, romance, thriller); by how it uses language (poetry, essay, novel, play). Cassius Longinus sorted out the methods various writers used to influence their audience’s emotions. Northrop Frye looked at the relationship between the “real” and the “ideal”: Romance was the ideal, irony the real, tragedy the plummet from ideal to real. When masterpieces rise above or interweave the genres, we call them classics. Shakespeare’s Hamlet is a mystery, a tragic romance, a thriller; The Tempest is fantasy; the comedies weave in bits that would work as French farce or vaudevillian schtick; much of the prose is pure poetry. But for readers gobbling up paperbacks at bedtime, “genre” became a flat, predictable formula (boy meets girl, star-crossed lovers are united, the killer is caught, the suspects are gathered in the parlor). Blasting those formulas was the first death blow. Writers like Michael Chabon played with genre in such powerful ways, the categories lost meaning. And once the word “genre” could no longer be used dismissively, the critics’ fun melted away. Authors began to play, blending and defying the conventions of various genres. Painfully aware how few book and music stores remained, they stopped worrying about category and focused on crashing the popularity lists. Genre’s demise should pop champagne corks all over the world. Too much has fallen between the compartments and landed in obscurity simply because an artist refused to conform to a formula. But can we wipe out the old categories altogether? Even the savviest curator might flounder. Can technology help us? I once copied out recipes from batter-stained index cards. Now, if I have extra buttermilk or a sack of ripe peaches, I search online for recipes with those ingredients. Spotify finds me all sorts of cool music. Books, though, are problematic: If I ask Google to suggest what I should read next after loving Abraham Verghese’s novel Cutting for Stone, it will suggest books about doctors, nonfiction by Verghese, and books that take place in Ethiopia. These are not the reasons I loved Cutting for Stone. The difference? Spotify has algorithms, but it also has human curators for its playlists. And human curators understand subjective qualities—vibe, tone, depth, candor. “Curate” was such a trendy verb a decade ago that I vowed to stop using the word, but now I see why it emerged with such fanfare: Discernment is the skill that will keep the rest of us sane. After listening to heavenly Irish music in the pubs of St. John, Newfoundland, I walked into a music store and asked for a recommendation: Celtic, but not self-consciously so, ballads, female singer, high clear voice, lilting melodies, the emotion strong but not maudlin, nothing sappy, historically rooted but fresh. Grinning, the guy pulled out five options and thanked me for knowing what I wanted. But to be that persnickety, you have to know exactly what you want ahead of time, and that ruins the chance of surprise. Besides, these days we barely ever shop in person—so now what? Sure, there are ratings, but how can you trust a bunch of strangers to tell you what will feed your soul? Maybe we could filter by the type and mood and color and the quality of the writing. Easy bedtime read or sentences you want to underline? Then the ingredients (mystery, witty dialogue, a little romance, strong friendships and teamwork, a lot of psychological complexity, meaning, depth). Then what we do not want (one-sentence paragraphs so manipulatively suspenseful they cancel sleep; gore designed to awaken some primordial bloodlust I would rather keep buried). Show some succinct measure of what other readers thought, but do not make us wade through quibbles that could taint our own response. Develop an algorithm skillful enough to note why each of us likes what we like. Add curation, to surprise us with choices we might not otherwise find. It is complicated, such sorting, and every year there will be more to choose from. But as we figure out a new approach, either softening or expanding the old categories and discarding the bias, we might begin to see how much comedy there is in tragedy, how much tragedy in comedy. Those of us who have shunned science fiction in favor of nonfiction social commentary will see how often they are one and the same. Realizing that what is said and why matters far more than when, where, or how, we might be less likely to snap our mind shut and avoid entire categories. Publicists will have to get more creative, selling something because of how it makes us feel, opens our minds, explores certain ideas. Artists and thinkers will feel freer to roam. If we pull this off, will we learn to think outside all the other boxes, too—race, class, gender, religion? Because there have always been blends, mixtures, influences, examples that shatter the compartments. We just need more graceful ways to acknowledge them. Read more by Jeannette Cooperman here. If you're interested in taking lessons on Zoom or In Person in Burbank, Glendale or North Hollywood, please contact us at (818)902-1233 or on our website at https://www.losangelesmusicteachers.com/online-music-lessons-burbank-ca.html
Is it hard to Learn Cello?
5/5/2021
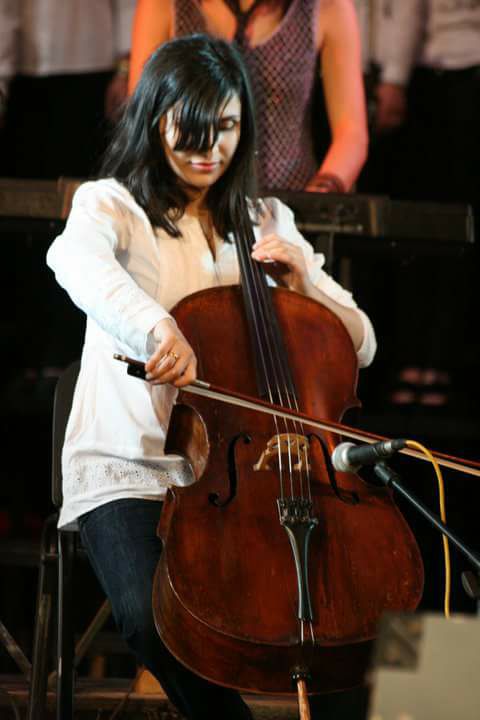 Is it hard to Learn Cello? When learning how to play the cello, very little is spoon-fed to you by the instrument. Keyboard and instruments with frets, such as the piano and guitar, are a little easier to learn the basics. Putting your finger on the right key/fret will allow you to produce the note you want to hear. With cello, you need to have a teacher guiding you to ensure you’re learning the right way. This will lead to a lifetime of enjoying the instrument. If you have the right teacher, anyone can learn the fundamentals of playing the cello. As with most instruments, the cello will come more easily to someone with experience reading notes and rhythms. Most of cello music is written down, rather than transferred aurally from teacher to student. Does My Age Matter? Young students make great beginner cellists. Often with youth comes unbridled enthusiasm for learning a cool new instrument that helps them absorb new information like a sponge. These advantages can carry a student a long way. The excitement encourages them to practice more on their own and their ability to retain information helps them progress quickly in their studies. One difficulty that young students face though, is the challenge of analyzing their playing. As a result, they need an outside observer to help them identify things that cause them trouble, whether it is posture, intonation, tone quality, etc. Young beginners are generally less coordinated than their adult counterparts and will remain that way until well after puberty. Adult beginners have their own set of advantages. Firstly, they’re better in control of their bodies which helps them make changes to technique and posture more quickly. They also have a strong ability to critically analyze their own actions, and better sense of how they want to sound. As a result of their ability to critically analyze their own playing, adult learners can sometimes go straight to the criticizing part. This can lead to discouragement when they don’t immediately sound the way they want. However, the student is probably playing at a level appropriate to how long they have been studying. Practice Helps perfect the sound Practicing in between lessons is another necessity that makes learning the cello much easier. Without daily practice times, you will find your teacher going over the same concepts week after week during your lessons. Make a commitment to find a small amount of time each day to practice playing the cello and you’ll set yourself up for success. (30 Min Rule) If you only have five minutes, play some open strings for tone quality. Have a little more time? Add in some scale practice. If you have even more time, pick apart the challenging sections of your newest solo piece. There is always something you can practice, but focus on the most important concepts with the time that you have. Start Learning Cello Today You no longer have to wonder if the cello is hard to learn. With a teacher guiding your technique, regular practice times, and a willingness to learn, you can become an excellent cellist. Overall, the cello is an incredible instrument with a wonderful depth of sound. To get started now, sign up for your first cello lesson right here at Los Angeles Music Teachers/ Burbank’s 5 star Music School with one of our best cello instructors Gvantsa. If you have any questions you are welcome to call us for advice on best practices for renting or buying a string instrument like violin or cello. Our teachers will also help answer any questions and guide you as you take lessons. If you're interested in signing up for lessons on Zoom or In Person in Burbank, Glendale or North Hollywood, please contact us at (818)902-1233 or on our website at https://www.losangelesmusicteachers.com/online-cello-lessons-in-burbank-ca.html
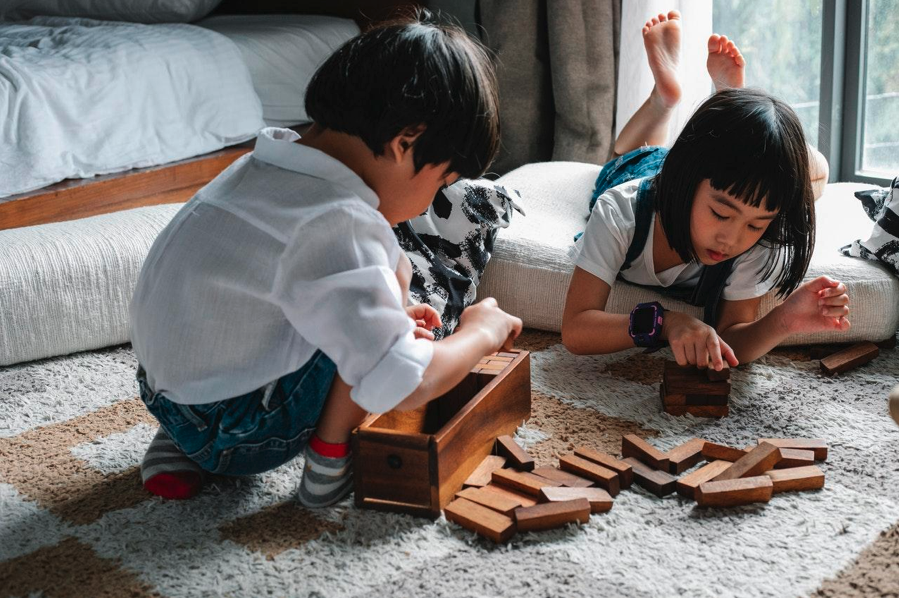 Photo credit: Pexels.com They say that April showers bring May flowers. Unfortunately, those springtime rains also mean that your kids can't go outside to play. Keeping your energetic little ones amused indoors can be a challenge. Luckily, there are ways you can entertain children inside while also honing their personal development. The below guide provides inspiration for moms and dads who want kids to keep busy while also learning a thing or two at home. Experience new cultures by learning another language. Kids learn foreign languages more easily than adults, so it's great to get them started early. According to Cornell University, learning a second language also offers cognitive advantages. Your little ones can easily hone their skills at home with online courses. To keep your kids interested, combine language learning with cultural lessons. There's no better way to finish Italian classes than with a big plate of pasta. Discover your family's own cultural heritage with genealogy. Genealogy is another way to combine language learning and culture. Learn about your family's cultural heritage and celebrate it. Junior Genealogist provides tips on how to make this educational moment fun for kids. You can interview elderly family members together, for example, or gather family photos to create a family tree. If you don't know much about your heritage, you can even order a genealogy testing kit online to find out more about your roots. Hone social skills, reactivity, and problem-solving with gaming While you want to minimize your child's screen time, playing video games isn't all bad. According to The American Psychological Association, gaming has social benefits. It can also improve problem-solving skills and reactivity. If your child is going to play multiplayer games requiring live interaction, make sure your internet is up to the task. Sufficient bandwidth is especially important if parents are trying to work from home at the same time. You can also enhance their experience with a gaming chair or new set of headphones. Improve math skills and expend energy with music and dance. If your kids are feeling cooped up inside and simply can't sit still, it's time to get moving. Turn on some music and dance it out. You can play foreign-language songs and encourage your little ones to sing to hone their newfound language skills. Music is also a great way to subtly give your child a math lesson. As Kindermusik explains, kids can learn basic geometry through visual dances, like circle dances. Music is also a great way to learn numbers as kids can count to the beat, and music can help build literacy skills as well. Fortunately, Los Angeles Music Teachers offers a wide range of online music lessons for your kids! Use arts and crafts to enhance fine motor skills. Once your kids have expended some of their energy with a vigorous dance session, you can sit them down to enjoy some arts and crafts. Again, this is an activity that can provide a discrete learning opportunity. Tasks like drawing, coloring, and painting improve bilateral coordination, for example. Meanwhile, an activity like beading enhances fine motor skills. Crafting also teaches kids patience and the merits of a job well done. They have to put in the time and effort to make something beautiful. Encourage imagination with an indoor treasure hunt. If you want to give your kids a treat on a particularly dreary rainy day, organize an indoor treasure hunt. Encourage them to use their imagination. They might pretend that they're pirates or knights on a quest. Imaginative play is critical for healthy childhood development. If you need ideas for your treasure hunt, The Spruce has a great guide with crafty riddle clues that are sure to get kids thinking. This spring, show your kids that staying indoors doesn't have to be a drag. The above guide will help you keep them amused until the weather is nicer. Looking for online or at-home music lessons for your kids? The qualified and experienced teachers at Los Angeles Music Teachers offer music lessons for a variety of instruments. Call 818-902-1233 to schedule your first lesson today!
 Top 10 Things Beginners Will Learn in Their First Guitar Lessons Are you thinking of learning how to play the guitar? When learning any new musical instrument, you need to lay down a good foundation, or otherwise suffer from developing bad habits which will slow you down and you won't be able to progress easily. When it comes to learning how to play guitar, you might need help. YouTube videos are helpful to get some quick tips and understanding. You might even be able to learn a couple of songs, but ultimately you're going to have questions and that's where a good instructor will be able to help you over the usual hurdles. Many beginners give up learning to play guitar after some time because it is frustrating. Learning a new skill is never easy, you will have to work hard to master it. However, with a few simple lessons the beginning, you can learn how to play the guitar without any hassle. In this article, we have listed the things that every guitar player must learn. Know As Much as You Can About how the Guitar is Constructed The first thing you must learn is the guitar anatomy. It is crucial for you to know what the components are and what they do. There is no need to hurry, you should take your time to get familiar with everything, from head to bridge. There's lots of free lessons on Youtube that can help you with this. There are different parts of a guitar; you must understand how every part works. This is to make learning how to play guitar easy. If you don’t know which string is the A as opposed to the E string, it will be challenging to learn how to play guitar. So, to successfully learn how to play guitar, you must get to know every part of the guitar. Holding the Guitar Correctly In order to play the guitar easily, you must hold it properly. Though many people think there is no rocket science, it can be difficult for someone who has never held a guitar before. To be able to produce the best quality sound, you must hold it correctly. Your left hand must be on the neck of the guitar while the other hand must be over the sound hole. In case you are left-handed, there are two solutions. You can flip the guitar without restringing or you can reverse the strings. This means you will have to position your right hand on the neck. You can try playing guitar in both ways and choose the one that you are comfortable with. Tuning the Guitar Tuning the guitar is a crucial step in ensuring the best sound quality. If you don’t know how to tune the guitar, you will have a challenging time learning how to play it. Your guitar can fall out of tune because of regular playing, environment, and temperature. Playing a tuned-out guitar will produce an off-key sound. Since the strings do not fall out of tune at the same rate, you must know which string to tune. So, it is crucial to know how to tune your guitar. It is suggested to get a tuner; you can even use free online guitar tuners. If you don’t have a tuner or a phone, you can use the 5th fret technique. Restring the Guitar The strings of your guitar will lose their shine when you play it regularly. It means that you need to change the strings. Knowing how to replace the strings is a great skill for a guitarist. So, how do you when to restring your guitar. You will know when the strings will be discolored, or the sound will be off or flat. By restringing your guitar, you can make sure the sound produced is of excellent quality. Not all the strings are made equal, you can ask the professional at the local shop to help you choose the right string for you. Holding a Pick Most guitar players us a pick when playing or strumming the guitar, although it can also be played with the fingers and fingernails. A pick is a small plastic that is used for strumming the strings. Though you will not be using it every time you play the guitar, learning how to hold a pick is a vital skill. You must hold the pick in between the tip of your thumb and first finger. Once you get to know how to play, you can figure out your own style. There are several types of picks available on the market, from thick to thin. In the beginning, it is advised to start with a thinner pick. Since it is made of plastic and is small, it is recommended to get many picks. It will not cost you a lot as they are inexpensive. Reading Chords and Tabs Many people think reading tabs and chords is difficult. This is a misconception; it is very simple. When learning how to play the guitar, it is recommended to start with simple songs. To make it easy to play chords, you can start with songs such as Bad Moon Rising. Moreover, it is better to start learning with a cover. This will help you get familiar with reading the chords and help in practicing transitioning between chords. Playing Open Chords In open chords, not all the strings are pressed down. One of the first skills the guitarist will learn is playing open chords. You must start with a basic open chord such as G and strum the string to ensure you hear a clear chord. After you have successfully learned a single open chord, you can move on to the second open chord. This will help you practice transitioning between the chords. It is suggested to keep on creating the library of chords until you can transition between key chords without any trouble. Playing in Rhythm After learning a chord, many beginners, call over their friends to impress them with their newly learned guitar skills. It is then, they understand they don’t know how to play in rhythm. This is something every guitarist goes through. It is crucial to practice strumming the chords in rhythm. For this, you must use a metronome to strum in rhythm. Once you master strumming one chord in rhythm, you can try with two chords. Playing Power Chords Power chords are used in rock music; it is two note chords. Power chords are dyads consisting of fifth notes and root. They are not minor or major because they don’t have the third. When playing power chords, you will only need two or three fingers on the frets. They are easy and fun to play. Since many songs are composed on power chords, there are many songs for you to cover. Playing Guitar Songs You can choose a song that is your favorite and learn to play it on guitar. This is an exciting and thrilling for new guitarists as it will be the first song they learn. Therefore, you need to be patient when learning new skills. You can’t learn to play guitar overnight, you have to practice regularly to master the guitar skill. If you're interested in taking lessons on Zoom or In Person in Burbank, Glendale or North Hollywood, please contact us at (818)902-1233 or on our website at https://www.losangelesmusicteachers.com/online-guitar-lessons-in-burbank-ca.html
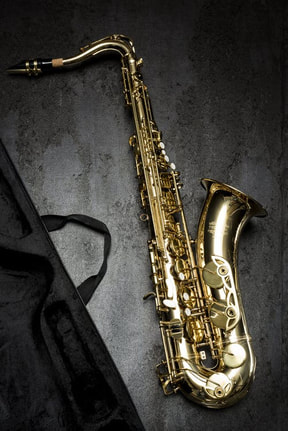
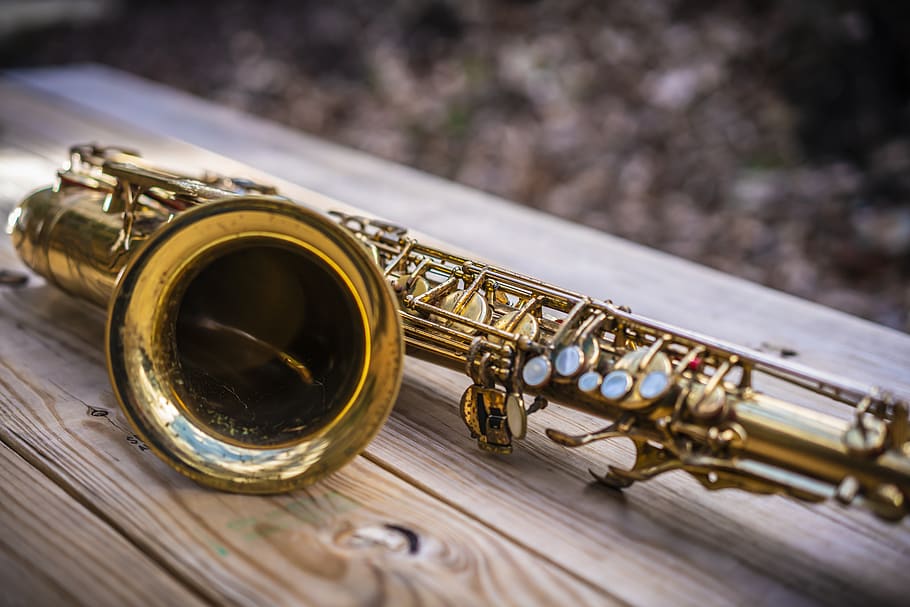 Lesson on How to Unstick a G-sharp Key on a Saxophone G# is a chronic problem for all saxophone players. Anyone who has ever played the saxophone has encountered this common problem. Over the last 45 years I’ve tried all of the powders that actually end up compounding the problem and also sliding a dollar bill through as you put a little pressure to clean the 2 surfaces is only a temporary fix at best. The best fix which I learned from my repairman in LA, Ivan Lukyanets is to use Lemon Pledge. It is totally clean, no harmful chemicals and leaves no residue. Procedure: Use a Q-Tip and put a little of the Pledge on it and rub it on both the cup and really get it into the pad groove, and you’ll see the Q-tip get dirty as you clean thoroughly. You may need to use a couple of Q-tips. Finally just take a new Q-tip and do a final cleaning to get all of the residue of the Pledge off. Easy as that, and keeps it clean usually for a couple of months. If you’re drinking any kind of drink other than water while playing the saxophone you’re likely to get a lot more stickiness problems from other keys as well like the low C# and Eb key, so cutting that out will also relieve the problem a bit. You could also have your repairman strengthen the spring slightly in case it’s too light. If you're interested in taking lessons on Zoom or In Person in Burbank, Glendale or North Hollywood, please contact us at (818)902-1233 or on our website at https://www.losangelesmusicteachers.com/online-saxophone-lessons-in-burbank-ca.html
 Thinking about Taking Voice Lessons But Need to Know More?If you have ever been thinking about taking voice lessons in person or online, but you just aren’t sure, here's a few FAC's to answer some things that you might be wondering about. A lot of people like to sing in a choir, in the car, or even in the shower. But is taking voice lessons right for you? The thought seems a little scary – particularly if you’re not used to singing in front of others, let alone a trained, professional instructor! Here is some information that can help you to decide if taking voice lessons is the right thing for you.
1. When should I start voice lessons? “The sooner the better!” If we start with proper technique at a young age, we can get a solid foundation of healthy singing that will last a lifetime. It's best for getting a firm foundation, understanding how important breathing and understanding how to use your vocal cords without straining them. At a very young age, we learn by copying! Don’t you remember a time when you copy the singers on the radio just because you like a particular song? As a matter of fact, vocal cords are like muscles, we train them to have muscle memory. Just as we train the greatest athletes at a young age, we can do the same with singers. As the voice is developing, we can start the same initial training that athletes do, but for the voice which can protect you from injuries to your vocal cords. 2. Know your goals The first thing you need to ask yourself is: what are my goals? Establishing your goals with singing is what will help you and your voice teacher set a path for your lessons. If your goals include sight reading better for your community choir, great. If they include one day singing on the Broadway stage, great. Knowing your goals with singing will help you to stay motivated and moving forward. Your goals should be realistic and achievable though. Voice lessons will improve the sound that you already have, but they aren’t going to guarantee you a fame-worthy singing voice. Everyone can learn to sing better, and a voice teacher can help you learn how to use your voice to the best of its ability. If the goal is to access your full potential as singers with an emphasis on easy and natural sounding tone, you’re in the right direction. 3. What to expect from taking voice lessons online? Voice lessons are about more than just singing. Vocal training engages the entire body and you will be instructed on correct posture, breathing and vowel shaping. Good singing lessons involve:
Vocal changes take time and effort. One or two voice lessons will not be enough time for a teacher to have a real impact on how you sing. Expect to give it a few months before you hear changes. The more you pay attention to the adjustments your teacher suggests, the faster you will get results. Keep in mind that any adjustments to vocal technique are most effective when you apply them every time you sing – with the radio, in the shower, in choir class, and anywhere in between. 4. How long should each lesson be? Basically, singing lessons should be as long and as frequent as you can afford them in term of time and finances! However, we’re not suggesting you should have a singing lesson every day – that’s a bit much! But a lesson at least once a week is beneficial for 99% of our students. Voice lessons are usually broken into 30, 45, and 60-minute sessions. It would be best to start with 30 minutes and then discuss with the teacher how and if you would benefit from trying a longer lesson. Normally we like to see our adult students for a 60 minute lesson every week so we can work in-depth on their voice and take a look at a song at the same time. This gives us as the teacher, and you as the student, an idea of how well you’re practicing and progressing. But if 60 minutes a week is not financially viable for you, it’s better to have a 30 minute lesson every week. When you’re training your voice, frequency is much better than duration – you don’t want to form any unhealthy or bad habits! Some people take voice lessons just because they find it fun and consider it a hobby! In that case, we recommend going with whatever feels right to you, either 30 minutes or an hour. There really isn’t a right or wrong. There is plenty you can learn in either time frame. Young kids don’t have as much vocal stamina, so 30 minutes at a time is best until around age 10. If your child is under 10, but you’d like them to have more lesson time, try two 30-minute lessons a week on different days. 5. How much will it cost and is it worth it? Here at Los Angeles Music Teachers the Prices are all the same. For online or in person lessons its $35 for 30 minutes, $45 for 45 minutes, and $60 for 1 hour lessons. If we are traveling to your house then we will be adding a $10 Traveling fee. Whatever the price is, you must remember it is an investment! You are investing in learning a useful skill that can elevate you life in many ways. And that's something that is priceless! If you're interested in taking lessons on Zoom or In Person in Burbank, Glendale or North Hollywood, please contact us at (818)902-1233 or on our website at https://www.losangelesmusicteachers.com/online-voice-lessons-in-burbank-ca.html Drum Lesson on Standard 8th Note Groove No drum beat is more iconic or important to learn than the standard 8th note groove. In fact, it provides the basic foundation for most of the music that we listen to. You’ll have heard it countless times in pop, rock, blues, metal and a variety of other musical styles. 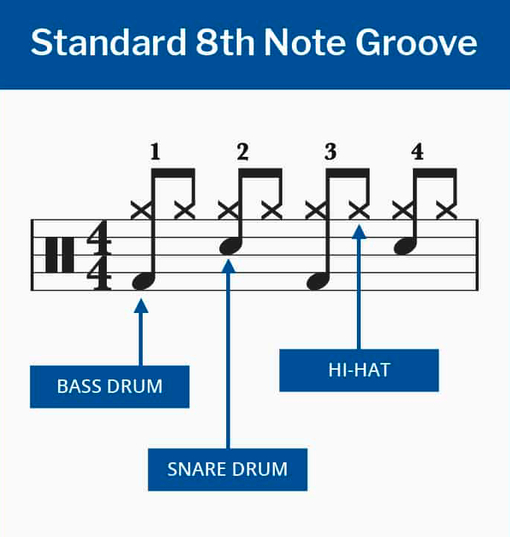 In a standard bar of popular music, we have 4 beats in each measure of time in music. That’s why our first job as drummers is to count the band in when starting a song. We've all heard the drummer count the band in "Ready .... 1 ...2... 3 ...4" That's because music is written in one and two bar phrases. On beats 1 and 3, you play the low-pitched bass drum. On beats 2 and 4, you play the high-pitched snare drum. Keeping great time is your most important job as a drummer, and the bass and snare are the key instruments that will make you into a first-class timekeeper. Great drummers move from bass to snare in the same way that a pendulum moves from side to side. This creates a feeling of motion that encourages listeners to dance, rock out, and get lost in the music! Don’t forget the hi-hats. The final part of this groove is the 8th notes which drummers typically play on the hi-hat cymbal. You can think of these 8th notes as the essential glue that holds the groove together. Drummers play the hi-hat on all 4 beats as well as the spaces in-between. So how does that work? If you were to count the hi-hats out loud, you would count them as “1 and 2 and 3 and 4 and”. This gives you 8 notes in total, hence why this known as the standard 8th note groove. Our drum instructors can teach you all the basics of becoming the drummer that you want to be. If you're interested in taking drum lessons on Zoom or In Person in Burbank, Glendale or North Hollywood, please contact us at (818)902-1233 or on our website at https://www.losangelesmusicteachers.com/online-music-lessons-burbank-ca.html
How To Read Music - Beginner Drums
4/5/2021
Time Signature Here is how to read drum notes. When to play a note is where the second layer of symbols comes in. And the most important symbol of this layer is this: 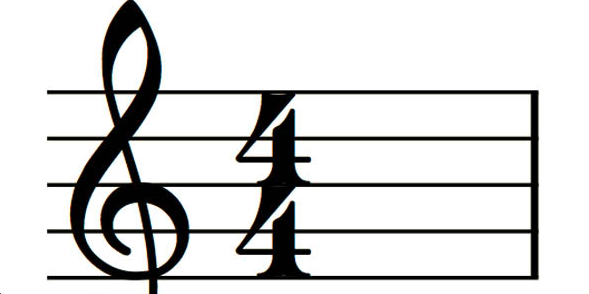 It will be placed at the very beginning of each piece of drum sheet music and you can safely ignore the number at the bottom for now. Rather, focus on the number at the top which tells you how many notes can fit into a bar (i.e. a part of your sheet; more on that in a second…). So? 4 notes, right? Right! But what about this “bar” thing? Bars Well, 4 notes for an entire piece of music wouldn’t be cool. It would give about 0.1 to 4 seconds of music (if you made it awfully slow). But fitting in, say, 400 instead of 4 notes wouldn’t be helpful either, because unless you’re an advanced musician, you need to count notes to be able to follow along. And you’d certainly lose track when trying to count to 400 and to play drums at the same time. That’s why sheet music writers came up with the idea of bars (or “measures”) which are signified by a vertical line like this:  This way you can fit 400 notes into a piece of sheet music – giving you minutes and minutes of music – while only having to count to 4, because now the sequence of 400 notes would be broken into 100 bars containing 4 notes each. Drum Music Notes So you have your piece of drum sheet music in front of you and you’re counting “1, 2, 3, 4”? Cool! But what to actually play while counting? This is what notes tell you. The most important ones are listed below and in order to read drum sheet music you need to be able to distinguish them by the way they appear in the “note” section (circle filled or unfilled; with or without vertical line; with or without tail). But: don’t try to learn them by heart now; rather, come back later once you encounter problems in your actual reading of drum sheet music. 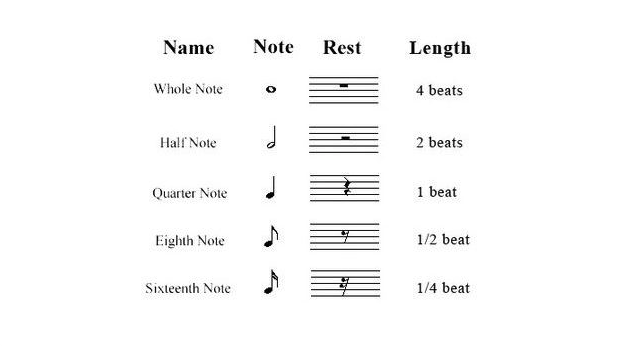 For now, let’s focus on the “length” column and imagine we were counting “1, 2, 3, 4” again. You’d then count and hit your drums as follows:
“Whole” and “half” notes are good for understanding the concept, but they actually almost never appear in drumming. So let’s look go over the remaining three note values one by one: Quarter Notes A quarter note takes up one beat, so you’d hit on count “1” and be done with it by the time you count “2”. Let’s assume for a second that what follows would be another quarter note, and another, and another. These 4 quarter notes would fill up a whole bar and be counted as follows: 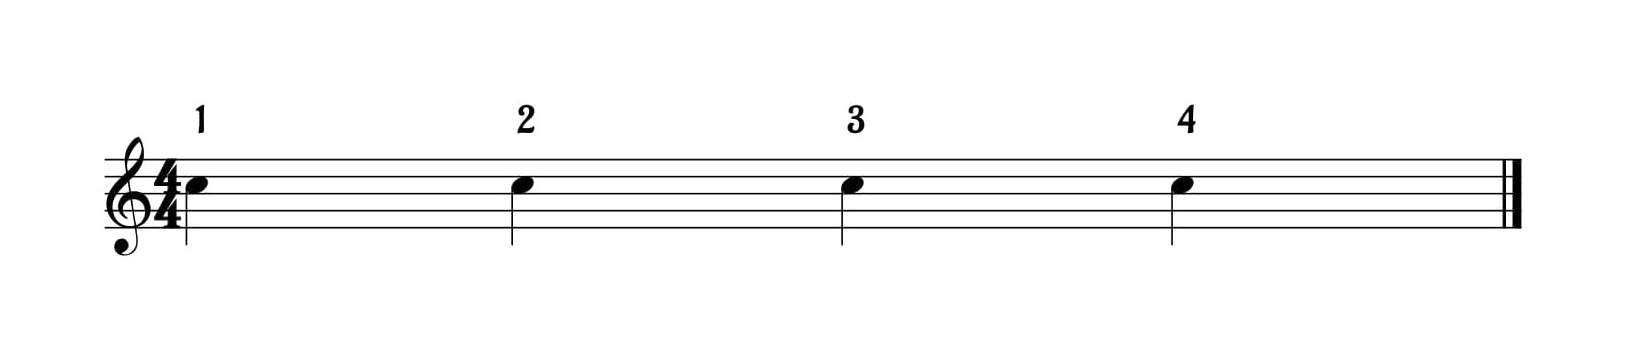 “1, 2, 3, 4” and a hit on each of those counts – that’s all there is to it. Eighth Notes An eighth note, by contrast, only lasts half a beat, so half of each of your counts. You’d hit on “1” and the eighth note would end exactly mid-way between counts “1” and “2”. But how to determine the exact middle between two counts? Well, by way of a more finely-grained counting system. Instead of “1, 2, 3, 4”, we’d now count “1, and, 2, and, 3, and, 4, and”. And hitting on count “1”, we’d now that the eighth lasts exactly until our first “and”. So let’s again assume that a whole bar would be filled with eighth notes. This would give us a sequence of 8 eighth notes and look like this: 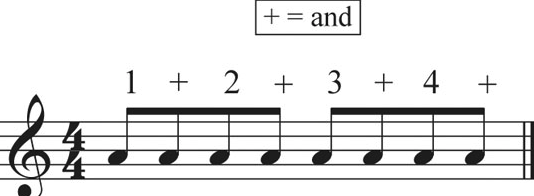 How do you play that? Right: you hit on counts “1, and, 2, and, 3, and, 4, and” Sixteenth Notes Ready for the finale? Sixteenth notes are shorter yet. They only last for one fourth of a beat. So we need a yet more finely-grained counting system: “1, e, and, a, 2, e, and, a, 3, e, and, a, 4, e, and, a”. Hitting on count “1”, you’d know that one sixteenth note would exactly last until count “e”. And how many sixteenth notes will fill up a whole bar? 16! And in a piece of drum sheet music this would look and be counted this way:  If you're interested in taking lessons on Zoom or In Person in Burbank, Glendale or North Hollywood, please contact us at (818)902-1233 or on our website at https://www.losangelesmusicteachers.com/online-music-lessons-burbank-ca.html
 The saxophone, when properly played, is extremely flexible and is capable of a wide range of expression. While the instrument is still sometimes unfairly maligned, a few simple steps can ensure that young saxophonists play with beautiful sounds that blend in any ensemble.
Quality Equipment First, quality equipment is essential. While performers should never be led to believe that a sound can be bought, a great mouthpiece, reed, and ligature set-up can make the performer’s job much easier. Form an Embouchure The saxophone embouchure is still often misunderstood. A collapsed chin, puffed out cheeks, and the like will never lead to the best sound. Likewise, the saxophone embouchure should not be overly tense or restricted. Instead, follow a simple step-by-step process for best results. First, for a great embouchure, rest the weight of the head (through the top teeth) on top of the mouthpiece. The neckstrap should be pulled up to a position where this can be achieved with the head in a natural, “looking-straight-ahead” position. For those students who find the vibrations traveling through the teeth from the mouthpiece off-putting (and for any who want to protect their mouthpieces from sharp teeth), a plastic or rubber mouthpiece patch is vital. Next, the lower lip should be rested on the lower teeth, not pulled over them. The reed should rest on the puffiest portion of the lower lip. Indeed, before the embouchure is sealed, the corners of the lips should be pulled in towards the center, further puffing up the lower lip. Finally, the embouchure should be sealed, with the lower jaw pointed down, and with plenty of space between the back teeth. There should be no upward pressure from the lower jaw. Proper Air Support Next, the matter of air should be considered. The saxophone is a wind instrument, and an inefficient one at that! It requires a steady stream of charged air, no matter the dynamic being performed. Often, young players are told from the beginning of their performance careers to “Back off!” Unfortunately, this often leads to anemic playing that is unstable in the extremes of register and dynamic. Instead, young players should be allowed to play out a bit more (with controlled sounds, of course), until they have had time to develop. Then, it will be much easier to perform even at the lowest dynamic and in any register with a quality, in-tune sound. Mouthpiece Exercise A simple tool can be utilized to help insure proper embouchure tension and airstream support. While not foolproof, playing reference pitches on the mouthpiece alone can get any student much closer to proper playing techniques. For the soprano saxophone, a concert C#6 (two octaves above middle C) should naturally come out when the mouthpiece alone is played. Similarly, the alto mouthpiece should produce a concert A5, the tenor a G5, and the baritone a D5. If any given mouthpiece is being played higher (or if the student seems to be constricting so much that no pitch comes out), that may point to too much tension in the embouchure. Inversely, a too-low pitch is a byproduct of too loose of an embouchure, too slow of an airstream, or a combination of the two. Listening Once the basics of tone production are comfortable for the student, they should be encouraged to listen to as many great tonal examples as possible. In this day of YouTube, there are a wealth of both wonderful and terrible role models at the students’ beck and call, so some professional guidance is in order. With these simple pointers, students of any age will be much more likely to be able to consistently play with a beautiful saxophone sound. Then they and all those around them will be able to enjoy what truly is the most voice-like of wind instruments! If you're interested in taking lessons on Zoom or In Person in Burbank, Glendale or North Hollywood, please contact us at (818)902-1233 or on our website at https://www.losangelesmusicteachers.com/online-saxophone-lessons-in-burbank-ca.html Let’s first look at where each drum or cymbal sits on the staff. 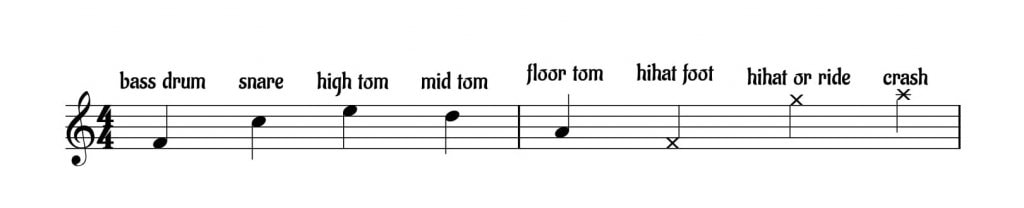 There are various version of this “drum key”, but once you get the concept you can read them all. So please notice that:
 For instance: You play the bass drum and hi-hat foot with your feet so they are furthest down in the staff. By contrast, the cymbals are situated up above your drums (and much higher than your pedals), so they are placed highest in the staff. If you are interested in taking singing lessons on Zoom or In Person, please contact us at (818) 902-1233 or on our website at https://www.losangelesmusicteachers.com/online-drum-lessons-in-burbank-ca.html
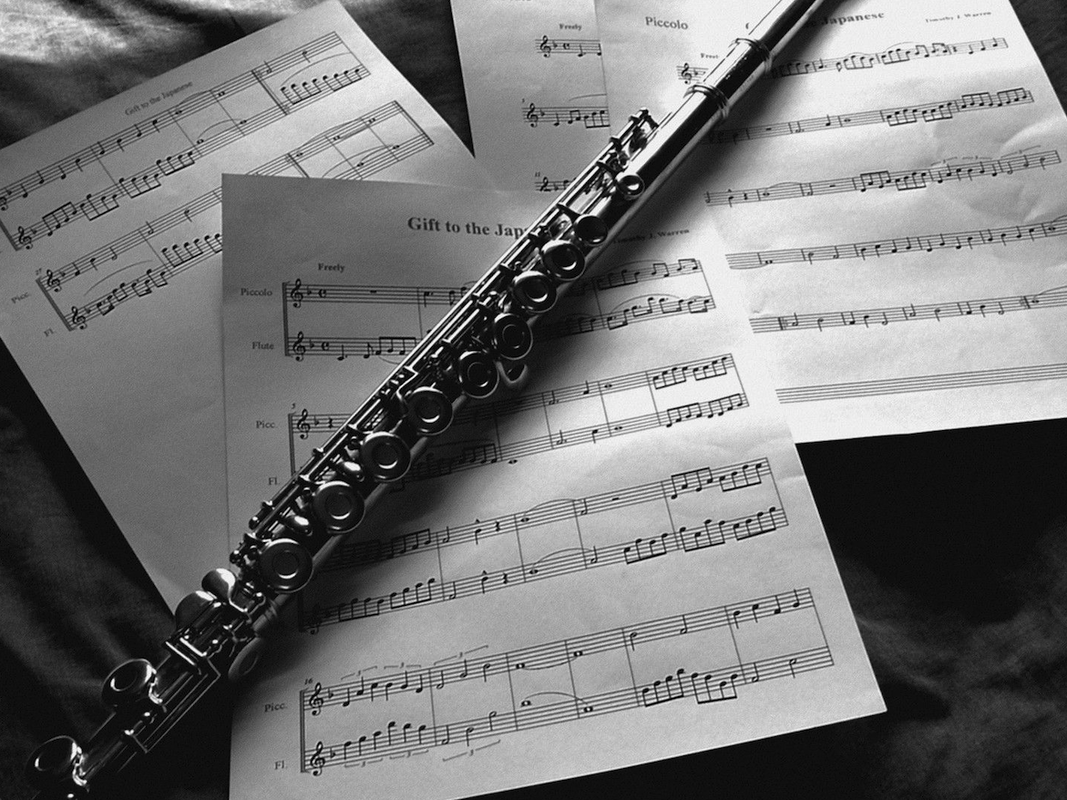 In your first lesson on flute, a beginner may find that holding the flute and getting the hands comfortable balancing it and keeping the fingers in the proper position is one of the most challenging things for a beginner. In order to get the fingers in place and to hold a flute properly, we have to talk about the proper posture, hand position, and angle for the instrument. By mastering these techniques, you’ll be able to play the flute in no time. Besides getting a sound out of the head joint, learning how to hold a flute is the most important concepts you’ll be taught when you start flute lessons. Once you can hold a flute, you can begin to enjoy the beauty of playing this timeless instrument.
The Flute is a member of the woodwind family, the flute is one of the oldest modern instruments in western civilization. Flutes are common in orchestras, marching bands, jazz, swing, and other popular genres of music. As with any instrument though, playing the flute starts with understanding how to hold a flute. To learn how to hold a flute, your flute instructor will focus on four key points. The following techniques will be emphasized:
1. Proper Posture Proper posture is important for playing any musical instrument, especially woodwinds. When you’re learning to play the flute, your posture will help you with your breathing and enable you to create clear, strong, resonant tones. Because of the importance of posture, this is one of the first points to address when learning how to hold a flute. Whether standing or sitting, make sure your spine is held straight and upright. Position your head squarely over your shoulders so you’re not hunched forward or leaning back. However, don’t hold your body too rigidly. Make sure you remain comfortable enough to take full, deep breaths and move your hands as you play. Being too stiff can impede your playing. 2. Left Hand Position After you’ve learned the best posture for playing the flute, it’s time to learn hand positions. You’ll start with the left hand, which controls the keys closest to the head joint near the mouthpiece (also known as the embouchure). Rest your left thumb on the first key of the bottom of the flute body, then curve your fingers around the other side. Your left index finger, middle finger, and ring finger, and rest on the 2nd, 4th, and 5th keys of the flute. Allow your pinky finger to gently touch the side key. You’ll hold the weight of the instrument in your left hand by supporting the flute on the palm between your thumb and index finger. 3. Right Hand Position With your right hand fingers, you’ll hold the end of the flute near the foot joint. Tuck your thumb under the instrument to support its weight, making sure that your right palm faces away from you. As with your posture, you’ll want to hold the flute firmly yet always give yourself the comfort and flexibility to play with ease. Focus on making a loose “C” shape with your right hand. Near the foot joint, you will see three bottom keys on the body of the flute. Your right index finger, right middle finger, and right ring finger will rest on these keys individually while your right little finger plays the first key on the foot joint. 4. Holding the Flute Parallel Finally, as you learn how to hold a flute, it’s important to make sure you hold the instrument parallel to the floor. This creates optimal air flow as you play, allowing you to produce bright, clear tones without squeaking. Letting your flute “droop” is a common mistake made by new players. Always make sure the instrument is held horizontally, directly parallel to the floor, instead of playing at an angle. Focus on making a 45 degree angle with your elbows to help you maintain the proper position. Learn How to Hold a Flute at Los Angeles Music Teachers. Whether you’ve been playing the flute for years or you’re a total beginner, Los Angeles Music Teachers has flute lessons for players of all ages and skill levels. Learn everything you need to know about this beautiful instrument with private lessons from Los Angeles Music Teachers. If you're interested in taking lessons on Zoom or In Person in Burbank, Glendale or North Hollywood, please contact us at (818) 902-1233 or on our website at https://www.losangelesmusicteachers.com/request-info.html WANT TO PLAY THE CLARINET?
3/19/2021
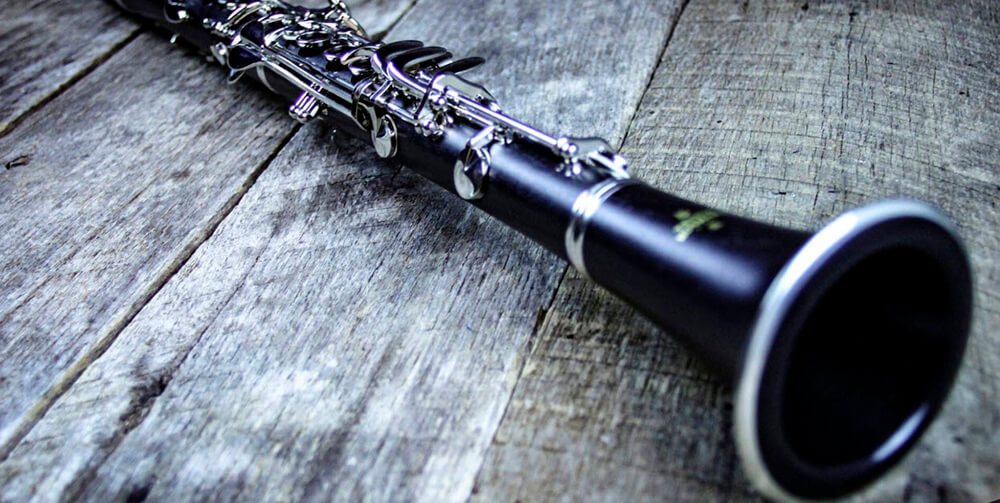 The clarinet is as versatile as it is fun. It is a great woodwind instrument to learn to play. If you're unsure on how to properly clean your instrument, our list of advice is designed to assist beginners. For more personalized, speak with your music instructor.
What Equipment Is Needed? There are a few essential pieces of equipment for every clarinetist: Reeds Ligatures Mouthpieces Did the clarinet come with a stock mouthpiece? If so, it is time to upgrade a better mouthpiece that provides the desired sound. All stock ligatures should be eliminated as well. Cloth ligatures offer more control than metal ones, so most educators recommend that their students transition into the usage of metal ligatures to open up their sound. The reed's strength should be determined by the mouthpiece. A “3” is usually the most common but it is not right for everyone. Be sure to speak with your music educator to find out about the strength that is right for you. How Is Embouchure Improved? This process doesn’t happen overnight. It’s an often overlooked performance aspect that involves the proper coordination between your upper lip, lower lip, chin and teeth. To begin, drop the jaw so that it is relaxed and not forced open. From there, move the jaw from side to side slightly, so that it can loosen up. Once full relaxation is achieved, roll your bottom lip ever so slightly over your lower teeth and firm up the mouths's corners. They should be brought forward and in, much like a smile. Place the index finger against the space between your top teeth and use the upper lip to press downward onto your finger. (The chin should automatically point downward once this step is taken.) Remove the finger, do not move a muscle, insert 1/4th of your mouthpiece and keep the upper teeth resting on top. Perfect embouchure has been achieved! What About Reeds? Finding the right clarinet reeds and maintaining them in the proper manner is crucial to your success. Choose the correct reeds for your mouthpiece and the level of pressure used. Do not moisten reeds with saliva, as these acids are highly detrimental to cane. When a new box of reeds is opened, do not test them all at the same time. The lip desensitizes and reed impressions are inaccurate. The break in process should be steady and slow. It does not take place in one day, they are played for a few minutes each day. When it comes to cleaning and maintenance, rinse your reeds in water after playing and use a soft cloth to dry them before they are stored on glass. Reed adjustment requires trial and error, so be sure to speak with your clarinet instructor for further advice. Any Practicing Advice? Most new clarinet players are misguided as far as practicing is concerned. The amount of time spent practicing is not as important as how that time is spent. An hour of efficient practicing is more effective than three hours of distracted practice. Practice time should consist of warm-ups, enjoyable sheet music and technique practice. Keeping up the technical side of things can be tough. Always practice technique, no matter what. Each practice should begin with a warm up, you can switch between sheet music and technique as necessary. What If I Have a Bad Day? Bad clarinet days are a very real thing. Practice can be frustrating at times. The trick is to remain calm. Don't force yourself to complete technique exercises or run through scales. At times like these, it is important to simply play through some of your favorite tunes. Spending time playing what you want to play lets you get into the flow of playing more rapidly. Becoming frustrated? There's nothing wrong with skipping your practice session for that day. Remember: this process is a challenge. There are going to be good days and there will be bad ones. Don't be discouraged. Your determination will pay off in the long run. If you are interested in taking a beginner clarinet lesson on Zoom or In Person, please contact us at (818) 902-1233 or on our website at https://www.losangelesmusicteachers.com/online-clarinet-lessons-in-burbank-ca.html The saxophone is one of the easiest of the woodwinds to learn at the beginning level but like all instruments it’s difficult to master. If you want to see some complete beginner’s progress, I’ve made videos of my students. It will show you what you can potentially do (if you practice every day about 45 minutes). These students were not taught to read music (reading adds a whole lot of other brain effort which slows down the process). The students in these videos are all playing by ear, just reading the chord changes but everything is improvised. Here’s a few: If you are interested in taking lessons on Zoom or In Person, please contact us at (818) 902-1233 or on our website at https://www.losangelesmusicteachers.com/online-jazz-improvisation-lessons-in-burbank-ca.html
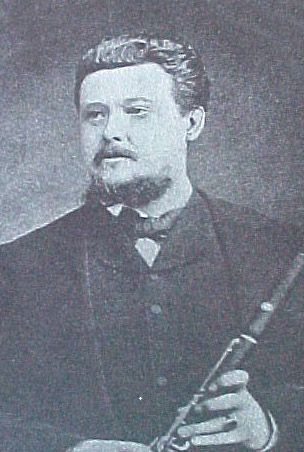 The Birth of Jazz was somewhere around the 1910’s. The saxophone was patented in 1846 and by the 1850’s lots of saxophonists began to play the instrument in the European military bands because of the considerable volume it could produce compared to the other woodwind instruments. At the same time, classical musicians, picked up the new woodwind instrument and began to write for it and play it in a classical style. One of the earliest classical pieces written for the saxophone was in 1860, called “Fantasie for Saxophone and Piano”, by Jules Demersseman, who was an early virtuoso on the instrument. It took a while for more serious classical composers to begin to use it in their works, but Debussy used the saxophone in 1901 and Ravel in 1903, which was several years before jazz was born. Besides Adolphe Sax himself, there were a number of saxophone players who made the saxophone famous before jazz. For example, this is rare footage of a couple of saxophone virtuosos (Rudy Wiedoeft and Benny Krueger) who were playing saxophone in a Classical/Ragtime style. For anyone who has an interest in the beginning stages of the saxophone, this video of saxophone playing is guaranteed to surprise you and make you smile! https://youtu.be/Db9P-u1_2bE 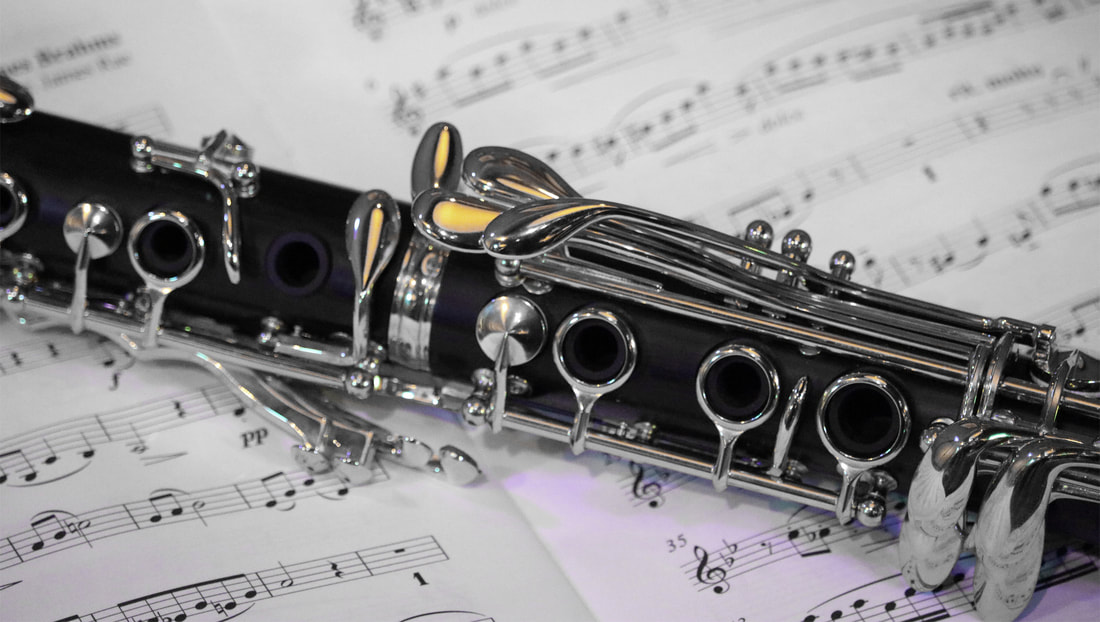 Playing The Clarinet
The clarinet is as versatile as it is fun. It is a great woodwind instrument to learn to play but the process can be confusing to those who are new to this instrument. If you're out of breath while playing or unsure on how to properly clean your instrument, our list of advice is designed to assist beginners. For more personalized, speak with your music instructor at Los Angeles music teachers online. What Equipment Is Needed? There are a few essential pieces of equipment for every clarinetist: Reeds [https://goo.gl/Haibfr] Ligatures [https://goo.gl/TVAqx2] Mouthpieces [https://goo.gl/Bmaq17] Did the clarinet come with a stock mouthpiece? If so, it is time to upgrade a better mouthpiece that provides the desired sound. All stock ligatures should be eliminated as well. Cloth ligatures offer more control than metal ones, so most educators recommend that their students transition into the usage of metal ligatures to open up their sound. The reed's strength should be determined by the mouthpiece. A “3” is usually the most common but it is not right for everyone. Be sure to speak with your music educator to find out about the strength that is right for you. How Is Embouchure Improved? This process doesn’t happen overnight. It’s an often overlooked performance aspect that involves the proper coordination between your upper lip, lower lip, chin and teeth. To begin, drop the jaw so that it is relaxed and not forced open. From there, move the jaw from side to side slightly, so that it can loosen up. Once full relaxation is achieved, roll your bottom lip ever so slightly over your lower teeth and firm up the mouths's corners. They should be brought forward and in, much like a smile. Place the index finger against the space between your top teeth and use the upper lip to press downward onto your finger. (The chin should automatically point downward once this step is taken.) Remove the finger, do not move a muscle, insert 1/4th of your mouthpiece and keep the upper teeth resting on top. Perfect embouchure has been achieved! What About Reeds? Finding the right clarinet reeds [https://goo.gl/Z3PmC8] and maintaining them in the proper manner is crucial to your success. Choose the correct reeds for your mouthpiece and the level of pressure used. Do not moisten reeds with saliva, as these acids are highly detrimental to cane. When a new box of reeds is opened, do not test them all at the same time. The lip desensitizes and reed impressions are inaccurate. The break in process should be steady and slow. It does not take place in one day, they are played for a few minutes each day. When it comes to cleaning and maintenance, rinse your reeds in water after playing and use a soft cloth to dry them before they are stored on glass. Reed adjustment requires trial and error, so be sure to speak with your clarinet instructor for further advice. Any Practicing Advice? Most new clarinet players are misguided as far as practicing is concerned. The amount of time spent practicing is not as important as how that time is spent. An hour of efficient practicing is more effective than three hours of distracted practice. Practice time should consist of warm-ups, enjoyable sheet music and technique practice. Keeping up the technical side of things can be tough. Always practice technique, no matter what. Each practice should begin with a warm up, you can switch between sheet music and technique as necessary. For more practice tips, check out How to Make Your Practice Time Count. [https://goo.gl/gqD6ko] What If I Have a Bad Day? Bad clarinet days are a very real thing. Practice can be frustrating at times. The trick is to remain calm. Don't force yourself to complete technique exercises or run through scales. At times like these, it is important to simply play through some of your favorite tunes. Spending time playing what you want to play lets you get into the flow of playing more rapidly. Becoming frustrated? There's nothing wrong with skipping your practice session for that day. Remember: this process is a challenge. There are going to be good days and there will be bad ones. Don't be discouraged. In the long run it pays to be determined. If you have any questions, want to sign up for lessons online, or want to subscribe to our newsletter, feel free to contact us with any of the links below  Why online music lessons?
For most of us, there are just not enough hours in the day, especially for busy families, business professionals, or students involved in multiple activities or dealing with the virus going on today. Families are often forced to choose between one activity or another because each additional activity requires additional preparation time (packing up gear and arriving early), travel time, and lesson time …for both the parent and the student. We also realize that there are a number of families that live in areas with harsh climates and excessive traffic. If you live in the south or in highly populated areas, it means not having to fight the hot traffic while trying to get to your lesson. And for those of us who live in the north, it means not having to decide between missing a class that you already paid for, or driving your family on icy roads through a dangerous snowstorm. To accommodate students/families in these situations we’ve opened up online lessons. The online lesson format is very similar to a private lesson Clear and Accurate Sounding Lessons With a background in audio and video production, we understand the importance of clear and accurate audio and video. We have invested heavily in high-quality microphones, audio capture devices, lighting, and video cameras. Much of which is actually used during our private online lessons. It’s important to us that you are able to hear clear vocals and accurate instrumentals, without the room distortion or background noise that you get on a built-in laptop mic or with most of the entry-level microphones. We also have a fast upload speed, so you’ll be able to view our time together in high-definition. Lesson Recording Did you know that the average student forgets 30-70% of what they learned within just a few hours of their lesson? On top of that, each day that passes by without practice, the student will lose another 50% of what’s left. Needless to say, the last thing a parent or student wants is to be paying for lessons (plus drive time and gas), only to spend most of their lesson time relearning old content from the previous week. A free option available to all of our online students is to have their lesson recorded. This allows students to review EVERYTHING they learned in the previous lesson, not just the parts they can remember; and they can do it at a time when they are most receptive to learning. It also creates a new level of transparency between the parent and teacher, allowing parents to review all of the content that their children are learning. This combination truly creates an opportunity for full lesson-retention, and puts students in a position where they are able to progress at a much faster rate compared to traditional music lessons. So if you're interested in learning about our online lessons, please contact us at www.losangelesmusicteachers.com or click on one of the links below  When Is The Best Time To Start Violin Lessons For Your Kids
As parents, we work and strive to provide our children with many opportunities possible to make them succeed in life. Some of these opportunities can come from music. Over the last couple of years, scientific evidence has pointed to the numerous ways in music lessons can help boost brain development in kids. In fact, research has shown that music is among the most effective ways to help children in building motor skills, cognitive growth and enhanced learning comprehension. However, with this in mind, many parents still wonder when the right time is for their children to begin lessons. With all the information available, parents can be equipped to know the best time to start violin lessons because this is a critical period. Being too early or too late can spell disaster. Early Immersion Starting from around birth to about the age of two, parents can introduce basic music concepts kids will love. Singing along to some baby songs while clapping, and making gentle movements like swaying can help create cognitive connections to the sound being played. As the child grows older, you can increase your child’s exposure to more formal aspects of music. As your child progresses with age, and becomes more aware you should still continue training at home, and get them to enroll for early age music lessons at school and at the local community center where they can meet other kids. The whole idea is to get them focused on recognizing different tunes, rhythms, melodies and different musical instruments. Recordings and flashcards will just fine. When it comes to the best time to start violin lessons for your kids, one of the common mistakes parents make is starting instrument training very early. If you introduce your child to violin training before they are ready, it could pressure them into rebellion and resentment. In fact, although pleasurable activities can bolster cognitive growth, research has shown forcing young kids to learn instruments can affect them negatively and hinder brain development. Best Time to Start Violin for Kids The best time to see whether your child is interested in violin training is around the age of five, preschool age. Violins come in different colors and sizes, so finding the right size and color shouldn’t be an issue. Just make sure you find one that suits their height and arm length. It’s also a good idea to have your child choose the violin they want, this will certainly help keep them involved in something they love and of their own choosing. While private classes are good, there are several online programs that are specifically designed to teach violin for beginners. These can be a more productive option as they are intuitive, interactive and come with games to make the whole learning process fun. Determining the Perfect Age to Start Violin Lessons online Note that when it comes to violin training, there’s no one size for all. It’s a personal decision, and one that involves patience. Understanding your child’s interests will certainly help.  A New Approach to Jazz Improvisation LessonsOne of the fastest ways to master jazz improvisation, no matter what instrument you play, is to start with one scale in one key and really learn to hear all the melodies and patterns in the scale. You don’t need worry about all the other keys in the beginning. Yes, of course eventually you will need to learn them to really be fluent as an improviser. In the beginning though, you need to eliminate as much theory and thinking as possible. As you will see below, your brain and body can do amazing things if you don’t over think what you’re trying to train it to do. Many people, myself included in the beginning, think that they can’t improvise because they don’t know enough scales and harmonic knowledge. That kind of thinking will just hold you back. Jazz improvisation is most quickly learned “by ear”. Listening to other saxophone players that you like and learning to HEAR the lines they are playing is how almost all of the great jazz musicians from the beginning of jazz up until the 1960’s learned how to improvise. In the 50’s and 60’s many great jazz teachers took up residency in the various colleges and began writing books on it. But the best improvisers learned by ear. Too much theory slows down the process. If you want to see proof of how you can learn much faster by ear, just check out any of these videos. In each one, these students have never played the saxophone before starting the method, they learned how to get a decent sound and learned only minimal reading. The method teaches you how to master one scale in one key so that your brain doesn’t get overloaded. The next step is to memorize 6 simple approach note pairs that resolve to target notes in each chord on a simple blues progression. There are many teachers who teach the blues scale and have their students learn a few licks or just let them wander around, but this method absolute teaches you to hear the chord changes and know exactly where you are at all times. Just take a listen to these students and notice how they are hitting all the chord changes. They are not reading anything except the chord symbols. Their are no tricks in the method. Just a straight forward system of teaching that eliminates reading and theory and just trains your ear properly. And it’s not a dead end. It’s only the beginning of training your ear so that you can continue to build on the foundation that it lays. So if you're interested in trying out your improvisation skills, we offer online lessons with limited in person lessons. You can contact us with any of the links below. 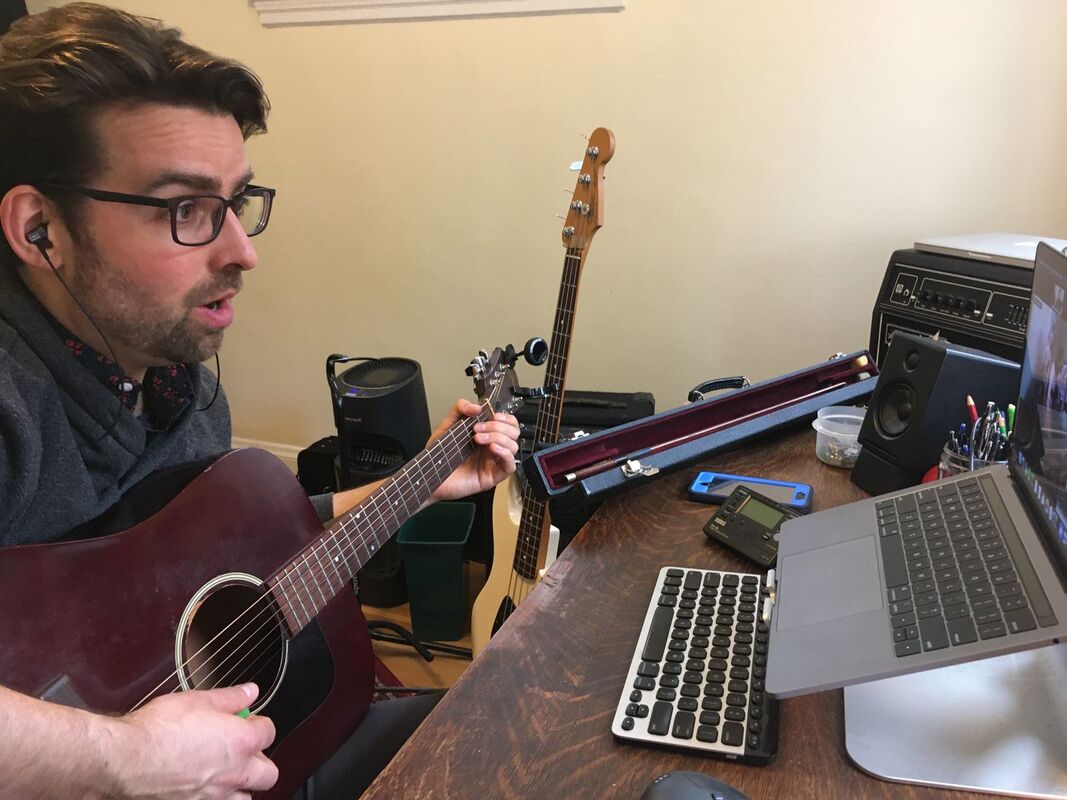 It goes without saying, but a lot of us are finding themselves stuck at home. That’s the bad news. The good news, however, there are a bunch of ways to get going teaching your lessons online without breaking the bank. Maybe you’ve never taught a lesson online in your life. That’s ok–this guide can help.
TWO KEY FACTORS TO KEEP IN MIND For all online one-on-one teaching, there are two major things that will determine the quality of the session:
For music lessons, however, having a good microphone and headphones will make the difference between your online lessons being a breeze versus a torture session. START WITH THE GEAR YOU’VE GOT As with everything in life, the better the gear you’re using, the higher-quality result you’ll get. But don’t worry—even if you’ve just got a phone, tablet, or laptop, you can get a quick & dirty setup to keep those lesson. WAYS TO CONNECT ONLINE WITH STUDENTS FOR LESSONS There are a lot of tools out there for connecting with someone over video, and they continue to grow and evolve over time. But we Definitely Recommend zoom. ZOOM My current favorite method is Zoom. It’s free to use for one-on-one video chats, is available for Mac, PC, and mobile devices, and it seems to be the most stable platform. Both you and your students need to download the Zoom app and create an account. This is easy and quick. You’ll also need to know the email that the student is using for their account. You can schedule a Zoom meeting (aka online lesson) to start at a given time, and you invite your student to that meeting via email. This email link will automatically open up the Zoom app (or prompt them to download it if they haven’t done so). Zoom will then ask both you and your student which video source and audio source to use. If you’re a total newbie and only have your phone, tablet, or laptop, no worries. You’ll be able to see and hear your student just fine. Another great thing about Zoom is that the teacher can record the online lessons on their computer. This doesn’t work on the mobile version of Zoom, but if you’re using your desktop or laptop, you can just click the record button and it will save the lesson to your hard drive. You could then upload the lesson to YouTube as an unlisted video for your student to reference or use it in another fashion. What a cool and useful feature! 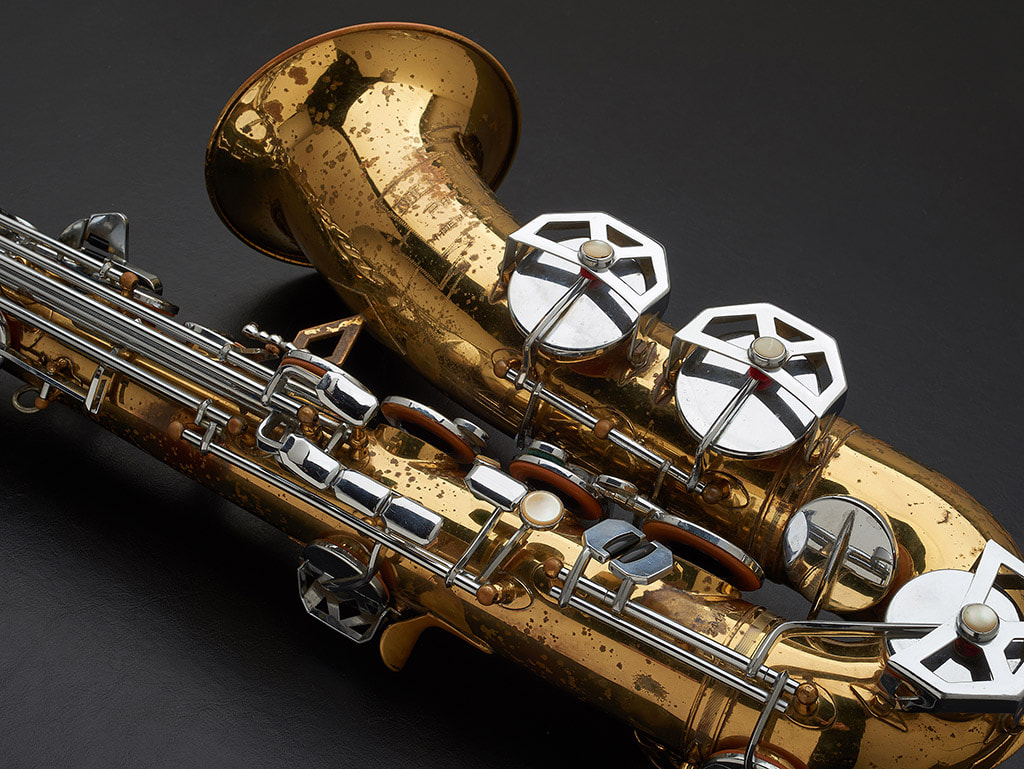 Secrets of Jazz Improvisation on Saxophone, Flute and Clarinet in Popular Music
When I was growing up and trying to learn how to play my saxophone in the 60's there were no good jazz teachers at the time, so everything I learned, I learned by transcribing and figuring out how to play by ear. I think it was a great way to develop my ear and it forced me to listen very hard to exactly what the player was playing but I was on my own trying to figure out what scales and devices the players were using. These days, there are so many transcription books on the market as well as practically every recording ever made by every great saxophone player that a young student is overwhelmed by the amount of information and often doesn't know where to start. What I'm going to tell you today is a secret or a tip that I would have paid big money to have understood. It would have saved me years of searching and trying to figure out what my favorite players were playing. At that time all my training was based on major and minor scales, the modes, and the bebop scale. The kind of music that I was interested in playing was more pop oriented which was heavily influenced by R&B. Every time I tried to play a solo it didn't seem to be in the right style because I was trying to force the scales that I was familiar with into these R&B styled songs. SO MANY OF MY STUDENTS HAVE COME TO ME OVER THE YEARS AND SAID THAT THEY STUDIED WITH ALL THESE "SO CALLED GREAT TEACHERS" THAT ARE FAMOUS PLAYERS BUT THEY DIDN'T FEEL LIKE ANY OF THEM COULD HELP THEM FIGURE OUT WHAT THEY NEEDED TO KNOW TO SOUND GOOD. You may be already figuring out what I'm about to tell you. It doesn't matter whether you're already an improviser or a beginner saxophone player, this one piece of knowledge will help you to understand how to play in all the various styles of jazz. Every style of jazz is based on a specific vocabulary that is derived from a scale. Bebop is based on the bebop scale, so if you're interested in playing bebop you will want to learn that scale thoroughly and the arpeggios that go along with that so that you are able to play and understand what other players are playing in that style and then analyze what catches your ear and turns you on. With that in mind, the secret that I am going to uncover for you today is simply this: Most contemporary pop music is based on the pentatonic scale and the pentatonic/blues scale (which is the pentatonic scale with an added flat 5th). You may say to yourself, well why is that such a great secret and how can that help me become a better saxophone player? Well, I'm going to explain how by learning that scale, you will be able to easily learn how to sound really hip in the contemporary pop scene today.Just by understanding that one thing and having the technique under your fingers, you will be able to cut down the amount of time it takes you to learn how to play a burning solo in almost all contemporary music today. Everything in the blues style is based on it. As far back as Albert Collins, BB King and other blues guitarists of the late 50s and 60s, their entire career was based on the blues scale. As music evolved, that scale continued to dominate the pop music scene through R&B music and contemporary pop. If you've ever tried to learn a pop song melody, or tried to learn a solo that you heard, if you were anything like me, you wouldn't have been able to figure out what was going on. However, by memorizing the pentatonic and the blues scale in what ever song you're trying to learn to play or improvise on you will begin to understand just how easy it can be to play without any wrong notes over most pop music chord progressions. For example, before I understood this in my early days of learning to play the saxophone, I was under the misconception that every chord change needed to have a specific scale that ran through it and all my solos sounded a bit forced. What I eventually figured out was that with the pentatonic blues scale I could play over many different chord changes with that one scale, and that would be the hippest way to play over those progressions. Even when you simply trying to learn a melody of a pop tune or R&B tune, if you learn the pentatonic blues in that key you will often find that the melody is based mostly or entirely on that scale. Let's look at some examples of pop melodies and see how well that applies: 1. Let's 1st look at the new Lady Gaga tune which I transcribed the melody and recorded a couple lessons on how to play it in a youtube video. Just click the link below to see the PDF that you can download. If we start at the pre-chorus you can see that the entire pre-chorus and chorus is based on an E minor pentatonic scale. G–A-B–C#-E. Just by knowing that, that melody becomes a super easy melody to not only transcribe but to also memorize. Further, if you were to solo or improvise around the melody itself you would sound the most tasteful playing that E minor pentatonic or E minor pentatonic blues scale. 2. Next, let's take a look at "Suit and Tie" by Justin Timberlake. Download the PDF below. Again, we will analyze the pre-chorus and chorus only. Here we see in the alto sax key that almost the entire tune is based on a G sharp minor pentatonic. (G#-B-C#-D#-F#). So if you were trying to transcribe this song because of the difficulty of the key you may not recognize that it's all with in this pentatonic scale (except for 2 places where it adds in A#). So once again if we just to learn that pentatonic scale, get it under your fingers then when you are listening along to figure out the notes you would see how easy it would be to figure out the song. 3. Another's example is up to that I recorded as well as did it a lesson for you on YouTube,” Firework” by Katy Perry. Download the PDF below to follow along as I show you how the entire verse is based on a D minor pentatonic scale(D-F-G-A-C). Again just learn that scale and this is also an easy song to transcribe on your own. 4. Here's another example of an entire solo that is really recognizable. This is a pretty famous saxophone solo that is based entirely on the B minor Pentatonic scale (B-C#-D_E  How to Set Up A Good Habit From the Very Start of Your Lessons
One suggestion for practicing that I can confidently recommend, from years of experience is for you would be to find the same time every day. If you can do it first thing in the morning or at lunch or before dinner or whatever time is a regular time that you won't get interrupted it makes it much easier for it to become a habit. Without that our lives are much too busy and the time just gets sucked out of the day and we find that we can't really remember what happened but the day just went by. I have a couple of students who are working 80 hour weeks but they have carved out a time that they see as sacred and they rarely miss, and for that reason, they are among my best students! They are disciplined in their work and they also carry that over to their practice time and it makes all the difference in their success and progress. if you pick a time, even if it's for 10 minutes, AND make it the SAME TIME every day you will really see the payoff. Once it becomes a habit it will be easier to do longer periods. Daily practice will make a HUGE difference in your progress as well as the amount of fun you will have. Let's face it, at the beginning of playing an instrument it sucks, you just feel like a clutz and you think you just don't have talent, but talent comes from making the commitment to practice and do it at least 5 times a week. Skipping more than one day is a mistake that you can't make up by practicing 2 or 3 hours the next day. Our brains don't work that way and all you have to do is to test it to know for yourself. Short periods of consistent focused practice will get you into a good habit that will help you get out of the beginner stage faster. Once you can start playing something fun you will get more inspired to practice more. Just try this for 2 weeks and see if it doesn't make all the difference for you. 10-20 minutes but everyday and the same time everyday. Think of it as your meditation period where you get away from everything else in your life and spend a few minutes on something that could really become a fun escape from your daily routine of work. I've been playing for over 40 years and I still practice every night, because I NEED to? No, not at all, it's because i really love spending that time getting away from everything else and just making some music. It's a great stress reliever for me and many of my colleagues and students. We all need a push sometimes. Just try it for 2 weeks and if it doesn't totally change how you feel about the piano and taking lessons I will give you your next lesson free. I promise! But you have to commit to really being consistent for those two weeks as if your life depends on it. And it DOES to a certain extent, if you want to be successful at anything you desire to incorporate into your life. I have had students who have called me for lessons and tell me that they are busy so they just want to take lessons every other week. I always tell them, don't think that having 2 weeks will give you enough time. Remember it's the consistent practice that works the best. If you do what most people do you will not practice hardly at all the first week and then try to hit it hard right before the lesson in the second week. Cramming simply doesn't work, especially with a musical instrument, but you'll really be surprised how well you'll do if you just do that 10 minutes a day. By the 3rd day you'll already see how easy you can come back to where you left off of the last practice. Then you'll thank me for the advice. Let's face it, we all have 10 minutes a day that we can set aside for something that we really want. Hope that helps! This started out as a suggestion to one of my students who has had a life goal to play piano. Then I realized that I was talking ot ALL of my beginner students.I know you want to be able to learn the piano. YOU CAN DO IT if you just make the commitment. Start with 10 minutes and then the progress and the fun you get out of getting to higher (and more fun) levels will inspire you to find MORE than 10 minutes and you will have started a good habit. OK I'll shut up now! LOL Rick 1. One way would be to play the progression using different inversions of the chords as you make smooth stepwise motion in your chord progression. If you don’t know how to do that, ask a competent keyboard player. Once you come up with some nice smooth and melodic connections of the chords the melodies will begin to be obvious to you immediately. You probably won’t hear the melody “all at once” but you will hear the basic skeleton and then the more you work with it you can then start to hear how to embellish it and come up with an interesting melody. Don’t think about the theory of what are the correct notes of each chord, just let your ear guide you and try to let it happen organically. Sing along to a recording of your progression and record what you sing. Do that over and over until you come up with the strongest melody. The more you work with the progression the easier it will get to hear the notes that work naturally over the chords.
2. The other way would be to set some kind of rhythmic feel with the progression that you may already have in your head, and lay that down on a recorder or garageband. After you have a basic feel or groove laid down, play that track over and over as you listen in your head for melodies that come naturally from the progression. Do this over and over and eventually you may even be able to hear the progression even without the recording. If you’re able to hear the whole thing at once in your head then just close your eyes and see if you can hear a melody. Just relax and put it in a loop in your head and eventually you can just start to sing little melodies that you come up with and at that point you’ll want to record them as your experimenting. The more you get the progression in your head the easier you will start to hear an organic melody, rather than just trying to peck something out on the piano or other instrument, it will usually get in the way as you stumble trying to find the notes. Instead, try letting your creative mind work without being distracted by the technique of the instrument. Using your voice in conjunction with your ear is always the most natural and musical way to create music. There’s plenty of other ways to create melodies as well but in general, using your imagination rather than trying to try to play it on an instrument, even if you’re proficient on the instrument, it will tend to get in the way so try using your voice and record it so that you can go back and transcribe it. Your voice does not get in the way (except if you have absolutely no concept of pitch) and by using your voice you are in more direct connection with your creative mind. It’s a skill, but if you practice it on a daily basis you will start to develop your ability to come up with very musical melodies. Joseph is only 11 years old in this video and is improvising on the saxophone at a high school level in less than 4 months!
|
Archives
April 2024
Categories
All
|
 RSS Feed
|
Music Lessons Available on All Instruments:
Piano Lessons
Guitar Lessons Voice Lessons Drum Lessons Violin Lessons Cello Lessons Saxophone Lessons Jazz Improvisation Lessons Flute Lessons Clarinet Lessons Singing Lessons Acoustic & Elec Bass Songwriting & Production |
Contact Us Now
|


Website by Never Alone Business Services