|
Top 10 Things Beginners Will Learn in Their First Guitar Lessons Are you thinking of learning how to play the guitar? When learning any new musical instrument, you need to lay down a good foundation, or otherwise suffer from developing bad habits which will slow you down and you won't be able to progress easily. When it comes to learning how to play guitar, you might need help. YouTube videos are helpful to get some quick tips and understanding. You might even be able to learn a couple of songs, but ultimately you're going to have questions and that's where a good instructor will be able to help you over the usual hurdles. Many beginners give up learning to play guitar after some time because it is frustrating. Learning a new skill is never easy, you will have to work hard to master it. However, with a few simple lessons the beginning, you can learn how to play the guitar without any hassle. In this article, we have listed the things that every guitar player must learn. Know As Much as You Can About how the Guitar is Constructed The first thing you must learn is the guitar anatomy. It is crucial for you to know what the components are and what they do. There is no need to hurry, you should take your time to get familiar with everything, from head to bridge. There's lots of free lessons on Youtube that can help you with this. There are different parts of a guitar; you must understand how every part works. This is to make learning how to play guitar easy. If you don’t know which string is the A as opposed to the E string, it will be challenging to learn how to play guitar. So, to successfully learn how to play guitar, you must get to know every part of the guitar. Holding the Guitar Correctly In order to play the guitar easily, you must hold it properly. Though many people think there is no rocket science, it can be difficult for someone who has never held a guitar before. To be able to produce the best quality sound, you must hold it correctly. Your left hand must be on the neck of the guitar while the other hand must be over the sound hole. In case you are left-handed, there are two solutions. You can flip the guitar without restringing or you can reverse the strings. This means you will have to position your right hand on the neck. You can try playing guitar in both ways and choose the one that you are comfortable with. Tuning the Guitar Tuning the guitar is a crucial step in ensuring the best sound quality. If you don’t know how to tune the guitar, you will have a challenging time learning how to play it. Your guitar can fall out of tune because of regular playing, environment, and temperature. Playing a tuned-out guitar will produce an off-key sound. Since the strings do not fall out of tune at the same rate, you must know which string to tune. So, it is crucial to know how to tune your guitar. It is suggested to get a tuner; you can even use free online guitar tuners. If you don’t have a tuner or a phone, you can use the 5th fret technique. Restring the Guitar The strings of your guitar will lose their shine when you play it regularly. It means that you need to change the strings. Knowing how to replace the strings is a great skill for a guitarist. So, how do you when to restring your guitar. You will know when the strings will be discolored, or the sound will be off or flat. By restringing your guitar, you can make sure the sound produced is of excellent quality. Not all the strings are made equal, you can ask the professional at the local shop to help you choose the right string for you. Holding a Pick Most guitar players us a pick when playing or strumming the guitar, although it can also be played with the fingers and fingernails. A pick is a small plastic that is used for strumming the strings. Though you will not be using it every time you play the guitar, learning how to hold a pick is a vital skill. You must hold the pick in between the tip of your thumb and first finger. Once you get to know how to play, you can figure out your own style. There are several types of picks available on the market, from thick to thin. In the beginning, it is advised to start with a thinner pick. Since it is made of plastic and is small, it is recommended to get many picks. It will not cost you a lot as they are inexpensive. Reading Chords and Tabs Many people think reading tabs and chords is difficult. This is a misconception; it is very simple. When learning how to play the guitar, it is recommended to start with simple songs. To make it easy to play chords, you can start with songs such as Bad Moon Rising. Moreover, it is better to start learning with a cover. This will help you get familiar with reading the chords and help in practicing transitioning between chords. Playing Open Chords In open chords, not all the strings are pressed down. One of the first skills the guitarist will learn is playing open chords. You must start with a basic open chord such as G and strum the string to ensure you hear a clear chord. After you have successfully learned a single open chord, you can move on to the second open chord. This will help you practice transitioning between the chords. It is suggested to keep on creating the library of chords until you can transition between key chords without any trouble. Playing in Rhythm After learning a chord, many beginners, call over their friends to impress them with their newly learned guitar skills. It is then, they understand they don’t know how to play in rhythm. This is something every guitarist goes through. It is crucial to practice strumming the chords in rhythm. For this, you must use a metronome to strum in rhythm. Once you master strumming one chord in rhythm, you can try with two chords. Playing Power Chords Power chords are used in rock music; it is two note chords. Power chords are dyads consisting of fifth notes and root. They are not minor or major because they don’t have the third. When playing power chords, you will only need two or three fingers on the frets. They are easy and fun to play. Since many songs are composed on power chords, there are many songs for you to cover. Playing Guitar Songs You can choose a song that is your favorite and learn to play it on guitar. This is an exciting and thrilling for new guitarists as it will be the first song they learn. Therefore, you need to be patient when learning new skills. You can’t learn to play guitar overnight, you have to practice regularly to master the guitar skill. If you're interested in taking Guitar lessons on Zoom or In Person in Burbank, Glendale or North Hollywood, we have some of the best guitar lessons in Los Angeles. Our guitar instructors are picked by interviewing hundreds of guitar instructors and we have really high standards on both their teaching ability as well as their personality. If you'd like to talk to one of our instructors or set up a first lesson we have a guarantee that if you don't absolutely love your first lesson you don't have to pay for it. Please contact us at (818)902-1233 or on our website at https://www.losangelesmusicteachers.com/online-guitar-lessons-in-burbank-ca.html
If you've ever wanted to improvise on the saxophone or whatever instrument you play, but were feeling like it's too difficult, take a look at my latest student who's been with me for less than 8 months.
She's just one of hundreds of students who has never played a saxophone or any musical instrument in her life and after 8 months she's improvising at a level that usually takes 4- 6 years. It's a very simple technique. This method takes all the thinking out of your playing so your head and fingers will get out of the way and you’ll learn how to trust your ear to guide you through just like your favorite players. It’s not as hard as it may seem to you right now. There are no tricks — just a simple step by step method that you can learn in 3 music lessons and in 4-7 months you’ll be applying it to all your favorite songs you want to solo on. This is a fun method that gets you playing real music right away instead of just exercises and scales. As a part of the training you will receive a slow blues track (piano, guitar, bass and drums) that you can practice along with. In just a few months you will be a new player, soloing with confidence and catching all the chord changes. Check out Melody Chu (who was a complete beginner saxophone student). In less than 8 months she is able to improvise at a very high level. She's been improvising for about 5 months now, but we were learning more complex rhythms and expression techniques to add into her improv for the last 5 months. Pretty amazing! If you want to take music lessons on Sax, flute, Guitar, Piano or any instrument contact us as www.losangelesmusicteachers.com. 5 Benefits to Learning Upright Bass
4/4/2022
For a lot of people, the image of a talented virtuoso conjures up images of pianist in a concert hall, or an expert violinist. However, the double bass is a beautiful and necessary instrument that forms the backbone of any serious orchestra; and a number of emerging studies show that playing it can help your brain, as well. In this article, I’ll give a quick rundown of some of the major mental and physical benefits that learning and playing the upright bass provides. 1. LEARNING THE BASS CAN HELP YOUR CHILD READ BETTER The basic premise behind the claim is that musical performance and practice helps expose children to sounds they wouldn’t otherwise have encountered – thus firing the areas of the brain associated with sound processing, and analysis. This is known as “neurophysiological distinction”. Developing neurophysiological distinction in a young child gives them the tools to tackle complex words and sounds in an academic setting, giving them skills that can aid in all areas of learning, but provide a special significance to reading and writing. 2. THE DOUBLE BASS IS GOOD FOR YOUR MEMORY This isn’t necessarily a benefit unique to the upright bass, but it is one that it can give you nonetheless. Organized music lessons have a positive effect on overall IQ and general cognitive function. What’s more, the longer you keep at it, the larger the positive effects are. Memory tests administered to a control group and a group who had a musical background indicated a significant score increase in the test subjects who had affiliation with organized music education. 3. PLAYING CAN MAKE YOUR BRAIN HEALTHIER Playing the bass is a worthwhile pursuit for a number of reasons. Studies performed on developing children showed not just a difference in brain activity, but a physical one as well – those that participated in music showed a significant increase in brain volume, as well. In layman’s terms, the grey matter in the brain is the part responsible for processing information. That means an increase in volume can have benefits such as increased attention span, improved social behavior, and a greater mental acuity and cognitive response time. Grey matter is a sign of a healthy, functioning brain – it’s the part that does the thinking. 4. THE DOUBLE BASS IS GOOD FOR PHYSICAL HEALTH AS WELL Playing any instrument has elements of good posture and position, but the upright bass may be an instrument where these qualities matter most. Not only is it one of the more physically demanding instruments due to its large size and heavy strings, it also is typically played in an upright, standing position. This makes proper posture essential for learning, and encourages a healthy spinal column and correct vertebrae alignment that carry benefit through one’s entire life. 5. THE BASS CAN OPEN PROFESSIONAL DOORS The upright bass is a wonderfully dynamic and versatile instrument – professional musicians that learn the double bass have a leg up in the music industry due to the flexibility of the instrument giving it a niche foothold in several different genres. Bassists are always in demand because they are a necessary part of so many different kinds of musical styles – be it jazz groups, live music, recording artists and bands, or symphony orchestras. CONCLUSION If you’ve been considering taking up the double bass, I hope this article has convinced you the positive benefits are absolutely worth it. The bass not only helps your musical ear and body, but helps encourage brain health as well. If you're interested in taking Bass lessons on Zoom or In Person in Burbank, Glendale or North Hollywood, we have some of the best Bass lessons in Los Angeles. Our Bass instructors are picked by interviewing hundreds of Bass instructors and we have really high standards on both their teaching ability as well as their personality. If you'd like to talk to one of our instructors or set up a first lesson we have a guarantee that if you don't absolutely love your first lesson you don't have to pay for it. Please contact us at (818)902-1233 or on our website at https://www.losangelesmusicteachers.com/contact-us-for-info.html
Best Drum Set Cymbals for Rock Music
3/31/2022
If you're interested in taking Drum lessons on Zoom or In Person in Burbank, Glendale or North Hollywood, we have some of the best drum lessons in Los Angeles. Our drum instructors are picked by interviewing hundreds of drum teachers and we have really high standards on both their teaching ability as well as their personality. If you'd like to talk to one of our instructors or set up a first lesson we have a guarantee that if you don't absolutely love your first lesson you don't have to pay for it. Please contact us at (818)902-1233 or on our website at https://www.losangelesmusicteachers.com/online-drum-lessons-in-burbank-ca.html One of our drum instructors wrote this article on Drum Set Cymbals for Rock Music We have reviewed the best cymbals for rock music. They come from the world’s greatest cymbal manufacturers; Paiste, Sabian, Meinl and Zildjian.
Why I picked these series? I decided to pick the rock cymbals from the biggest cymbals manufacturers in the world
Some of these series are used more than 20 years in the rock music both in studio and live. A lot of rock drummers use these series so they are well established. Let me tell you some main characters that these companies offer so you can narrow your choices.
This is just a short synopsis when it comes to rock cymbals that these companies offer, but of course there’s more to it. The fact that every rock drummer in the world plays one of these series says enough about the purpose behind them and their character. What they have in common? They are all loud and mostly with higher pitch of course some series pitch stay in the middle and for some goes into deep. Mostly they all have brilliant finish in order to get a better attack. Regarding sustain is long except with Paiste rude where idea is “hit and run” strong punch and after that it disappears, the same goes for Meinl Dark Custom. What are the differences? The most important component of premium cymbals is B20 bronze. All these companies use it. Sometimes in clear for sometimes they add some other components so they can make a magic sauce like Paiste and Zildjian. Find out more about cymbal materials here. I already mention that pitch can differentiate as well as the versatility. Some series like Zildjian A custom are very versatile while series like Paiste Rude has only one purpose. The main difference is in character and the sound. From Paiste 2002 which has that old school sound, over Rude which has a deep sound with a strong attack up to AAX totally modern cymbal with a bright sound and not too much “in your face”. You see every cymbal from the list has its own sound character. Regarding the series level, Paiste 2002 is the top-level with Paiste same goes for Meinl Dark Custom while Zildjian and Sabian have higher series than these. Paiste and Meinl cymbals are more expensive due to that fact but in comparison to two other companies they do offer a slightly better sound but totally different. If you're interested in taking Drum lessons on Zoom or In Person in Burbank, Glendale or North Hollywood, we have some of the best drum lessons in Los Angeles. Our drum instructors are picked by interviewing hundreds of drum instructors and we have really high standards on both their teaching ability as well as their personality. If you'd like to talk to one of our instructors or set up a first lesson we have a guarantee that if you don't absolutely love your first lesson you don't have to pay for it. Please contact us at (818)902-1233 or on our website at https://www.losangelesmusicteachers.com/online-drum-lessons-in-burbank-ca.html
Lesson on How to Get the Most out of Your Music lessons When learning how to play any musical instrument (such as piano, guitar, saxophone, etc.), you can progress fast or you could move at a snail’s speed. It all depends on your learning approach. Most music teachers focus more on making sure that you don’t miss your learning sessions. Of course, missing daily practice sessions will slow your progress down, but your learning approach is more important than the time spent on it. Students make several mistakes in their approach and these mistakes impact the result they get from their practice sessions. Here are some of the mistakes and their solutions. 1. Playing without concentration Some students practice with their musical instrument while doing something else. Most commonly, people play an instrument while watching the TV. Learning requires full concentration as it requires the whole of your mind. When you play an instrument without full concentration, it is just a repetition of what you have already learned. It is a waste of time because you won’t learn anything more. Whenever you want to practice, you have remove anything that may cause a distraction, so you can listen to what you’re playing and look out for flaws. 2. Playing without looking for flaws Another common mistake is playing an instrument through a piece of music without taking note of your flaws. If you do that, you won’t improve. You’ll only turn your training session to a formality. You will continue to move on with your flaws. You’ll slow down your progress that way. Instead, watch for flaws while you’re playing the music. And if you come across any bad spot, stop and try to improve on the spot before you move on. 3. Playing through a musical piece repeatedly It is true that practice makes perfect. You’ll improve when you keep playing through a piece again and again, but the rate of improvement will be very slow. You’ll keep playing through your flaws over and over again. It is better to stop each time you encounter a problem. Find the cause and solution to the problem before you move on. You’ll learn faster that way. 4. Playing a passage over until it sounds better Some students prefer to play over a problematic area until they observe an improvement before they move forward. The problem with this learning technique is that it is not certain that you’ll breeze through the spot when next you play the piece. It is better to get to the root of the problem. Find out the real problem and the cause of the problem. That way, you’ll be able to proffer a technical solution to the problem. When the problem is solved, you’ll be able to play it better subsequently. You need full concentration and engagement for identifying problems and solving them. When your brain is fully engaged in this, you’ll be able to take note of the problems and their solutions. Most importantly, everything you learn will stick with you for a long time. This is the most effective approach to learning how to play any musical instrument. If you're interested in taking Music lessons on Zoom or In Person in Burbank, Glendale or North Hollywood, we have some of the best music lessons in Los Angeles. Our instructors are picked by interviewing hundreds of instructors and we have really high standards on both their teaching ability as well as their personality. If you'd like to talk to one of our instructors or set up a first lesson we have a guarantee that if you don't absolutely love your first lesson you don't have to pay for it. Please contact us at (818)902-1233 or on our website at https://www.losangelesmusicteachers.com/online-guitar-lessons-in-burbank-ca.html
How Warmups Can Keep Your Hands From Hurting On Guitar
A lot of guitar learners are curious about how to prevent their hands from hurting while playing on the guitar. Truth be told, the simplest and easiest way to achieve this feat is by warming up. As with most exercises, it is always important for people to warm up first before engaging in any strenuous activity which can go a long way in helping to prevent them from hurting themselves. Warm-ups are essential for both novice and professional guitarists. Before doing anything on the guitar it is highly recommendable for players to perform a series of warmup exercises such as rehearsing, playing a gig or doing some recordings. Just so you know, many muscles, tendons, and bones are responsible for finger movements. This is why it is essential for guitarists to perform some warmup exercises before they even start flailing them around recklessly. This post is designed to enable you understand how warmups can keep your hands from hurting on guitar. Here are some important things you need to know about these preparatory exercises. They help to prevent injuries Ultimately, warming up can be every efficient in helping to improve your playing skills and technique. However, it is also important to note that these little exercises can go a long way in helping to prevent injuries from occurring. Carpal Tunnel Syndrome and tendonitis are some common problems that can occur as a result of not warming up before play. Just so you know, that are many guitarists that have been forced to retire from playing the guitar due to problems of this sort. This is why warming up before playing is important as it goes a very long way to help to prevent body injuries. Parting shot Warming up should be regarded more like a precautionary exercise than an optional thing. There is no better way to avoid those nightmare experiences associated with hurting hands than this. Now that you know how warmups can keep your hands from hurting on guitar, it is imperative to ensure that you make these activities a norm. Don’t just grab your guitar and let rip without taking the time to do some warming up exercises. Medically speaking, it is advisable to observe some finger stretching routines before setting out to play the guitar. There is no need to cut your guitar playing dreams short due to your inability to perform proper warm up routines before playing which has finally messed up your hands. In fact, doing so doesn’t even make any sense. The main aim of engaging in warmup routines is to awaken all the necessary ligaments, tendons, and muscles needed for playing the guitar. This can go a long way in preparing the hand and even the mind for the vigorous playing demands you are about to engage in. If you feel you need more help with some warm up techniques, you can call or message us with the links below. We have teachers ready to help you with your warmups with lessons online on zoom.
If you're interested in taking Guitar lessons on Zoom or In Person in Burbank, Glendale or North Hollywood, we have some of the best guitar lessons in Los Angeles. Our guitar instructors are picked by interviewing hundreds of guitar instructors and we have really high standards on both their teaching ability as well as their personality. If you'd like to talk to one of our instructors or set up a first lesson we have a guarantee that if you don't absolutely love your first lesson you don't have to pay for it. Please contact us at (818)902-1233 or on our website at https://www.losangelesmusicteachers.com/online-guitar-lessons-in-burbank-ca.html
Music is written down using notes on a staff.
Notes are symbols used for musical sound. A staff is a set of five lines and four spaces on which notes are written to indicate their pitch.
The Treble Clef is the top set of lines, the staff, in a piece of sheet music. It shows you the notes to play with your right hand. The lines and spaces have letter names. The spaces are labeled FACE starting with the first space at the bottom. The lines are labeled EGBDF (Every Good Boy Does Fine) starting at the bottom line and going to the top line.
The Alto Clef is directly in the middle of the staff, in a piece of sheet music. Many do not learn this clef, as it is primarily only used for the viola, the viola da gamba, the alto trombone, and the mandola. The lines and spaces have letter names. The spaces are labeled GBDF starting with the first space at the bottom. The lines are labeled FACEG starting at the bottom line and going to the top line.
The Bass Clef is the bottom set of lines, the staff, in a piece of sheet music. These are the notes that you play with your left hand of the piano. The spaces are labeled ACEG (All Cows Eat Grass). The lines are labeled GBDFA (Good Boys Deserve Fudge Always) starting at the bottom line and going up to the top line. And the last piece of important information is that the low C in treble clef (the note that is in the middle of the piano keyboard) is the note just below the staff on the first ledger line below the treble staff AND that note is the same note as the first note ABOVE the bass clef staff (the note on the first ledger line above the bass clef staff is ALSO middle C. So there is one note which is SHARED by both the treble and the bass clef.
If you're interested in taking Piano lessons on Zoom or In Person in Burbank, Glendale or North Hollywood, we have some of the best piano lessons in Los Angeles. Our piano instructors are picked by interviewing hundreds of drum instructors and we have really high standards on both their teaching ability as well as their personality. If you'd like to talk to one of our instructors or set up a first lesson we have a guarantee that if you don't absolutely love your first lesson you don't have to pay for it. Please contact us at (818)902-1233 or on our website at https://www.losangelesmusicteachers.com/online-piano-lessons-in-burbank-ca.html
How To Choose a Time Length that Best Suits Each Student
Knowing how to choose a lesson length is an important aspect of learning music. This is why it is very common to hear people ask, “what is the best time length for music lessons?” These 5 basic factors are established to enable music students to get the best time length for their music lessons. 1. Goals Goals are established to give learners a clear idea of what they want to achieve. Goal setting is an important aspect of learning that cannot be underestimated even in the music world. Learning how to choose an appropriate goal can go a long way to help you obtain the best time length for music lessons which depends largely on your ambition. 2. Concentration It is imperative to learn to play accurately. Interestingly, this cannot be achieved without a high level of concentration. It is a bad habit for a musician to make mistakes while playing. This doesn’t reflect growth in any way. Your concentration levels will determine the length of music lesson you take. Consider taking a shorter lesson especially if you find it difficult to concentrate for a longer period (about an hour). 3. Teacher Music teachers play an important role in helping learners achieve their goals regardless of the lesson length set. When it comes to learning music, there is simply no need to dish out long tiring lessons. The most important thing for every music teacher is to provide the necessary information required to improve learning. This can go a long way to enable the learner to find the best lesson length set. Note that too much information can overwhelm the learner. 4. Experience Experience, they say, is the best teacher. It is important for learners seeking to know what the best time length is for music lessons to ensure that they build on their experience levels. Studies have shown that the more experienced a person is at a thing, the longer he or she will concentrate which can be very helpful in building confidence. 5. Ability Like experience, ability is built over time. Your ability to focus on the project at hand (learning music) can help you identify the best time length for music lessons. Develop your ability to learn and you will find ample time to achieve perfection. Finally, your practice and budget will also play an important role in improving your lesson length. So ensure to practice effectively and ensure to go with a lesson that you can afford. If you're interested in taking music lessons on Zoom or In Person in Burbank, Glendale or North Hollywood, we have some of the best music lessons in Los Angeles. Our music instructors are picked by interviewing hundreds of music instructors and we have really high standards on both their teaching ability as well as their personality. If you'd like to talk to one of our instructors or set up a first lesson we have a guarantee that if you don't absolutely love your first lesson you don't have to pay for it. Please contact us at (818)902-1233 or on our website at https://www.losangelesmusicteachers.com/online-drum-lessons-in-burbank-ca.html Knowing how to choose a lesson length is an important aspect of learning music. This is why it is very common to hear people ask, “what is the best time length for music lessons?” These 6 basic factors are established to enable music students to get the best time length for their music lessons. 1. Goals Goals are established to give learners a clear idea of what they want to achieve. Goal setting is an important aspect of learning that cannot be underestimated even in the music world. Learning how to choose an appropriate goal can go a long way to help you obtain the best time length for music lessons which depends largely on your ambition. 2. Concentration It is imperative to learn to play accurately. Interestingly, this cannot be achieved without a high level of concentration. It is a bad habit for a musician to make mistakes while playing. This doesn’t reflect growth in any way. Your concentration levels will determine the length of music lesson you take. Consider taking a shorter lesson especially if you find it difficult to concentrate for a longer period (about an hour). 3. Comfort Generally, it is difficult to achieve progress in an uncomfortable state or situation. You must ensure to be comfortable with what you are doing to achieve a significant time length with your music lessons. There is no need to stress yourself learning music when you are not comfortable with it. 4. Teacher Music teachers play an important role in helping learners achieve their goals regardless of the lesson length set. When it comes to learning music, there is simply no need to dish out long tiring lessons. The most important thing for every music teacher is to provide the necessary information required to improve learning. This can go a long way to enable the learner to find the best lesson length set. Note that too much information can overwhelm the learner. 5. Experience Experience, they say, is the best teacher. It is important for learners seeking to know what the best time length is for music lessons to ensure that they build on their experience levels. Studies have shown that the more experienced a person is at a thing, the longer he or she will concentrate which can be very helpful in building confidence. 6. Ability Like experience, ability is built over time. Your ability to focus on the project at hand (learning music) can help you identify the best time length for music lessons. Develop your ability to learn and you will find ample time to achieve perfection. Finally, your practice and budget will also play an important role in improving your lesson length. So ensure to practice effectively and ensure to go with a lesson that you can afford. If you're interested in taking music lessons on Zoom or In Person in Burbank, Glendale or North Hollywood, we have some of the best music lessons in Los Angeles. Our music instructors are picked by interviewing hundreds of music instructors and we have really high standards on both their teaching ability as well as their personality. If you'd like to talk to one of our instructors or set up a first lesson we have a guarantee that if you don't absolutely love your first lesson you don't have to pay for it. Please contact us at (818)902-1233 or on our website at https://www.losangelesmusicteachers.com/online-drum-lessons-in-burbank-ca.html
Basic Guitar Lessons to help our beginner students to get started: How to Hold a Guitar Pick with Either Hand If you are right-handed, you will want to fret with your left hand and hold your pick in your right. Before you pick up your pick, take a moment to shake out and relax your right hand. Next, form a loose fist with your thumb on the outside of your index finger. Turn your hand so that your thumb is facing you. Slide your pick between your thumb and the middle of your index finger. Keep a relaxed grip on your pick with the pointed end sticking out away from your hand. Your pick should be held under the center of your thumb. You typically want to leave about a half inch of your pick sticking out from beneath your thumb. If you’ll be strumming your guitar, you might want to leave a slightly larger section of your pick exposed. If you need to pick for accuracy, allow a smaller tip of your pick to stick out. This lets you get closer to your strings. How to Strum Your Guitar Hold your picking hand over the sound hole on your acoustic guitar or over the body if you are playing electric. Don’t rest your hand on the guitar; instead allow your hand to hover. Now, use the pick to strum your guitar from the thickest string down. Don’t move your whole arm to strum your guitar. Instead, let the movement come from your wrist. Practice rotating your wrist like you are unscrewing a light bulb while keeping your wrist straight and your grip on your pick fairly loose and easy. When you strum, you should feel a rotation in your wrist, rather than bending. You can strum a chord from the top string down or the bottom string up. Try alternating down and up strums to hear the difference between each type of strum. You can try other rhythms or combinations like down-down-up-down to convey different feelings or evoke a genre. For example, punk music will typically use only quick down strums while an old country standard could be slow alternating up and down strokes. If you're interested in taking Guitar lessons on Zoom or In Person in Burbank, Glendale or North Hollywood, we have some of the best guitar lessons in Los Angeles. Our guitar instructors are picked by interviewing hundreds of guitar instructors and we have really high standards on both their teaching ability as well as their personality. If you'd like to talk to one of our instructors or set up a first lesson we have a guarantee that if you don't absolutely love your first lesson you don't have to pay for it. Please contact us at (818)902-1233 or on our website at https://www.losangelesmusicteachers.com/online-guitar-lessons-in-burbank-ca.html
To the uninitiated, tuning a piano may seem a simple, straightforward procedure, but it isn’t. The process is complicated by the sheer number of strings and tuning pins (more than 200 of each, the exact number varying with the model), by the high tension under which the strings are stretched, by the tightness with which the tuning pins are anchored in the pinblock, and by the friction points over which the taut strings must slide as they’re being tuned. All of these factors are obstacles not only to tuning, but also to creating a tuning that will be stable for a reasonable length of time, given the piano’s use and environment. Tuning is also potentially made more difficult by the design element of modern pianos known as loop stringing. In loop stringing, each length of steel music wire in the treble actually forms two strings, which are separated by a sharp bend in the wire where the strings are anchored to the piano’s castiron frame. Sometimes these two strings sound the same note and are tuned to the same pitch. Other times, they are parts of adjacent notes, with one half of the wire tuned a half step higher or lower than the other half, the two halves necessarily held at distinctly different tensions. Because all parts of a single wire have a tendency to seek the same tension, loop stringing is a more challenging environment in which to learn how to create a stable tuning. In addition to physical obstacles, there are acoustical obstacles to tuning. A paradox common to all fixed-pitch instruments, first discovered by the ancient Greeks, is that it’s impossible for all the intervals — thirds, fourths, fifths, sixths, etc. — within a perfect octave to themselves be perfect. This problem is dealt with by slightly expanding or contracting — tempering — each of these intervals so that, together, they will add up to a perfect octave. The tuner creates a temperament— a single octave of 13 notes at the center of the keyboard in which every note is tuned in its correctly tempered relationships to all other notes in that octave — and then copies those relationships to all remaining sections of the keyboard by tuning each note to be a perfect octave (or octaves) above or below the corresponding note in the temperament octave. But even the phrase perfect octave is a bit of a misnomer. Vibrating strings give off harmonics — fainter tones whose frequencies are in a specific mathematical relationship to that of the fundamental, or principal frequency at which the string is vibrating. For a piano to sound right, the tuner must tune each string so that its harmonic and fundamental frequencies are all in tune with those of the other strings. Due to the stiffness of steel strings, the frequencies of their harmonics are somewhat higher than the theoretical ideal, a property called inharmonicity. In addition, the human ear tends to hear the higher pitches as a little flatter than they actually are. To compensate for these effects, the tuner must tune (stretch) the octaves a bit sharper in the treble and a bit flatter in the bass than would be the case were the octaves actually perfect. How muchsharper or flatter is both an art and a science, which is one of the reasons why some astute musicians may prefer one tuner over another. To tune each note, and then to confirm its accuracy, the tuner performs certain listening tests. These tests require listening to faint, regularly undulating interference patterns in the soundwave, called beats, that occur when two notes that form an interval are played together, and harmonics of the two notes are at almost but not quite the same frequency. The tuner tunes one of the notes so that the beats are either eliminated (beatless) or occur at a certain precise rate of speed, depending on the particular test and the interval being tested. In addition, most notes on a piano are sounded by sets of two or three strings each, called unisons; to sound in tune, every string in a unison must be tuned at precisely the same pitch — that is, they must be beatless relative to each other. When you combine tuning’s physical and acoustical obstacles, you can see why it takes years of training and practice to become an accomplished piano tuner. What Tuning Does Not Include Tuners often arrive at a service call to find a piano with sticking keys, hanging dampers, and/or broken parts. However, tuning involves only correcting the pitches of the strings. It does not cover cleaning, adjustment, or repairs to the mechanical, structural, or cosmetic parts of the piano, or voicing (tone adjustment). The tuner and client should discuss these other needs so that both clearly understand the work to be done and how much it will cost. That said, if a piano problem is caused by something accidentally dropped inside the piano, such as a pencil or hair ornament, and it can be removed with no more than a few minutes’ work, the tuner will often include that service in the tuning fee. When contacting a tuner, be sure to let him or her know the piano’s brand and model, whether it is a vertical or a grand, when it was last tuned, and any repairs or adjustments you believe need to be made. This will allow the tuner to allot sufficient time, and to be prepared with the proper tools and materials for the job. How Often Should a Piano Be Tuned? This is the question most frequently asked by customers. The answer depends, first, on the piano’s use. In the most critical situations, such as in a recording studio, where the accuracy of the tuning will live in perpetuity in a recording, the answer is probably every day, or even several times a day. In concert halls and other performance situations, the piano is tuned before every rehearsal and every performance, and sometimes the tuning is even touched up at intermission. For a piano used in the typical home, tuners usually state the recommendation in terms of so many tunings per year. Because a piano is always going out of tune, beginning as soon as the tuner has finished the job, the frequency of tuning will depend on the tolerance of the pianist to changes in pitch, the piano owner’s budget, the ability of that piano to hold its tuning, the consistency of the temperature and humidity in the room the piano is kept in, and in how skillful the tuner is in creating stable tunings. For most home pianos, the owner will be satisfied if the piano is tuned two or three times a year. For professional use or fussier owners, four to six tunings a year, or even more, may be appropriate. Why Won’t My Piano Hold Its Tune? First, we consider the physical condition of the piano, something of which many owners will not be aware — the instrument could be faulty due to age and wear. Various conditions, some described in terms of “cracked” parts and often confused by customers, may or may not be affecting the ability of the piano to hold its tune: Pinblock — The pinblock is a plank of laminated hardwood, located beneath the cast-iron plate at the front of a grand or at the top of a vertical, into which holes are drilled for the tuning pins, and into which the pins are driven and tightly held. Over time, these holes can expand slightly from wear, age, and dryness, causing the tuning pins to loosen and no longer be able to hold the strings at their correct tensions. Cracks can also appear around the holes or between laminations (thus the term cracked pinblock). A worn or cracked pinblock is the most common structural cause of a piano’s inability to hold a tune. Plate — The cast-iron plate or frame, along with the piano’s wooden case, is the primary structural support for the tension of the strings. On rare occasions, the plate will crack, usually rendering the piano untunable, and possibly unrepairable. This can happen due to a design flaw or a flaw in the casting, or due to extreme mishandling of the instrument during moving, such as dropping the piano from a height. Cracked plates are very rare; most technicians will see only a few in an entire career. Soundboard — The soundboard is a thin wooden board, usually of spruce, that is partly covered by the cast-iron plate. The soundboard is made to resonate by the vibrating strings, thus amplifying their sound and transmitting it to our ears. Just about everyone has heard of a cracked soundboard. However, soundboard cracks have no effect on a piano’s ability to hold its tune. Bridges — Bridges are strips of hardwood, glued to the soundboard, that transmit the strings’ vibrations to the soundboard. The strings are stretched over the top of the bridges and bear against them, held in place by bridge pins. Age, dryness, and the pressure of the strings against the bridge pins can, over time, cause cracks to form around the pins, which then loosen. Except in extreme cases in which a bridge is virtually falling apart, the principal effect of loose bridge pins is not on the ability of the piano to hold its tune. Rather, loose bridge pins provide insecure termination points for the vibrating strings, causing tonal irregularities called false beats that, when excessive, make the affected strings sound out of tune even when they’ve been tuned as well as possible. Strings — Metal fatigue, rust, corrosion, pitting, and any history of liquid spilled into a piano can cause false beats and other irregularities, making tuning more difficult and less accurate. Due to the effects of metal fatigue, concert instruments may require restringing in as few as 10 years. Pianos in the home may benefit from restringing after about 25 years of use, though few receive that treatment. Daily and, especially, seasonal variations in humidity are the most common cause of pianos without structural flaws going out of tune. The soundboard swells and shrinks slightly with changes in humidity, altering the tension on the strings. Wide swings of humidity can keep a piano’s pitch in a constant state of flux, forcing the tuner to radically change the pitch with each tuning. The further out of tune the piano gets between tunings, the less stable its tuning will be when it does get tuned. When making a large pitch correction, the tuner may tell the customer that the piano is too flat or too sharp for a stable tuning to be done in a single session, and that after getting the tuning close to accurate, he or she will have to return in a few weeks to retune the piano. If the customer fails to have the piano tuned regularly, it will seem to be always out of tune. I have many customers who, in order to keep their pianos as close to pitch as possible, have them tuned once a month. It’s not uncommon for pianos kept in the faculty and practice studios of conservatories to be tuned two or three times a month; concert pianos, even when not in use, are usually tuned once a week just to keep them close to pitch. Tuning stability can be greatly increased by use of a humidity-control system — for the entire home, for just the piano room, or inside the piano itself. Counterintuitively, frequent service is particularly important with new pianos. Brand-new instruments can be very unstable as their new strings and soundboard continue to settle, and in their first year usually must be tuned four to six times. Most dealers will tune a new piano before delivery, and once or twice after delivery, often at no additional cost to the customer. Depending on how many times it was tuned on the dealer’s floor, and before that in the factory, this may or may not be enough to stabilize the piano so that the frequency of tuning can return to whatever the customer considers normal. Failure to ensure that the recommended post-sale service is actually done can substantially lengthen a new piano’s break-in period and make its tuning seem unstable. A piano’s tunability is also a factor of its quality and price — when offering a piano at a particular price point, manufacturers take into account the sophistication and expectations of prospective purchasers. More expensive pianos can be tuned more accurately, and, given equivalent conditions of use, will usually hold a tune better than less expensive ones because of their superior designs, better materials, more robust construction, better workmanship, and more extensive preparation in the factory. Due to globalization and the increasing computerization of manufacturing, these differences are less pronounced than in former eras, but are still obvious in comparisons of high-end with entry-level instruments. Lastly, the mechanical skill of the tuner is very important to the stability of the tuning. One of the greatest obstacles to tuning stability is the unequal tension that occurs between the vibrating and non-vibrating sections of a string as, during tuning, the wire is drawn over the friction points that separate those sections near the string’s two ends. As soon as the note is forcefully played, the tension will equalize and the string will go out of tune. To prevent this from happening during a performance or shortly after the tuner leaves, tuners use test blows — striking the keys at least as forcefully as any pianist would — to settle the strings so that they can be immediately retuned, if necessary, and stabilized. Another important mechanical skill is the ability to turn very tight tuning pins by minute amounts and without bending them — a bent pin will quickly unbend, and throw its string out of tune. A highly skilled tuner working on a good instrument can tune so stably that when the humidity changes, most of the notes on the piano will seem to move sharp or flat together, and the tuning will continue to sound good for some time. In most cases, a skilled tuner can do a terrific job in 1½ to 2½ hours, sometimes less. Inexperienced tuners who take all day to tune a piano will move and bend the pins much more than necessary, producing an unstable tuning and possibly damaging the pinblock. Electronic Tuning Devices vs. Tuning by Ear Electronic tuning devices (ETDs) are now used by many piano tuners, even by some who can tune by ear. Unlike the aural (by ear) tuner, ETDs can “hear” only one note at a time; they don’t listen to intervals or beats, or tune the strings of a unison to one another. When using an ETD, it isn’t necessary to first tune a temperament. In theory, one could tune a piano with an ETD by starting at the lowest note on the piano and working upward to the highest. A skilled tuner who has trained as an aural tuner can use an ETD to great advantage. The use of an ETD doesn’t eliminate the need for the tuner to develop superior listening skills, but it does allow the already skilled tuner to perform such tasks as pitch raising faster and more accurately, reducing the need to retune sections that have already been tuned. Use of an ETD also allows the tuner to tune for longer periods of time with less fatigue, and makes it possible to tune in noisy environments that would be difficult for an aural-only tuner. For concert and recording work, an ETD is a more accurate pitch reference than a tuning fork, which can vary in pitch with temperature. This is particularly important when tuning a piano that will be accompanied by an orchestra, as many professional orchestras tune to a pitch of from A-441 to A-443, both of which are slightly higher than the traditional A-440 to which most pianos are tuned. (The numbers refer to the frequency, in cycles per second, of the A above middle C.) In an institutional setting in which two or more pianos must be tuned together, an ETD makes it easy to synchronize not only the overall pitch, but also the stretching of the octaves in the upper and lower sections of the keyboard. Problems occur, however, when novice tuners without aural skills are entirely dependent on ETDs. They can’t hear when they make a mistake, or when they need to override the judgment of the machine to get the best results. Also, an ETD cannot, by itself, create a stable tuning. The tuner must still know how to manipulate the tuning pins and strings so that the piano will stay in tune when the job is done. If you're interested in taking Piano lessons on Zoom or In Person in Burbank, Glendale or North Hollywood, we have some of the best Piano lessons in Los Angeles. Our Piano instructors are picked by interviewing hundreds of Piano instructors and we have really high standards on both their teaching ability as well as their personality. If you'd like to talk to one of our instructors or set up a first lesson we have a guarantee that if you don't absolutely love your first lesson you don't have to pay for it. Please contact us at (818)902-1233 or on our website at https://www.losangelesmusicteachers.com/online-music-lessons-burbank-ca.html
So, you (or someone in your family) has finally signed up for those violin lessons you've been wanting for ages. What to do about an instrument? We at Los Angeles Music Teachers firmly believe that for beginners, rental is the best option for the first few months (at the very least). Purchasing an instrument is a very personal thing which requires the development of the musical "ear", or the ability to distinguish the qualities of one instrument from another. It takes time to reach this point. From our perspective, it makes sense to wait until one has sufficient experience before making a major investment in an instrument. Another advantage to renting a violin or cello is that size exchanges can be made at any time. As your child grows the size of the violin or cello also needs to grow. At some point, your child will outgrow the first instrument. The rental insurance coverage for theft or damage assures peace of mind, which is particularly important when it is a child who is handling the instrument. Considering all of these benefits, making rental payments for a time can constitute money well spent. And, if one decides to purchase an instrument later on, Depending on where you rent the Violin, a percentage of what has been spent in rental fees can be applied towards this purchase. Tips on care and maintenance:
If you have any questions you are welcome to call us for advice on best practices for renting or buying a string instrument like violin or cello. Our teachers will also help answer any questions and guide you as you take lessons. If you're interested in signing up for lessons on Zoom or In Person in Burbank, Glendale or North Hollywood, please contact us at (818)902-1233 or on our website at https://www.losangelesmusicteachers.com/online-violin-lessons-in-burbank-ca.html
This is a quick lesson on what each piece of a drum kit is and what are some of the typical setups that are most popular. To work out how many ‘piece’ drum kit you have simply add up all the drums, ignoring cymbals and other hardware. Another method is to count the toms and then add 2 (for the snare and bass drum). So if your drum kit has 5 toms then it’s likely to be a 7 piece kit (assuming it has one snare drum and one bass drum). If a kit has one bass drum, one snare drum and one tom then it’s a 3 piece kit. The most common configuration is a 5 piece kit consisting of a bass drum, snare drum and 3 toms (high, mid and low) – and then of course you also have the hi-hats, cymbals etc. but these don’t count towards the number of ‘pieces’. You could have a 5 piece kit with 100 cymbals – it’s still a 5 piece kit.
Serious about learning to play the drums? Drums are an awesome instrument to learn at any age but when you’re just starting out you might need some extra help and instruction. It’s really important that you get the basics right from the beginning such as how to hold the drums sticks and how to maintain good posture at the drum kit. Did you know you can now learn drums online? You can have structured step by step online lessons from a professional teacher that you work through at your own pace. By the time you finish the beginner level course you’ll be able to:
Parts of a Typical 5-piece Drum Kit
1. The Bass Drum / Kick Drum
The Bass Drum is the largest of all the drums and also commonly gets referred to as the ‘Kick Drum’ or just ‘Kick’. The bass drum is played using a foot pedal that attaches to the rim (hoop) of the drum. Sometimes the front head of the drum (the resonant head) will have a hole in it – this can be used to alter the tone of the drum and is also commonly used to mic the drum up. Sometimes the resonant head is removed completely, again to alter the tone of the drum.
It’s common to place a pillow or some other damping material inside a bass drum to control the resonance of the drum and also help reduce the volume level. The bass drum has feet at the front (resonant head side) – these are known as ‘spurs’ and are generally angled in such a way as to minimise any movement of the drum while playing it. Some drummers like to have more than one bass drum so they can use both feet to play faster rhythms. Alternatively you can use a double bass drum pedal (sometimes called a double kick pedal) – this allows you to use both feet to hit a single bass drum. Although double bass drum playing is probably most common on the metal scene, double bass drum pedals are used extensively in a wide range of musical styles from jazz fusion to funk and pop. Bass drums are available in a wide range of sizes, the most common being 20″ or 22″ in diameter (drums are generally measured in inches as opposed to metric measurements).
2. The Drum Stool / Throne
The stool that you sit on is known as a ‘drum throne’. It’s typically a round padded stool with 3 chrome legs. The height of the throne is really down to personal preference but normally you should ensure you can put your feet flat on the floor and your thighs should be sloping downwards slightly.
3. The Hi-Hats
The hi-hat cymbals are a pair of cymbals that close against each other using a foot operated pedal. Hi-hat cymbals are typically 14″ in diameter but are available in a range of other sizes.
The hi-hats are probably the most dynamic element of the drum kit due to the wide range of sounds that can be produced. Distinct tonal options are:
4. The Snare Drum
The snare drum is one of the most important drums on the kit – it forms the centre of the kit and can be played in a wide variety of ways, commonly used to play the ‘backbeat’ of a typical straight 8’s beat. The drum is normally 14″ in diameter and 6″ in depth but is available in a wide range of other sizes. The drum consists of a wooden or metal shell and it will always have both a batter (top) and resonant (bottom) head.
The resonant head has snare wires suspended under it to produce the classic snare ‘buzz’ sound – the mechanism used to attach the snare wires to the drum is called the snare strainer. The snare strainer mechanism normally also includes a ‘throw off’ to switch the snares on and off and an adjustment thumb-screw to adjust the tightness of the snare wires. The snare drum sits on a special snare drum standconsisting of legs and a 3 arm basket to hold the drum.
5. The Tom Toms
Tom toms or ‘toms’ as they’re more commonly known, come in a wide range of sizes.
On a 5 piece kit you will have a high tom, mid tom and low / floor tom. The low tom will either be ‘mounted’ (normally on a ‘fusion’ kit) – i.e. attached with a clamp to a cymbal stand, or it will be a floor tom (normally on a ‘rock’ kit) – i.e. it sits independently on its own 3 legs.
Toms normally have a batter (top) and resonant (bottom) head but the resonant head isn’t mandatory. There are a variety of clamping mechanisms for the high / mid toms – most commonly they’ll attach to tom arms that in turn attach to the bass drum. Another option is for the toms to be clamped to cymbal stands.
6. The Ride Cymbal
The ride cymbal is a larger cymbal (20″ is a fairly typical size) that generally sits on the right hand side of the drum kit. It’s normally a heavier cymbal played with the tip of the drum stick to produce that distinctive ride ‘ping’ sound.
For a more defined ping sound you can also play the bell of the cymbal using either the tip or shoulder of the stick for an even louder ping sound. A general rule of thumb with ride cymbals is not to crash them unless they’re designed as ‘crash/ ride’ cymbals. Crashing a normal ride cymbal can result in damage and it also probably won’t sound particularly good.
7. The Crash Cymbal
Crash cymbals are generally a bit smaller than ride cymbals – a typical size being 16″. They’re designed to be hit quite hard with a glancing blow from the shoulder of the stick. Normally crashes are used as accent notes, for example at the end of a fill, however you can also ‘ride’ the crash, playing powerful rhythmic patterns similar to what would be played on the hi-hats or ride cymbal. It’s very common in rock music to ride the crash in particularly loud parts of the song – have a listen to The Pretender by the Foo Fighters where Taylor Hawkins switches between riding the ride and riding the crash during the choruses (4 bars of ride, 4 bars of riding the crash etc.).
It’s quite common to have several crash cymbals around the drum kit in a variety of sizes. Generally speaking larger cymbals will have a louder sound and longer sustain whereas smaller crash cymbals will be quieter with a shorter sustain. Having a choice of crash cymbals is both convenient, in terms of having one near to the last drum you played and also allows the player to develop a richer and more varied sonic palette. For example, if a fill calls for two crashes in short succession it often sounds better for these to be played on two different cymbals. For really powerful moments you might hit both at the same time!
If you're interested in taking Drum lessons on Zoom or In Person in Burbank, Glendale or North Hollywood, we have some of the best drum lessons in Los Angeles. Our drum instructors are picked by interviewing hundreds of drum instructors and we have really high standards on both their teaching ability as well as their personality. If you'd like to talk to one of our instructors or set up a first lesson we have a guarantee that if you don't absolutely love your first lesson you don't have to pay for it. Please contact us at (818)902-1233 or on our website at https://www.losangelesmusicteachers.com/online-drum-lessons-in-burbank-ca.html
Stanley Turrentine had one of the fattest, richest and most colorful sounds of all of my favorite players of the saxophone. Along with that amazing sound was a very soulful and lyrical style of playing that pulls you right in. Many people don’t know that he was a great soloist on jazz standards. So lyrical and swinging and his music always makes you feel good. I had the opportunity to see him up close in intimate bar settings and his music was always hip and high spirited with a lot of soul. His most popular period was probably his CTI period when he started to use the fusion jazz style in his music, featured the all stars, George Benson, Richard Tee, Bob James, Freddie Hubbard, Milt Jackson, Eric Gale, Grant Green, Idris Muhammed, and Ron Carter. During this period in 1970 he put out his biggest selling album, “Sugar”. Not only did the song “Sugar” become a hit but also a standard in the jazz repertoire. Also, he also plays Coltrane’s Impressions on this album and it’s a soulful and swinging version that is very hip! Here’s a video of Stanley on one of my favorite live programs ever on TV. David Sanborn hosted a show called, “Night Music” which was aired about 1am and featured some of the best jazz musicians alive at that time. The show didn’t last long but if you want to see some great live jazz, check out this video and some of the other jazz musicians who were featured. If you're interested in taking Saxophone lessons on Zoom or In Person in Burbank, Glendale or North Hollywood, we have some of the best Saxophone lessons in Los Angeles. Our Saxophone instructors are picked by interviewing hundreds of Saxophone instructors and we have really high standards on both their teaching ability as well as their personality. If you'd like to talk to one of our instructors or set up a first lesson we have a guarantee that if you don't absolutely love your first lesson you don't have to pay for it. Please contact us at (818)902-1233 or on our website at https://www.losangelesmusicteachers.com/online-drum-lessons-in-burbank-ca.html
Our wonderful piano/voice teacher, Danielle Crook, was featured this month in Martha Stewart's Weddings Magazine as a French Singer performing for a very upscale French Themed Wedding in Los Angeles at the Langham Hotel. She was hired through Rossi Music a sister company to Los Angeles Music Teachers. "Danielle is not only one of our outstanding voice teachers, but she's also a wonderful vocalist who has the ability to sing in 13 languages. That could be a Guinness world record!", jokes Grammy Winner, Rick Rossi, who manages both music based businesses. "I knew Danielle was an outstanding musician and vocalist since hiring her as a piano and voice teacher a few years ago. Then months later, after seeing the comments that were coming directly from her students and reading the Google reviews her students were leaving for her, confirmed that she was quite special!!"
"Recognizing her unique ability as a singer came a bit later, when we were discussing music and bands and she told me that she could sing in 13 languages. That immediately got my attention because in 2011, I had created a French and International Band called "Esperanto" that made an album of International music. At that time we were getting quite a few bookings at events, festivals and various kinds of dinner parties and even weddings! Right at our peak of success we lost our singer because she needed to move back east to help her aging mother. Ever since that time we were unable to find an adequate replacement because of all the languages she was able to sing. So when Danielle mentioned her ability to sing in many languages and the love she had for French Music and International music, I began to start marketing for our French Band again and this French Themed Wedding became her very first event with Rossi Music. Fortunately, we were lucky enough to be able to get some video footage and here's a sample of her singing at the event. https://youtu.be/Iiis5wTs-bk. This was a beautiful wedding filled with the best of everything, beautiful ballroom, amazing floral designs and for entertainment, the French music of Danielle and the band as well as French dancers who put on two 20 minute shows in between the sets of the french music." As a result, Martha Stewart Weddings asked to feature the French Themed Wedding in her magazine. Click the link below to see the photos from the event. https://www.marthastewart.com/8131884/french-inspired-ballroom-wedding-california-kurt-boomer?slide=7e28f1b6-c30e-4f5e-913d-3cdfba4136c5#7e28f1b6-c30e-4f5e-913d-3cdfba4136c5 You can check more out at Rossi Music French International Event Bands for Hire or visit our Los Angeles Music Teachers website for more information on how you can take piano or voice lessons with Danielle. Our band, Paris Cafe is a tasteful marriage of French Chanson, jazz swing music of the American Songbook and more contemporary pop featuring French Chanteuse Danielle. With a variety of repertoire of vintage American standards, French jazz songs and mixed with some contemporary current Top 40, Paris Cafe is a unique alliance between the old world and the new, French charm, vintage Hollywood glam and soulful pop and R&B. With world class singers and musicians, Paris Cafe gathers all the ingredients to make it hot as well as to keep you dancing!! Check out more at www.Rossimusic.biz or call us at 818-902-1233. We're the specialists for connecting the best unique artists with the right events. We serve all of southern california including, Los Angeles, Manhattan Beach, Newport Beach, Laguna Niguel, Malibu, Palm Springs, Indian Wells, Santa Barbara, Orange County, San Diego, Pasadena, Beverly Hills, Santa Monica, Brentwood, Palos Verdes, Redondo Beach, Marina del Rey, Irvine, Pacific Palisades, Westlake Village, Woodland Hills, Thousand Oaks, Ventura County, Bel Air, Westwood, Century City, Venice, Long Beach, San Fernando Valley, Anaheim, Newport Coast, Huntington Beach, Laguna Beach, San Juan Capistrano, Dana Point, San Clemente, Costa Mesa, Orange, La Habra, Century City, San Gabriel, Sierra Madre, Valencia, Coronado, Rancho Santa Fe, Carlsbad, La Jolla. We specialize in Vintage and contemporary Jazz Bands, Swing Big Bands, Smooth Jazz, French Jazz Quartets, French Lounge Music, Pink Martini Cover Bands, World Music, and Electric String Quartets with Tracks. If you're interested in taking music lessons on Piano, Guitar, Voice, Violin, Drums, Bass, Cello or Woodwinds check out our website at www.losangelesmusicteachers.com or call us at 818-209-2620 Drums On: The Double Shuffle
6/25/2021
The Double Shuffle is also known as the Chicago Shuffle, the Full Shuffle, the Prima Shuffle, and sometimes the Texas Shuffle, as well as several other names. It goes by so many aliases it almost makes you wonder if it’s on the lam from the law. This groove has been around for quite some time. Drummer Bobby Morris played it on Louis Prima’s song “Just A Gigolo,” though you’re probably more familiar with David Lee Roth’s 1985 redo of it. This is an essential shuffle groove. If you can’t play any other shuffle, you should at least have a handle on the Double Shuffle. However, it’s a bit tricky to master. The challenge is getting the left-hand dynamics just right, so practice playing all the unaccented notes very softly. Admittedly, you can also perform this groove with medium level “soft” notes, but by practicing them softly you’ll be ready for any musical situation. The accented snare note can be played in the middle of the drumhead for a meaty sound, or as a rimshot for a higher pitched ringing timbre. Here’s a tip: To play a quick accent after a soft note, it can help to use a Moeller “whipping” motion or use your fingers to “grab” the stick briefly. Most drummers accent both the snare and ride together, mainly because it’s easier to do it that way. For greater control, work on just accenting the snare hand and keeping the ride or hi-hat even. ADD-A-NOTE METHOD. One way of teaching this groove is to start with a basic shuffle and add notes to the snare and bass drum parts until you’re eventually playing the whole pattern. Keep in mind that patterns C and D are often interchangeably referred to as Texas Shuffles. LIMB PAIR METHOD. Another way I often teach grooves is to isolate the hand pattern (the first limb pair) in order to master it first. Once that’s solid and the dynamics are consistent, layer it on top of the much simpler foot pattern (the second limb pair). The slower you work on the hand pattern, the sooner you’ll be able to get the dynamics under control. Once you get these down, experiment with other bass drum patterns. If you're interested in taking Drum lessons on Zoom or In Person in Burbank, Glendale or North Hollywood, we have some of the best drum lessons in Los Angeles. Our drum instructors are picked by interviewing hundreds of drum instructors and we have really high standards on both their teaching ability as well as their personality. If you'd like to talk to one of our instructors or set up a first lesson we have a guarantee that if you don't absolutely love your first lesson you don't have to pay for it. Please contact us at (818)902-1233 or on our website at https://www.losangelesmusicteachers.com/online-drum-lessons-in-burbank-ca.html
Drum Shuffle Variations Continued...
6/18/2021
There are dozens of shuffle variations and, just too slightly confuse you after the last shuffle blog we made, their names sometimes change by geographical region. Here are a few of the best ones. KICK DRUM SHUFFLE. The bass drum plays a shuffle rhythm beneath the hands. This is a tiring and loud groove that doesn’t work everywhere, but it’s well worth the time to develop it for situations where it fits. Once mastered, the hands are free to play fills over it. SAMBA SHUFFLE. You can think of this as the strange progeny of a samba and a kick drum shuffle hookup. The hi-hat pedals the second triplet partial (the &s) for a constant rolling feel. PURDIE SHUFFLE. Here’s a simple version of a this celebrated shuffle (we dig deeper into it below). Note how the snare ghost notes maintain the momentum of the groove. Many other bass drum patterns are possible. Try to come up with some of your own. CHEATER SHUFFLE. Okay, this isn’t really a shuffle, but it’s something I’ve seen hard rock drummers and beginners play from time to time, and it can be useful as a fill pattern too. FLAT TIRE SHUFFLE. Also called an Inside or Backward Shuffle, it sounds like a flat tire turning. This is a key blues groove. DOUBLE BASS SHUFFLE. An indispensable tool for rock and metal drummers, here we shift the shuffle pattern to the feet. Lots of drummers lead these left-footed, since their left foot is already used to keeping four-on-the-floor time on the hi-hat. LAZY MAN SHUFFLE. Here’s a useful variation to use when you want to let the rest of the band play the shuffle feel while you drive right down the middle of it. This can groove really hard. JAZZ/SWING SHUFFLE. In this permutation a jazz ride or hi-hat pattern takes the place of the shuffle pattern. Drummers often place a quiet snare on (1) ah to complete the feel. HAND TO HAND SHUFFLE. If you’re ever asked to play a shuffle at a ridiculous speed, this version may become your best friend. TRAIN BEAT SHUFFLE. Basically a triplet version of the country classic. LA GRANGE SHUFFLE. On the ZZ Top classic “La Grange,” drummer Frank Beard plays this variation of a Hand To Hand shuffle on the rim of his snare, and embellishes the pattern with flams and drags. SNARE SHUFFLE. This is a great country or blues groove, and sounds fantastic when using a brush in your right hand while playing a rim-click with your left. ROCK SHUFFLE. Played heavier than many other variations, the kick and snare suggest the shuffle as much as the hi-hat pattern does. Lots of rock drummers begin learning to shuffle with this kind of beat. HALFTIME SHUFFLE. Here the snare accents count 3 and the groove feels more laid back and often funkier than a regular shuffle. GLAM ROCK SHUFFLE. This variation transfers the hi-hat part to the floor tom for a powerful jungle feel. If you're interested in taking Drum lessons on Zoom or In Person in Burbank, Glendale or North Hollywood, we have some of the best drum lessons in Los Angeles. Our drum instructors are picked by interviewing hundreds of drum instructors and we have really high standards on both their teaching ability as well as their personality. If you'd like to talk to one of our instructors or set up a first lesson we have a guarantee that if you don't absolutely love your first lesson you don't have to pay for it. Please contact us at (818)902-1233 or on our website at https://www.losangelesmusicteachers.com/online-drum-lessons-in-burbank-ca.html
What do you love most about teaching music lessons? What I love most about being a music instructor at Los Angeles Music Teachers is about seeing the smiles from students when they are able to progress and get over hurdles. I love breaking down music difficulties into easy to digest pieces so that the student is led in a very smooth way to higher and higher levels of proficiency. What inspired you to create your own business? I love helping new students, no matter what age to experience the fun and excitement of playing music. Why should you choose LAMT? What makes our music school so unique is that our teachers are selected from the best of the best in Los Angeles. We only accept teachers who not only have a Masters in music but also must show that they are performers as well. We have a separate business to help our teachers get paid gigs doing special events and studio dates, so all of our teachers understand the importance of applying music teaching to the real world of music and making music fun by customizing to each students individual tastes in music. Can you provide your services online? Yes, we have been teaching on Zoom for over 7 years and currently still teach most of our students who joined us during Covid on Zoom because they love the convenience and because it works. We've adapted the whole learning experience so that the students don't feel like they are missing anything by learning their instrument online. What changes have you made to keep your customers safe from Covid-19? We have large rooms with lots of windows for breeze to enter. We require 6 feet distance from the student unless the teacher and student have both been vaccinated. All of our teachers teaching in person are vaccinated. If you're interested in taking lessons on Zoom or In Person in Burbank, Glendale or North Hollywood, please contact us at (818)902-1233 or on our website at https://www.losangelesmusicteachers.com/online-music-lessons-burbank-ca.html
The Best 10 Jazz Drummers Of All Time
5/24/2021
Jazz drumming is an art form that requires unprecedented control, coordination, and rhythmic understanding. Jazz is a musical genre that has birthed some of the greatest drummers alive. And jazz drummers have also been pivotal in the development of the modern drum set. In this article, I’m going to list ten of the best jazz drummers of all time. All of the jazz drummers I feature are true innovators and have made undeniable contributions to the genre throughout their careers. Read on to discover my selection of the best jazz drummers of all time, who have had an enormous influence on the genre and helped to further jazz as an art form! 10. Peter Erskine (Born 1954) Peter Erskine is a jazz drumming legend who picked up the drum sticks at the tender age of four. He is an incredibly diverse musician and is well-versed in all different forms of jazz and broader genres such as Funk and Pop. Erskine performed with Stan Kenton and Maynard Ferguson before joining the jazz-fusion group Weather Report. Erskine is an accomplished jazz drummer who is highly regarded for his efficient movement and exceptional technique. He effortlessly moves around the kit with real finesse, and he is a true master of swing and syncopation. 9. Steve Gadd (Born 1945) Steve Gadd is widely regarded as one of the most influential drummers of all time and has set a new standard in contemporary drumming. He is a very accomplished musician and can play anything from jazz right through to Rock music. He has an impeccable playing feel that leaves listeners amazed. As one of the ‘greatest groovers’ to ever pick up the sticks, he masterfully approaches jazz drumming with musical brilliance and delivers what the song requires, every time. Gadd’s feel, imagination, and technical ability makes him one of the best jazz drummers of all time. 8. Louie Bellson (1924-2009) Delivering explosive and dynamic performances, Louie Bellson has cemented himself as one of the jazz drumming greats. Not only is he one of the best jazz drummers, but Bellson also matured into an accomplished author, composer, and entrepreneur. His expressive playing style was indeed a reflection of his varied and hectic life! Louie Bellson helped to pioneer double bass drum sets, and he took full advantage of both bass drum pedals with his exciting and adventurous performances. He was one of the most incredible big band drummers of all time and played with a wide range of acclaimed artists during his long career. 7. Max Roach (1924-2007) A true innovator of Bop drumming, Max Roach left an enormous legacy and is considered one of the most crucial jazz drummers in history. As well as pioneering Bop, he worked in many other music styles and performed with the very best artists of his time, including Coleman Hawkins and Charlie Parker. Max Roach was one of the first drummers to utilize the ride cymbal to emphasize a rhythmic pattern, and this added a beautiful sonic texture to swing and jazz music. Roach innovated an entirely new drumming method by being one of the first drummers to utilize limbs independently. 6. Joe Morello (1928-2011) Joe Morello was an incredibly skilled jazz drumming legend who became renowned for his technical proficiency in playing unusual rhythmic time signatures. He played with a real finesse that helped him to achieve superstar jazz drumming status by emphasizing irregular beats and rhythms through his playing. Morello had an incredibly unique approach to the jazz drum set with Brubeck’s compositions. He held the music together while still showing his creative flair and originality with his unusual syncopations and exciting accents. 5. Tony Williams (1945-1977) Tony Williams was one of the most inspiring and best jazz drummers of all time. He gained fame by performing with Miles Davis at 17 and significantly helped to pioneer jazz fusion. He was not only an incredibly versatile drummer, but he played with incredible precision and technical prowess. Throughout his remarkable career, Tony Williams performed with other legendary musicians, including Jaco Pastorius and Herbie Hancock. He performed with sublime control and power, unleashing dazzling polyrhythms and intricate patterns behind the drum set. 4. Elvin Jones (1927-2004) Elvin Jones was an incredibly prolific jazz drummer who accompanied a wide range of pioneering artists, including John Coltrane, Charles, Mingus, Miles Davis, and more. He quickly distinguished himself as one of the best around his unique playing style – blending power with musical finesse. With the John Coltrane Quartet, Jones helped to innovate jazz music by breaking the music free from the cagey bar lines that restricted the flow. Jones’ drumming paved the way for a modern style of jazz that flowed freely. His creativity, legato phrasing, and syncopations helped to push the boundaries of the genre. 3. Art Blakey (1919-1990) Art Blakey was nicknamed “The Thunder” by Max Roach for his powerful and captivating drumming style. He was one of the most desirable and best jazz drummers throughout the ’50s, ’60s, ’70s, and ’80s. Every jazz musician wanted to play with Art Blakey. He had an incredible signature style and was incredibly adept at maintaining independence with all four limbs. Blakey had a more straight-ahead drumming style than most Bop drummers, but he also liked to innovate with different sounds behind the drum set. He can also be credited with inspiring the development of riveted cymbals by placing his keys over the ride cymbal wingnut to produce a sizzle effect. 2. Buddy Rich (1927-2004) Without a doubt, one of the best jazz drummers of all time, Bernard “Buddy” Rich was one of the most technically gifted and dazzling drummers there ever was. He displayed incredible speed, consistency, power, and dynamics with his highly expressive drumming. Even though his style was wild and powerful, he was also adept at playing softer with drum brushes. Buddy Rich performed with his time’s greatest jazz artists, including Tommy Dorsey, Benny Carter, Harry James, and many more. From 1966 until his death, he led successful big bands even in an era when their population had diminished. Rich’s extended drum solos were phenomenal, and there is no denying he was one of the most influential drummers of all time. 1. Gene Krupa (1909-1973) Gene Krupa is widely considered the founding father of modern drumming. Krupa’s style and showmanship were mesmerizing to watch. He was the first drummer to use a bass drum on a recording session and profoundly influenced the modern drum kit. Krupa was the first drummer to perform solos in a song and helped to bring attention to the drummer within a band. Krupa’s superb drum solos became widely celebrated amongst jazz musicians in the 1930s. He had a crucial role in elevating the drummer’s position from an accompanying instrument to a solo voice. There are far too many sensational jazz drummers to be able to list in a single article. There are countless drumming legends I have missed, who are all worthy of a feature! I hope you have enjoyed my selection of the best jazz drummers, who have all influenced entire generations of musicians and helped to further the legendary genre with their unmatched ability and creativity. If you're interested in taking lessons on Zoom or In Person in Burbank, Glendale or North Hollywood, please contact us at (818)902-1233 or on our website at https://www.losangelesmusicteachers.com/online-drum-lessons-in-burbank-ca.html
Ascap Article - The Death of Genre
5/6/2021
What a Great article, If you read below you will see what Jeannette Cooper had to say about Genres in music today. Time was, you listened to jazz or rock, read mysteries or romances, majored in English lit. or anthropology, craved Chinese or Italian. You stuffed your likes into compartments. Then came cross-fertilization, influences, blends, hybrids, boundary-breaking ecommerce. Now you can listen to Japanese jazz or Afro-Celtic rock, read a literary mystery that is half cozy and half thriller, eat a kimchi quesadilla or roll sushi ingredients into a burrito. Genre is dying. “The idea of identity as a fixed and narrow concept, and of taste as inherently cloistered, feels bizarre, punitive, and regressive,” Amanda Petrusich wrote last month in the New Yorker. “Genre feels increasingly irrelevant to the way we think about, create, and consume art.” It is entirely relevant, however, to the way we market art. The few remaining bookstores need to figure out where, on what shelf, in what section, a book belongs. Librarians need to catalog that book. Publicists need to hype a new book to readers who already love books like this one. Awards shows need categories. So even as genre loses sway, it continues to organize our cultural marketplace—and we continue to glue on the wrong labels. Petrusich mentioned Justin Bieber’s distress to have his R&B album nominated for Best Pop Vocal Album—which, sure, was a more prestigious category, but the album was R&B. Tyler, the Creator objected to winning Best Rap Album because “whenever we, and I mean guys that look like me, do anything that’s genre-bending, they always put it in a rap or urban category…. Why can’t we just be in pop?” Why, and how, did genre take shape in the first place? Blame Aristotle, who gave the scientists their taxonomy of genus and species and broke literature into poetry, drama, and prose. From there he outlined subcategories: lyric, epic, and dramatic poetry, the latter including comedy, tragedy, melodrama, and—the start of the blending—tragicomedy. You will dizzy yourself if you try to find today’s criteria, the organizing principles we use to categorize. Genre can be determined by historical period (regency) or geographic location (westerns); by how tightly it cleaves to established reality (fantasy, magical realism, science fiction, true crime); by what psychological needs it satisfies in us (mystery, romance, thriller); by how it uses language (poetry, essay, novel, play). Cassius Longinus sorted out the methods various writers used to influence their audience’s emotions. Northrop Frye looked at the relationship between the “real” and the “ideal”: Romance was the ideal, irony the real, tragedy the plummet from ideal to real. When masterpieces rise above or interweave the genres, we call them classics. Shakespeare’s Hamlet is a mystery, a tragic romance, a thriller; The Tempest is fantasy; the comedies weave in bits that would work as French farce or vaudevillian schtick; much of the prose is pure poetry. But for readers gobbling up paperbacks at bedtime, “genre” became a flat, predictable formula (boy meets girl, star-crossed lovers are united, the killer is caught, the suspects are gathered in the parlor). Blasting those formulas was the first death blow. Writers like Michael Chabon played with genre in such powerful ways, the categories lost meaning. And once the word “genre” could no longer be used dismissively, the critics’ fun melted away. Authors began to play, blending and defying the conventions of various genres. Painfully aware how few book and music stores remained, they stopped worrying about category and focused on crashing the popularity lists. Genre’s demise should pop champagne corks all over the world. Too much has fallen between the compartments and landed in obscurity simply because an artist refused to conform to a formula. But can we wipe out the old categories altogether? Even the savviest curator might flounder. Can technology help us? I once copied out recipes from batter-stained index cards. Now, if I have extra buttermilk or a sack of ripe peaches, I search online for recipes with those ingredients. Spotify finds me all sorts of cool music. Books, though, are problematic: If I ask Google to suggest what I should read next after loving Abraham Verghese’s novel Cutting for Stone, it will suggest books about doctors, nonfiction by Verghese, and books that take place in Ethiopia. These are not the reasons I loved Cutting for Stone. The difference? Spotify has algorithms, but it also has human curators for its playlists. And human curators understand subjective qualities—vibe, tone, depth, candor. “Curate” was such a trendy verb a decade ago that I vowed to stop using the word, but now I see why it emerged with such fanfare: Discernment is the skill that will keep the rest of us sane. After listening to heavenly Irish music in the pubs of St. John, Newfoundland, I walked into a music store and asked for a recommendation: Celtic, but not self-consciously so, ballads, female singer, high clear voice, lilting melodies, the emotion strong but not maudlin, nothing sappy, historically rooted but fresh. Grinning, the guy pulled out five options and thanked me for knowing what I wanted. But to be that persnickety, you have to know exactly what you want ahead of time, and that ruins the chance of surprise. Besides, these days we barely ever shop in person—so now what? Sure, there are ratings, but how can you trust a bunch of strangers to tell you what will feed your soul? Maybe we could filter by the type and mood and color and the quality of the writing. Easy bedtime read or sentences you want to underline? Then the ingredients (mystery, witty dialogue, a little romance, strong friendships and teamwork, a lot of psychological complexity, meaning, depth). Then what we do not want (one-sentence paragraphs so manipulatively suspenseful they cancel sleep; gore designed to awaken some primordial bloodlust I would rather keep buried). Show some succinct measure of what other readers thought, but do not make us wade through quibbles that could taint our own response. Develop an algorithm skillful enough to note why each of us likes what we like. Add curation, to surprise us with choices we might not otherwise find. It is complicated, such sorting, and every year there will be more to choose from. But as we figure out a new approach, either softening or expanding the old categories and discarding the bias, we might begin to see how much comedy there is in tragedy, how much tragedy in comedy. Those of us who have shunned science fiction in favor of nonfiction social commentary will see how often they are one and the same. Realizing that what is said and why matters far more than when, where, or how, we might be less likely to snap our mind shut and avoid entire categories. Publicists will have to get more creative, selling something because of how it makes us feel, opens our minds, explores certain ideas. Artists and thinkers will feel freer to roam. If we pull this off, will we learn to think outside all the other boxes, too—race, class, gender, religion? Because there have always been blends, mixtures, influences, examples that shatter the compartments. We just need more graceful ways to acknowledge them. Read more by Jeannette Cooperman here. If you're interested in taking lessons on Zoom or In Person in Burbank, Glendale or North Hollywood, please contact us at (818)902-1233 or on our website at https://www.losangelesmusicteachers.com/online-music-lessons-burbank-ca.html
Is it hard to Learn Cello?
5/5/2021
Is it hard to Learn Cello? When learning how to play the cello, very little is spoon-fed to you by the instrument. Keyboard and instruments with frets, such as the piano and guitar, are a little easier to learn the basics. Putting your finger on the right key/fret will allow you to produce the note you want to hear. With cello, you need to have a teacher guiding you to ensure you’re learning the right way. This will lead to a lifetime of enjoying the instrument. If you have the right teacher, anyone can learn the fundamentals of playing the cello. As with most instruments, the cello will come more easily to someone with experience reading notes and rhythms. Most of cello music is written down, rather than transferred aurally from teacher to student. Does My Age Matter? Young students make great beginner cellists. Often with youth comes unbridled enthusiasm for learning a cool new instrument that helps them absorb new information like a sponge. These advantages can carry a student a long way. The excitement encourages them to practice more on their own and their ability to retain information helps them progress quickly in their studies. One difficulty that young students face though, is the challenge of analyzing their playing. As a result, they need an outside observer to help them identify things that cause them trouble, whether it is posture, intonation, tone quality, etc. Young beginners are generally less coordinated than their adult counterparts and will remain that way until well after puberty. Adult beginners have their own set of advantages. Firstly, they’re better in control of their bodies which helps them make changes to technique and posture more quickly. They also have a strong ability to critically analyze their own actions, and better sense of how they want to sound. As a result of their ability to critically analyze their own playing, adult learners can sometimes go straight to the criticizing part. This can lead to discouragement when they don’t immediately sound the way they want. However, the student is probably playing at a level appropriate to how long they have been studying. Practice Helps perfect the sound Practicing in between lessons is another necessity that makes learning the cello much easier. Without daily practice times, you will find your teacher going over the same concepts week after week during your lessons. Make a commitment to find a small amount of time each day to practice playing the cello and you’ll set yourself up for success. (30 Min Rule) If you only have five minutes, play some open strings for tone quality. Have a little more time? Add in some scale practice. If you have even more time, pick apart the challenging sections of your newest solo piece. There is always something you can practice, but focus on the most important concepts with the time that you have. Start Learning Cello Today You no longer have to wonder if the cello is hard to learn. With a teacher guiding your technique, regular practice times, and a willingness to learn, you can become an excellent cellist. Overall, the cello is an incredible instrument with a wonderful depth of sound. To get started now, sign up for your first cello lesson right here at Los Angeles Music Teachers/ Burbank’s 5 star Music School with one of our best cello instructors Gvantsa. If you have any questions you are welcome to call us for advice on best practices for renting or buying a string instrument like violin or cello. Our teachers will also help answer any questions and guide you as you take lessons. If you're interested in signing up for lessons on Zoom or In Person in Burbank, Glendale or North Hollywood, please contact us at (818)902-1233 or on our website at https://www.losangelesmusicteachers.com/online-cello-lessons-in-burbank-ca.html
Photo credit: Pexels.com They say that April showers bring May flowers. Unfortunately, those springtime rains also mean that your kids can't go outside to play. Keeping your energetic little ones amused indoors can be a challenge. Luckily, there are ways you can entertain children inside while also honing their personal development. The below guide provides inspiration for moms and dads who want kids to keep busy while also learning a thing or two at home. Experience new cultures by learning another language. Kids learn foreign languages more easily than adults, so it's great to get them started early. According to Cornell University, learning a second language also offers cognitive advantages. Your little ones can easily hone their skills at home with online courses. To keep your kids interested, combine language learning with cultural lessons. There's no better way to finish Italian classes than with a big plate of pasta. Discover your family's own cultural heritage with genealogy. Genealogy is another way to combine language learning and culture. Learn about your family's cultural heritage and celebrate it. Junior Genealogist provides tips on how to make this educational moment fun for kids. You can interview elderly family members together, for example, or gather family photos to create a family tree. If you don't know much about your heritage, you can even order a genealogy testing kit online to find out more about your roots. Hone social skills, reactivity, and problem-solving with gaming While you want to minimize your child's screen time, playing video games isn't all bad. According to The American Psychological Association, gaming has social benefits. It can also improve problem-solving skills and reactivity. If your child is going to play multiplayer games requiring live interaction, make sure your internet is up to the task. Sufficient bandwidth is especially important if parents are trying to work from home at the same time. You can also enhance their experience with a gaming chair or new set of headphones. Improve math skills and expend energy with music and dance. If your kids are feeling cooped up inside and simply can't sit still, it's time to get moving. Turn on some music and dance it out. You can play foreign-language songs and encourage your little ones to sing to hone their newfound language skills. Music is also a great way to subtly give your child a math lesson. As Kindermusik explains, kids can learn basic geometry through visual dances, like circle dances. Music is also a great way to learn numbers as kids can count to the beat, and music can help build literacy skills as well. Fortunately, Los Angeles Music Teachers offers a wide range of online music lessons for your kids! Use arts and crafts to enhance fine motor skills. Once your kids have expended some of their energy with a vigorous dance session, you can sit them down to enjoy some arts and crafts. Again, this is an activity that can provide a discrete learning opportunity. Tasks like drawing, coloring, and painting improve bilateral coordination, for example. Meanwhile, an activity like beading enhances fine motor skills. Crafting also teaches kids patience and the merits of a job well done. They have to put in the time and effort to make something beautiful. Encourage imagination with an indoor treasure hunt. If you want to give your kids a treat on a particularly dreary rainy day, organize an indoor treasure hunt. Encourage them to use their imagination. They might pretend that they're pirates or knights on a quest. Imaginative play is critical for healthy childhood development. If you need ideas for your treasure hunt, The Spruce has a great guide with crafty riddle clues that are sure to get kids thinking. This spring, show your kids that staying indoors doesn't have to be a drag. The above guide will help you keep them amused until the weather is nicer. Looking for online or at-home music lessons for your kids? The qualified and experienced teachers at Los Angeles Music Teachers offer music lessons for a variety of instruments. Call 818-902-1233 to schedule your first lesson today!
Top 10 Things Beginners Will Learn in Their First Guitar Lessons Are you thinking of learning how to play the guitar? When learning any new musical instrument, you need to lay down a good foundation, or otherwise suffer from developing bad habits which will slow you down and you won't be able to progress easily. When it comes to learning how to play guitar, you might need help. YouTube videos are helpful to get some quick tips and understanding. You might even be able to learn a couple of songs, but ultimately you're going to have questions and that's where a good instructor will be able to help you over the usual hurdles. Many beginners give up learning to play guitar after some time because it is frustrating. Learning a new skill is never easy, you will have to work hard to master it. However, with a few simple lessons the beginning, you can learn how to play the guitar without any hassle. In this article, we have listed the things that every guitar player must learn. Know As Much as You Can About how the Guitar is Constructed The first thing you must learn is the guitar anatomy. It is crucial for you to know what the components are and what they do. There is no need to hurry, you should take your time to get familiar with everything, from head to bridge. There's lots of free lessons on Youtube that can help you with this. There are different parts of a guitar; you must understand how every part works. This is to make learning how to play guitar easy. If you don’t know which string is the A as opposed to the E string, it will be challenging to learn how to play guitar. So, to successfully learn how to play guitar, you must get to know every part of the guitar. Holding the Guitar Correctly In order to play the guitar easily, you must hold it properly. Though many people think there is no rocket science, it can be difficult for someone who has never held a guitar before. To be able to produce the best quality sound, you must hold it correctly. Your left hand must be on the neck of the guitar while the other hand must be over the sound hole. In case you are left-handed, there are two solutions. You can flip the guitar without restringing or you can reverse the strings. This means you will have to position your right hand on the neck. You can try playing guitar in both ways and choose the one that you are comfortable with. Tuning the Guitar Tuning the guitar is a crucial step in ensuring the best sound quality. If you don’t know how to tune the guitar, you will have a challenging time learning how to play it. Your guitar can fall out of tune because of regular playing, environment, and temperature. Playing a tuned-out guitar will produce an off-key sound. Since the strings do not fall out of tune at the same rate, you must know which string to tune. So, it is crucial to know how to tune your guitar. It is suggested to get a tuner; you can even use free online guitar tuners. If you don’t have a tuner or a phone, you can use the 5th fret technique. Restring the Guitar The strings of your guitar will lose their shine when you play it regularly. It means that you need to change the strings. Knowing how to replace the strings is a great skill for a guitarist. So, how do you when to restring your guitar. You will know when the strings will be discolored, or the sound will be off or flat. By restringing your guitar, you can make sure the sound produced is of excellent quality. Not all the strings are made equal, you can ask the professional at the local shop to help you choose the right string for you. Holding a Pick Most guitar players us a pick when playing or strumming the guitar, although it can also be played with the fingers and fingernails. A pick is a small plastic that is used for strumming the strings. Though you will not be using it every time you play the guitar, learning how to hold a pick is a vital skill. You must hold the pick in between the tip of your thumb and first finger. Once you get to know how to play, you can figure out your own style. There are several types of picks available on the market, from thick to thin. In the beginning, it is advised to start with a thinner pick. Since it is made of plastic and is small, it is recommended to get many picks. It will not cost you a lot as they are inexpensive. Reading Chords and Tabs Many people think reading tabs and chords is difficult. This is a misconception; it is very simple. When learning how to play the guitar, it is recommended to start with simple songs. To make it easy to play chords, you can start with songs such as Bad Moon Rising. Moreover, it is better to start learning with a cover. This will help you get familiar with reading the chords and help in practicing transitioning between chords. Playing Open Chords In open chords, not all the strings are pressed down. One of the first skills the guitarist will learn is playing open chords. You must start with a basic open chord such as G and strum the string to ensure you hear a clear chord. After you have successfully learned a single open chord, you can move on to the second open chord. This will help you practice transitioning between the chords. It is suggested to keep on creating the library of chords until you can transition between key chords without any trouble. Playing in Rhythm After learning a chord, many beginners, call over their friends to impress them with their newly learned guitar skills. It is then, they understand they don’t know how to play in rhythm. This is something every guitarist goes through. It is crucial to practice strumming the chords in rhythm. For this, you must use a metronome to strum in rhythm. Once you master strumming one chord in rhythm, you can try with two chords. Playing Power Chords Power chords are used in rock music; it is two note chords. Power chords are dyads consisting of fifth notes and root. They are not minor or major because they don’t have the third. When playing power chords, you will only need two or three fingers on the frets. They are easy and fun to play. Since many songs are composed on power chords, there are many songs for you to cover. Playing Guitar Songs You can choose a song that is your favorite and learn to play it on guitar. This is an exciting and thrilling for new guitarists as it will be the first song they learn. Therefore, you need to be patient when learning new skills. You can’t learn to play guitar overnight, you have to practice regularly to master the guitar skill. If you're interested in taking lessons on Zoom or In Person in Burbank, Glendale or North Hollywood, please contact us at (818)902-1233 or on our website at https://www.losangelesmusicteachers.com/online-guitar-lessons-in-burbank-ca.html
Lesson on How to Unstick a G-sharp Key on a Saxophone G# is a chronic problem for all saxophone players. Anyone who has ever played the saxophone has encountered this common problem. Over the last 45 years I’ve tried all of the powders that actually end up compounding the problem and also sliding a dollar bill through as you put a little pressure to clean the 2 surfaces is only a temporary fix at best. The best fix which I learned from my repairman in LA, Ivan Lukyanets is to use Lemon Pledge. It is totally clean, no harmful chemicals and leaves no residue. Procedure: Use a Q-Tip and put a little of the Pledge on it and rub it on both the cup and really get it into the pad groove, and you’ll see the Q-tip get dirty as you clean thoroughly. You may need to use a couple of Q-tips. Finally just take a new Q-tip and do a final cleaning to get all of the residue of the Pledge off. Easy as that, and keeps it clean usually for a couple of months. If you’re drinking any kind of drink other than water while playing the saxophone you’re likely to get a lot more stickiness problems from other keys as well like the low C# and Eb key, so cutting that out will also relieve the problem a bit. You could also have your repairman strengthen the spring slightly in case it’s too light. If you're interested in taking lessons on Zoom or In Person in Burbank, Glendale or North Hollywood, please contact us at (818)902-1233 or on our website at https://www.losangelesmusicteachers.com/online-saxophone-lessons-in-burbank-ca.html
Thinking about Taking Voice Lessons But Need to Know More?If you have ever been thinking about taking voice lessons in person or online, but you just aren’t sure, here's a few FAC's to answer some things that you might be wondering about. A lot of people like to sing in a choir, in the car, or even in the shower. But is taking voice lessons right for you? The thought seems a little scary – particularly if you’re not used to singing in front of others, let alone a trained, professional instructor! Here is some information that can help you to decide if taking voice lessons is the right thing for you.
1. When should I start voice lessons? “The sooner the better!” If we start with proper technique at a young age, we can get a solid foundation of healthy singing that will last a lifetime. It's best for getting a firm foundation, understanding how important breathing and understanding how to use your vocal cords without straining them. At a very young age, we learn by copying! Don’t you remember a time when you copy the singers on the radio just because you like a particular song? As a matter of fact, vocal cords are like muscles, we train them to have muscle memory. Just as we train the greatest athletes at a young age, we can do the same with singers. As the voice is developing, we can start the same initial training that athletes do, but for the voice which can protect you from injuries to your vocal cords. 2. Know your goals The first thing you need to ask yourself is: what are my goals? Establishing your goals with singing is what will help you and your voice teacher set a path for your lessons. If your goals include sight reading better for your community choir, great. If they include one day singing on the Broadway stage, great. Knowing your goals with singing will help you to stay motivated and moving forward. Your goals should be realistic and achievable though. Voice lessons will improve the sound that you already have, but they aren’t going to guarantee you a fame-worthy singing voice. Everyone can learn to sing better, and a voice teacher can help you learn how to use your voice to the best of its ability. If the goal is to access your full potential as singers with an emphasis on easy and natural sounding tone, you’re in the right direction. 3. What to expect from taking voice lessons online? Voice lessons are about more than just singing. Vocal training engages the entire body and you will be instructed on correct posture, breathing and vowel shaping. Good singing lessons involve:
Vocal changes take time and effort. One or two voice lessons will not be enough time for a teacher to have a real impact on how you sing. Expect to give it a few months before you hear changes. The more you pay attention to the adjustments your teacher suggests, the faster you will get results. Keep in mind that any adjustments to vocal technique are most effective when you apply them every time you sing – with the radio, in the shower, in choir class, and anywhere in between. 4. How long should each lesson be? Basically, singing lessons should be as long and as frequent as you can afford them in term of time and finances! However, we’re not suggesting you should have a singing lesson every day – that’s a bit much! But a lesson at least once a week is beneficial for 99% of our students. Voice lessons are usually broken into 30, 45, and 60-minute sessions. It would be best to start with 30 minutes and then discuss with the teacher how and if you would benefit from trying a longer lesson. Normally we like to see our adult students for a 60 minute lesson every week so we can work in-depth on their voice and take a look at a song at the same time. This gives us as the teacher, and you as the student, an idea of how well you’re practicing and progressing. But if 60 minutes a week is not financially viable for you, it’s better to have a 30 minute lesson every week. When you’re training your voice, frequency is much better than duration – you don’t want to form any unhealthy or bad habits! Some people take voice lessons just because they find it fun and consider it a hobby! In that case, we recommend going with whatever feels right to you, either 30 minutes or an hour. There really isn’t a right or wrong. There is plenty you can learn in either time frame. Young kids don’t have as much vocal stamina, so 30 minutes at a time is best until around age 10. If your child is under 10, but you’d like them to have more lesson time, try two 30-minute lessons a week on different days. 5. How much will it cost and is it worth it? Here at Los Angeles Music Teachers the Prices are all the same. For online or in person lessons its $35 for 30 minutes, $45 for 45 minutes, and $60 for 1 hour lessons. If we are traveling to your house then we will be adding a $10 Traveling fee. Whatever the price is, you must remember it is an investment! You are investing in learning a useful skill that can elevate you life in many ways. And that's something that is priceless! If you're interested in taking lessons on Zoom or In Person in Burbank, Glendale or North Hollywood, please contact us at (818)902-1233 or on our website at https://www.losangelesmusicteachers.com/online-voice-lessons-in-burbank-ca.html |
Archives
April 2024
Categories
All
|
|
Music Lessons Available on All Instruments:
Piano Lessons
Guitar Lessons Voice Lessons Drum Lessons Violin Lessons Cello Lessons Saxophone Lessons Jazz Improvisation Lessons Flute Lessons Clarinet Lessons Singing Lessons Acoustic & Elec Bass Songwriting & Production |
Contact Us Now
|
Website by Never Alone Business Services

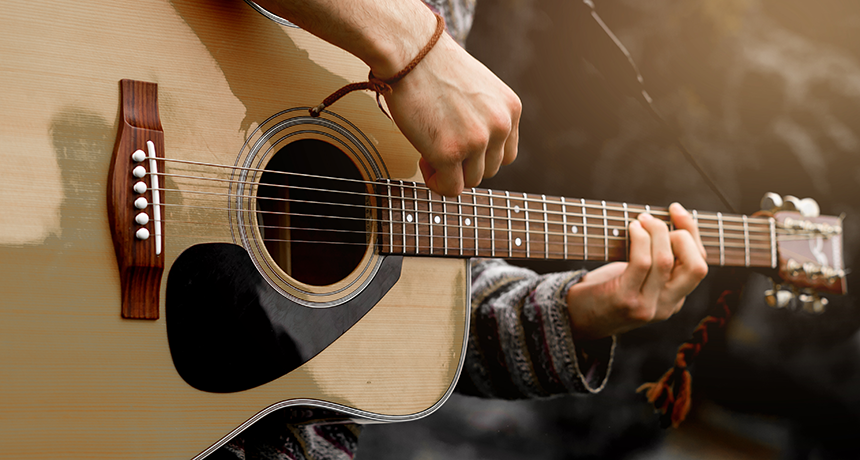
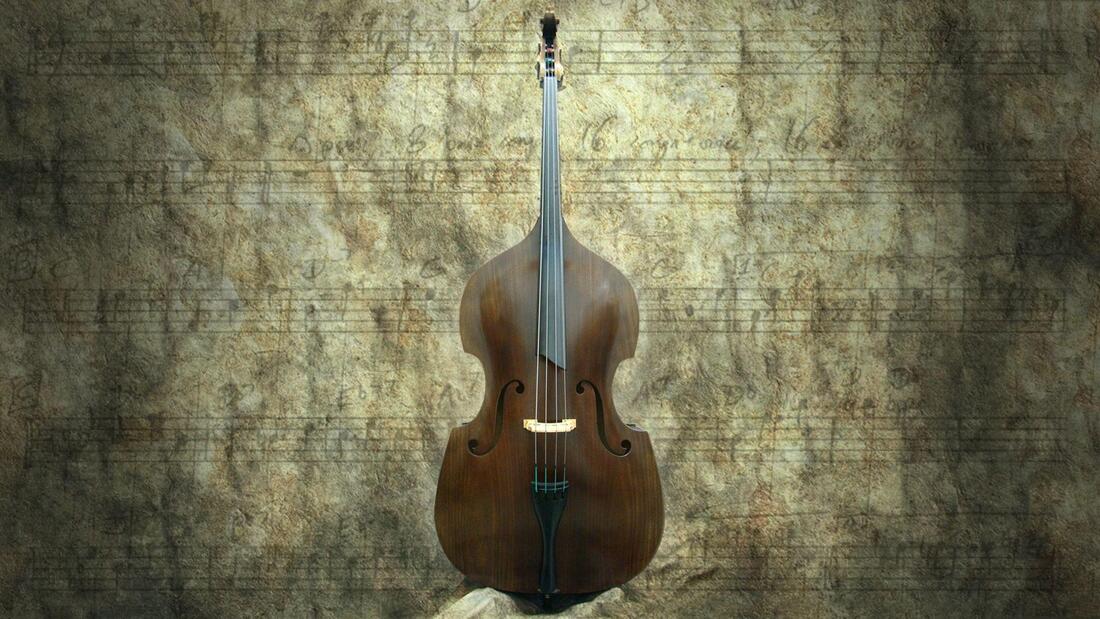
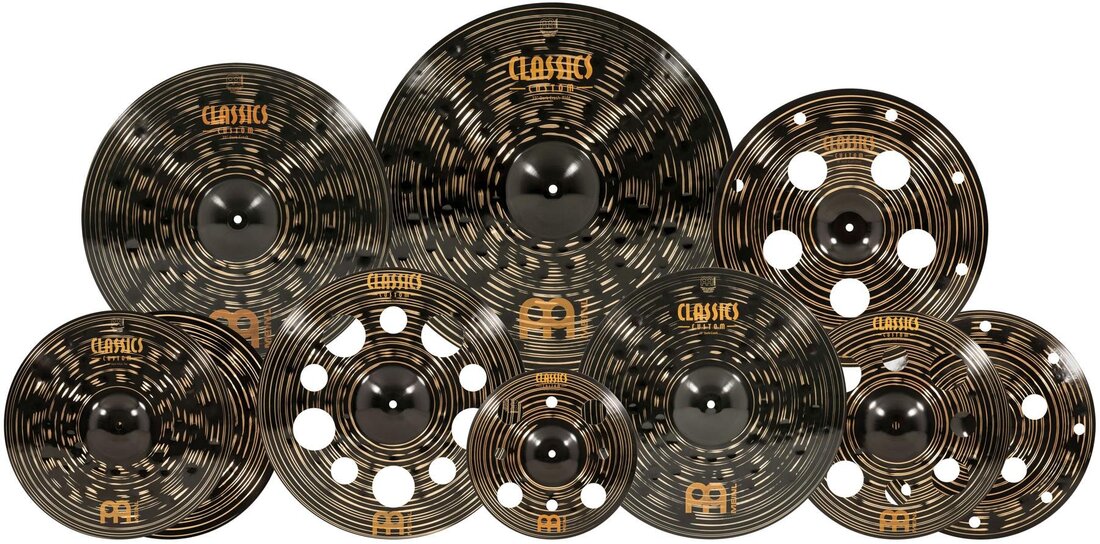

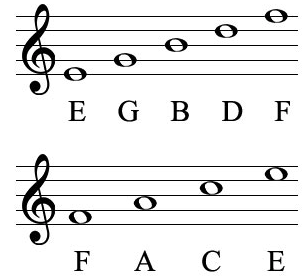
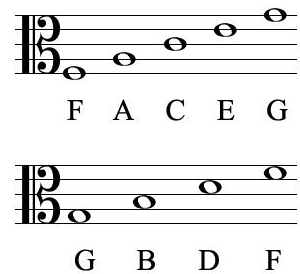
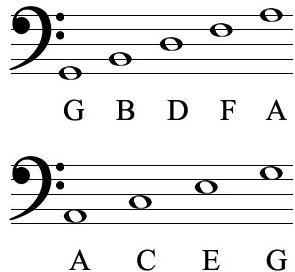
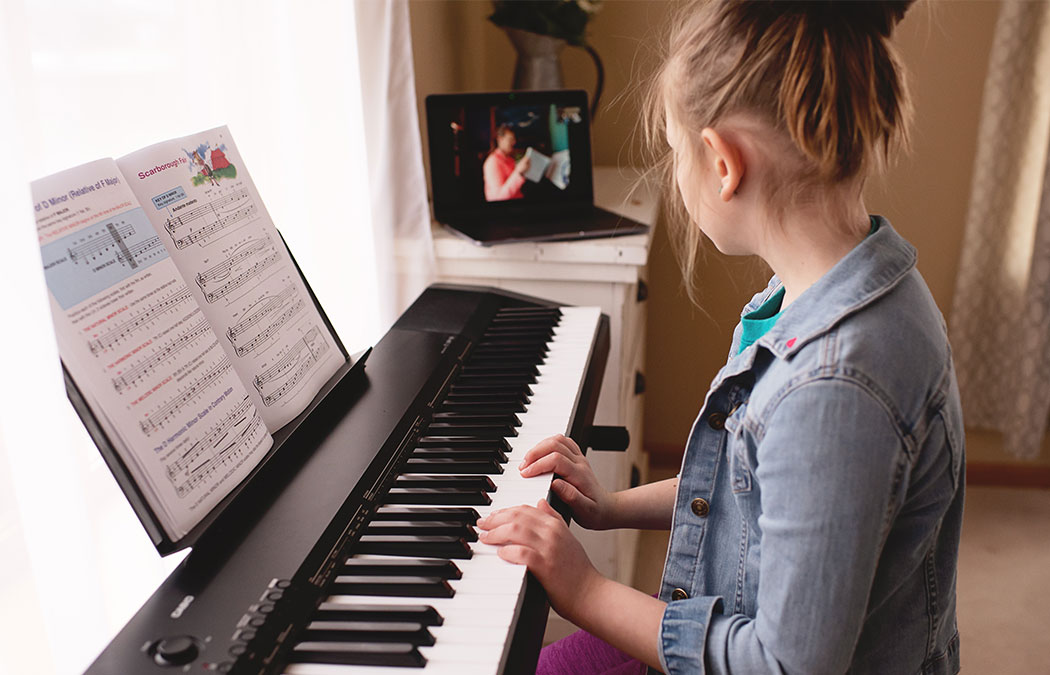
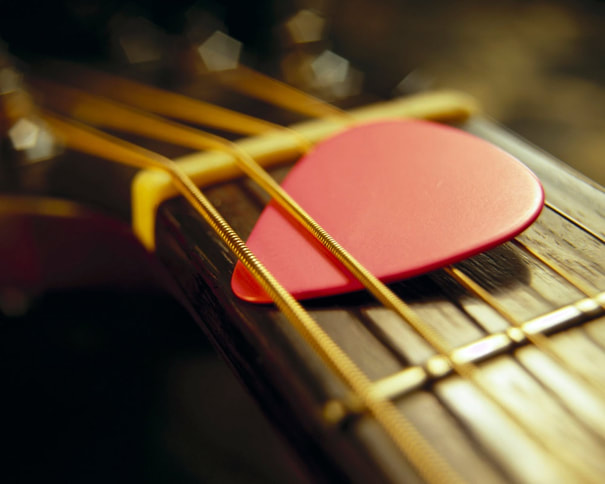
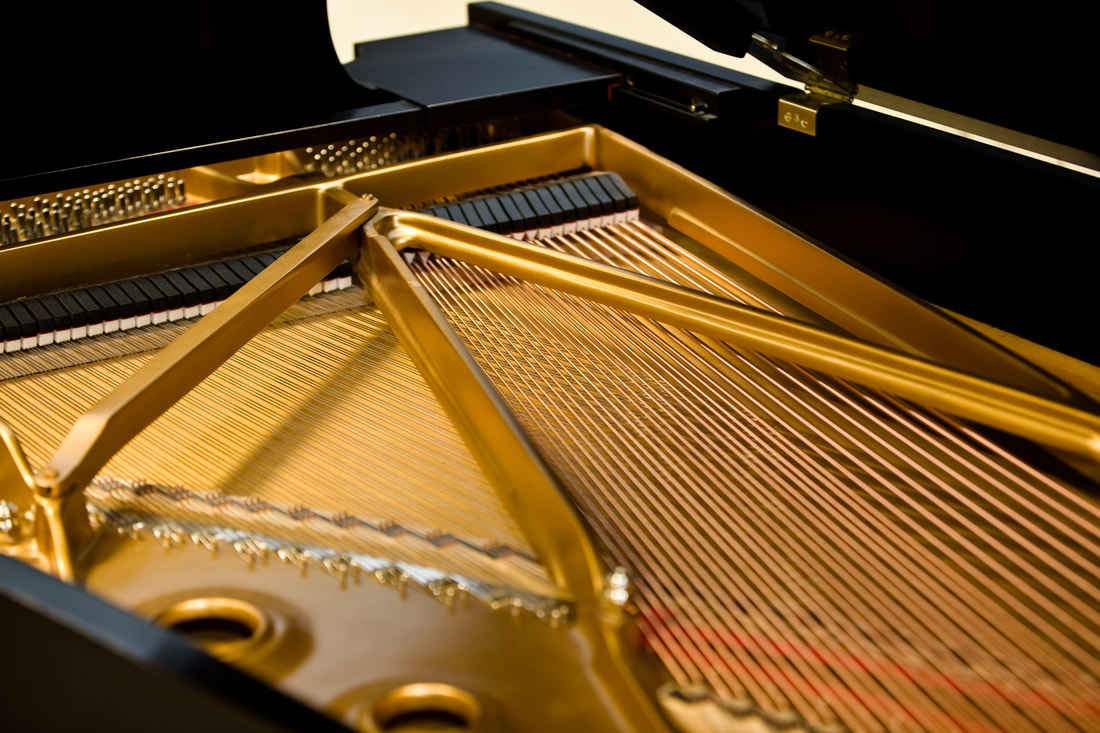
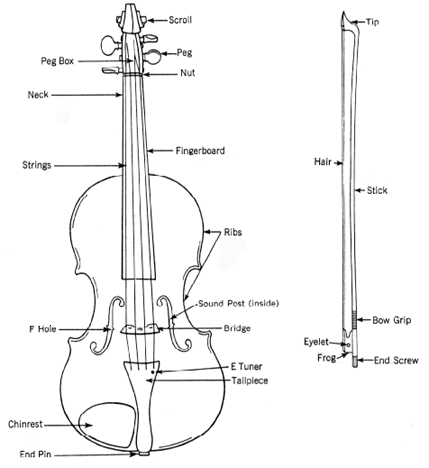
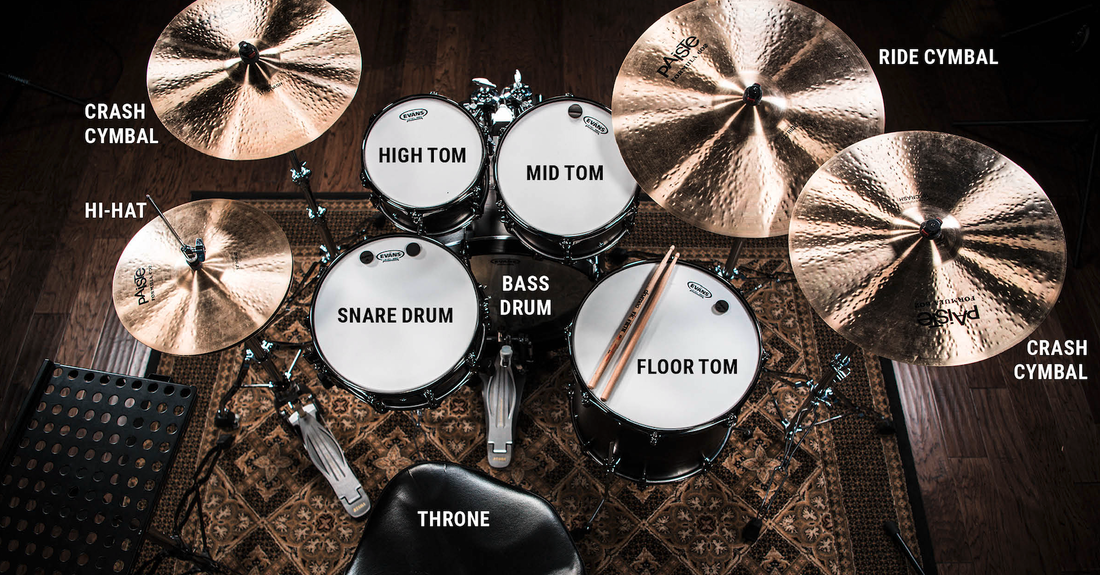
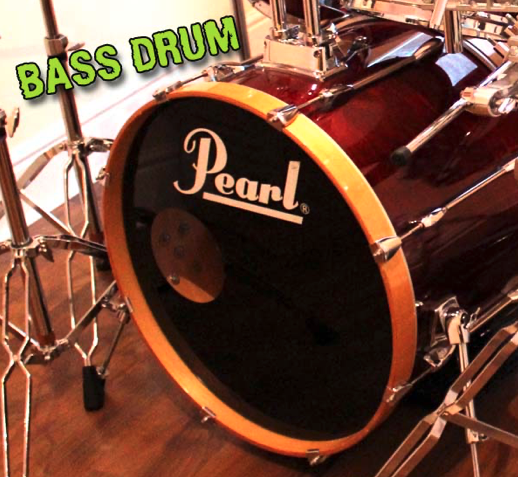
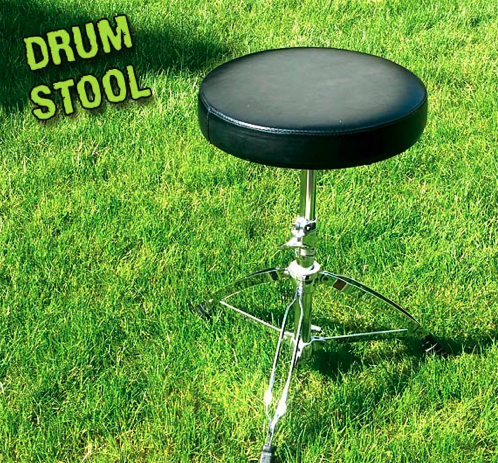
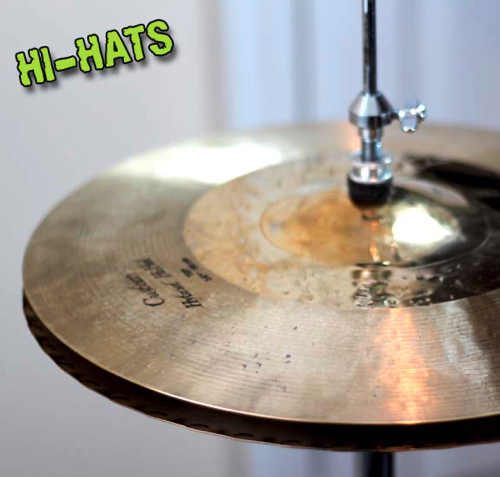
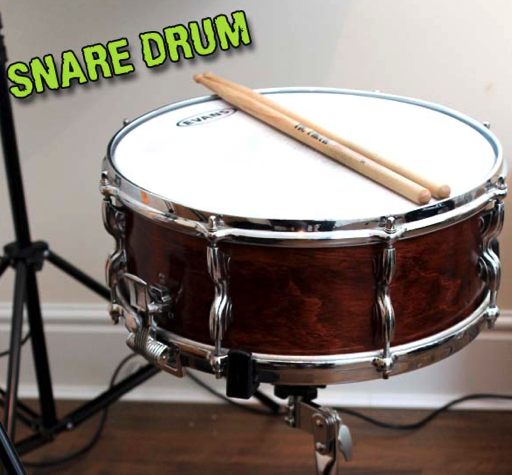
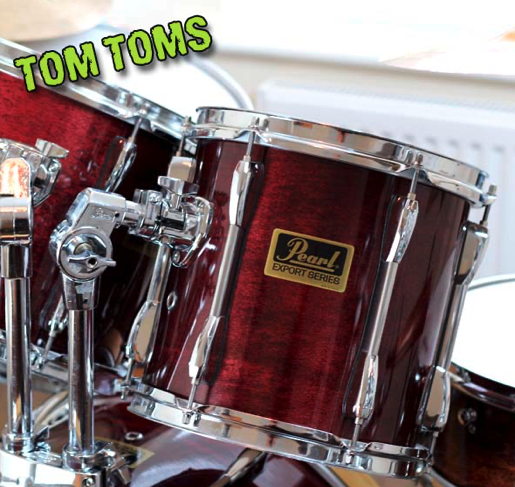
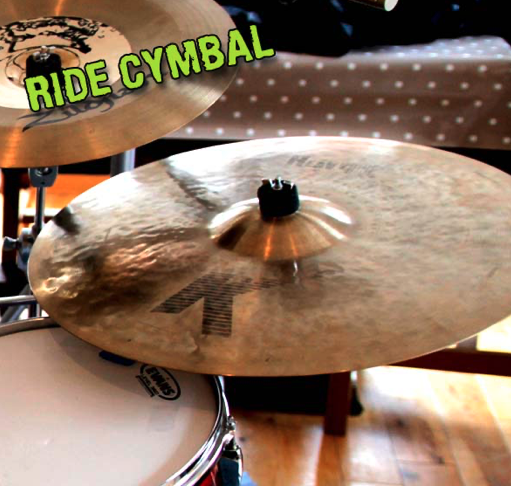
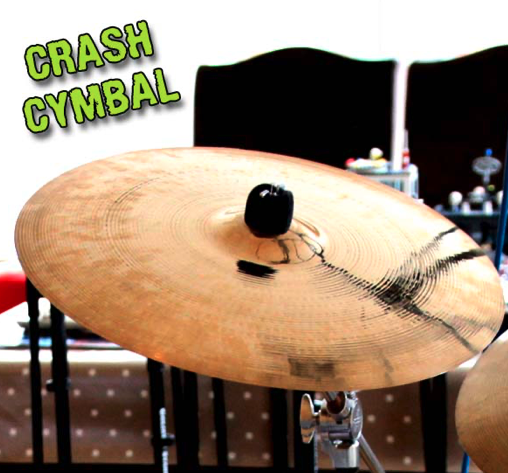

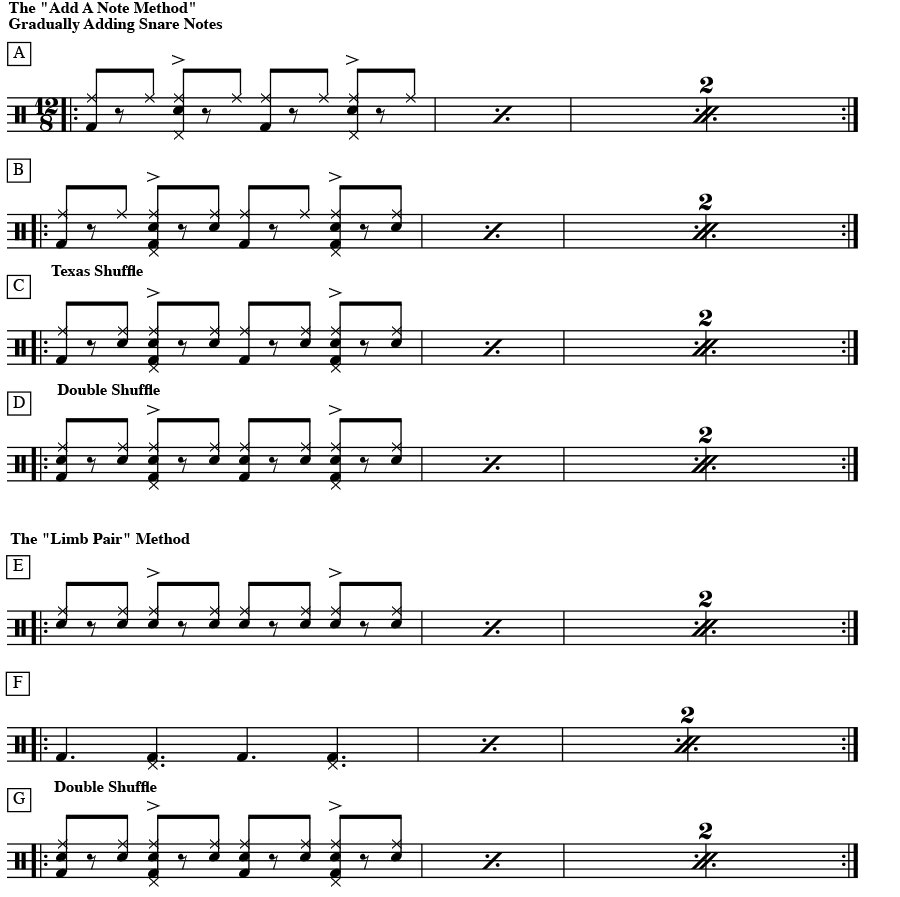
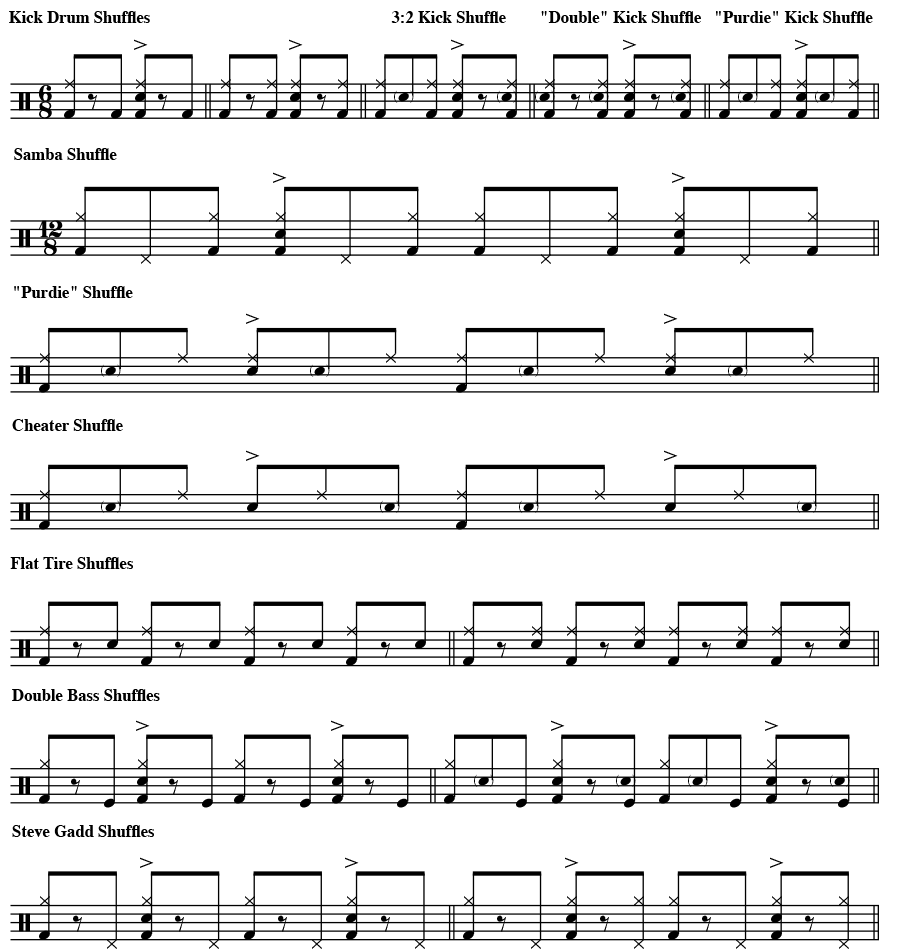
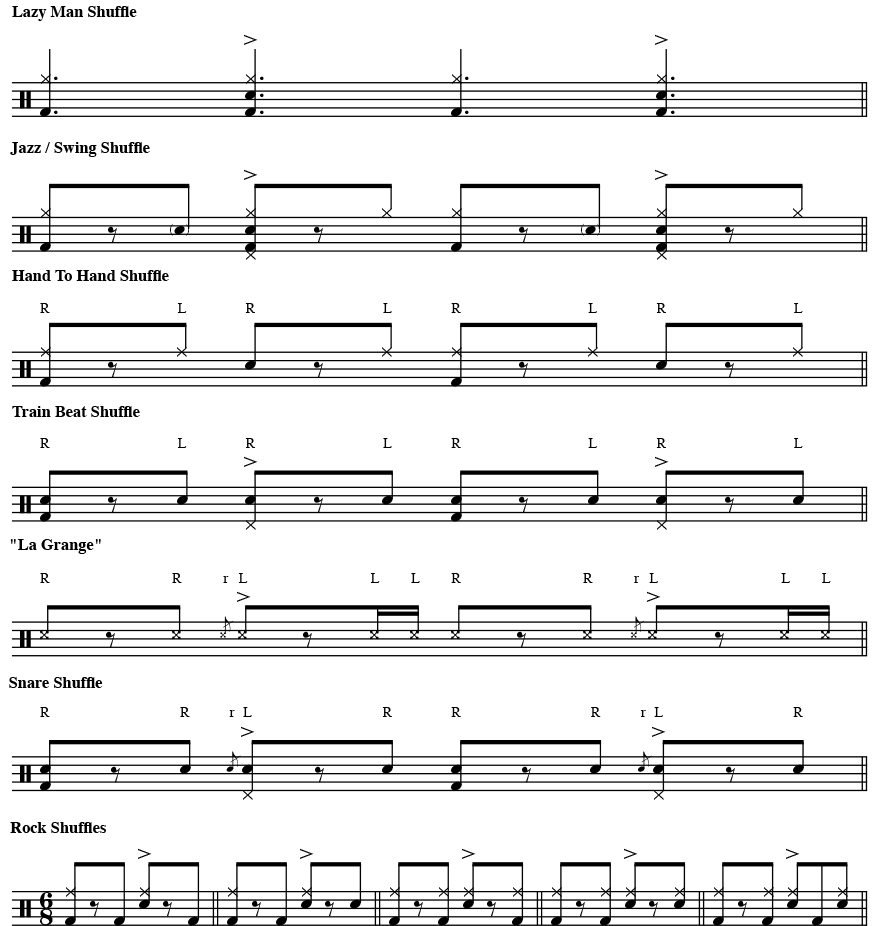

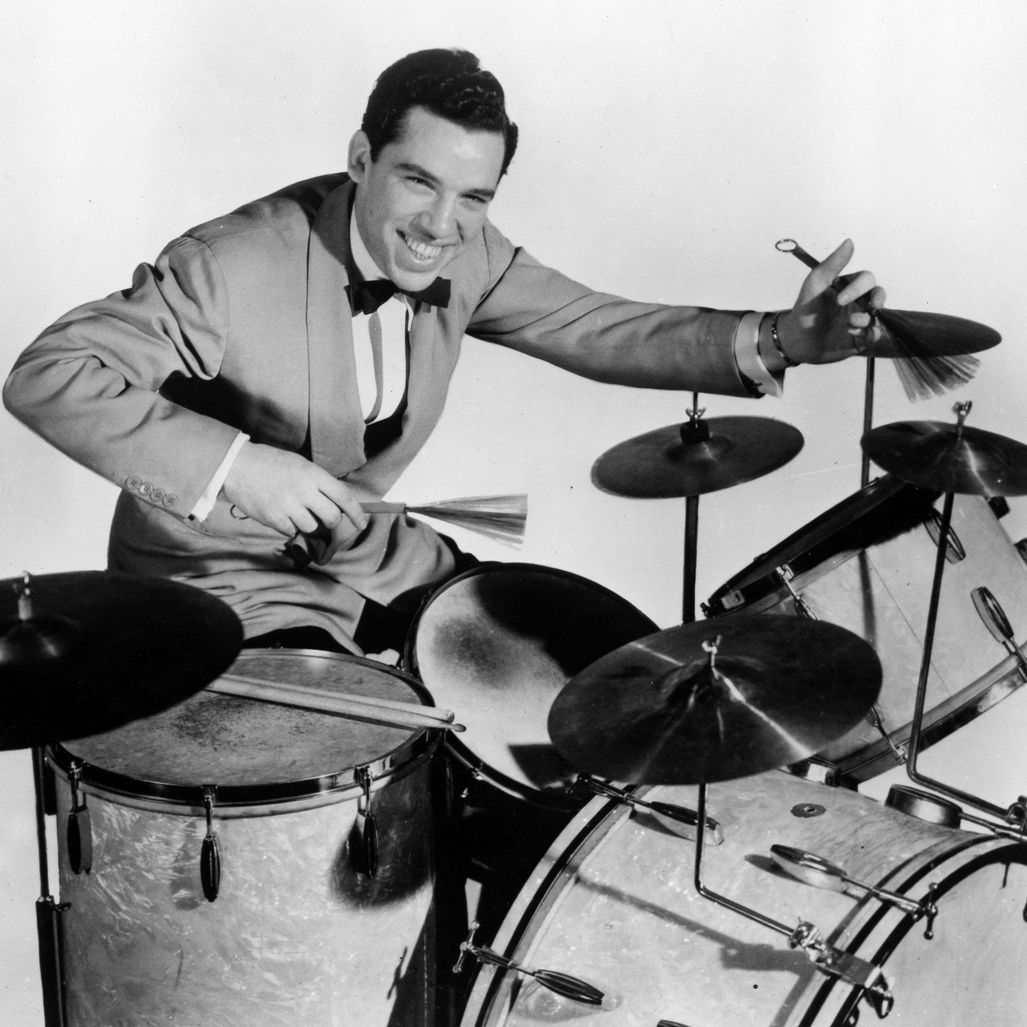
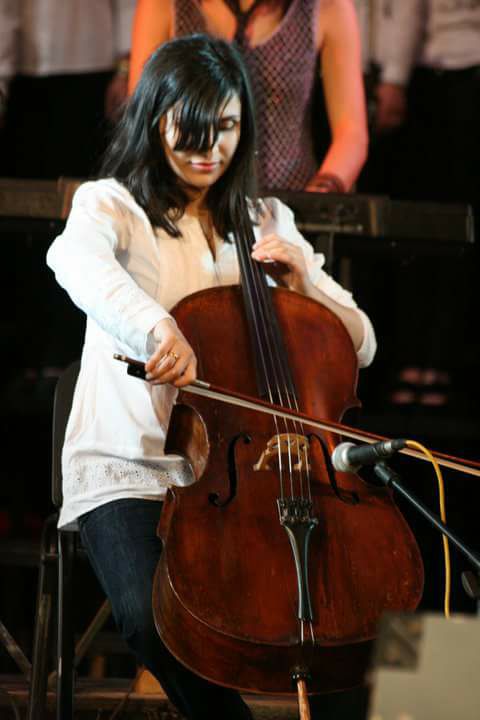

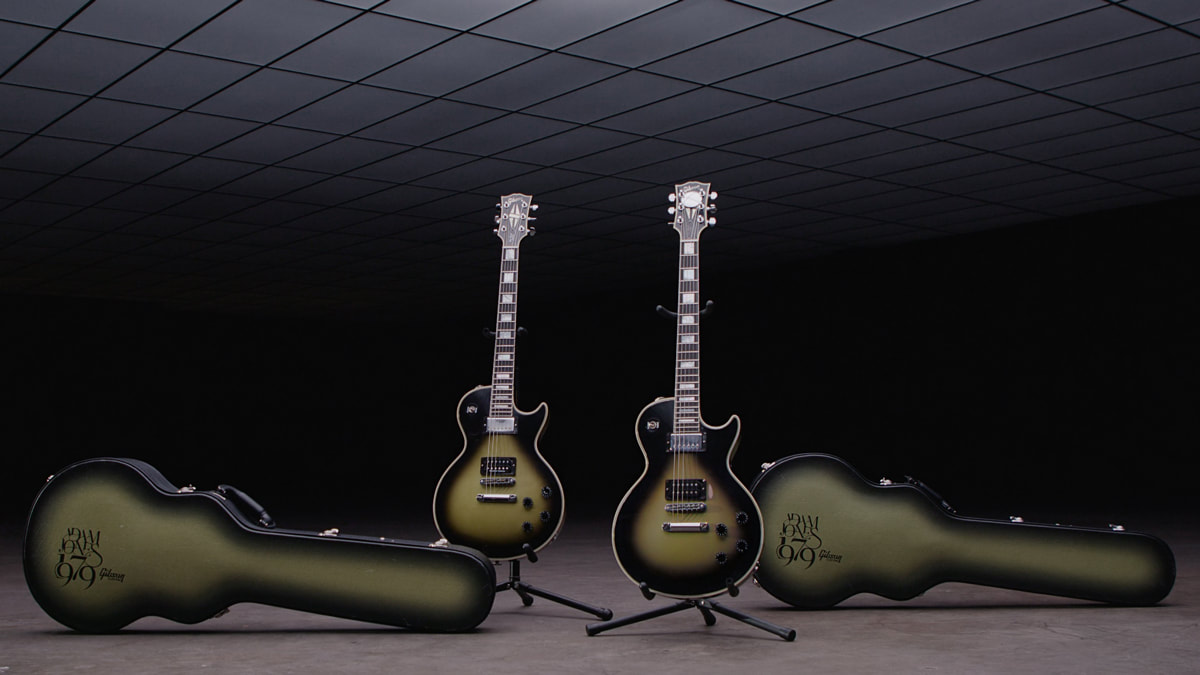
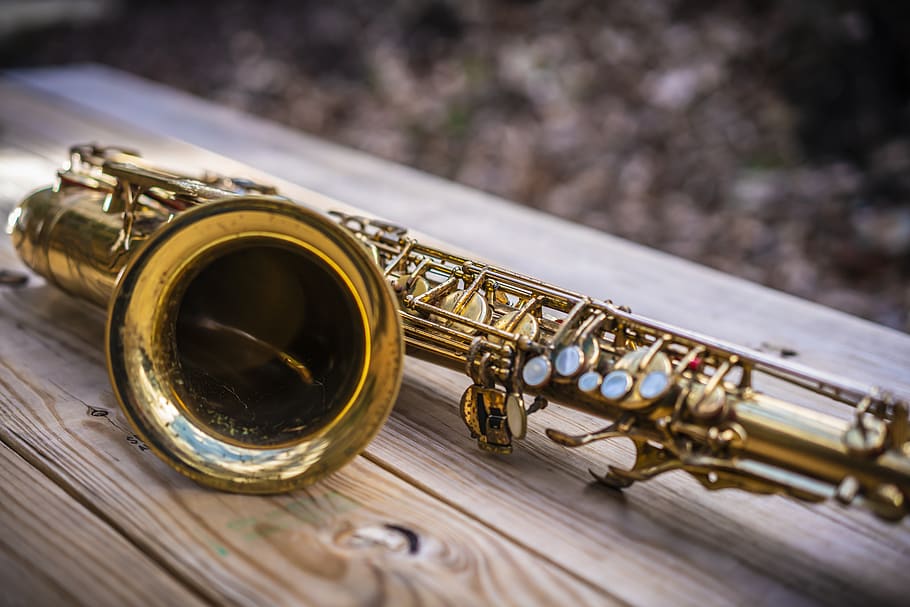

 RSS Feed


